If you are on a plan that includes custom domains, you can setup your Kourses membership site to show on your own domain rather than a subdomain.kourses.com domain. This helps re-inforce your brand to your customers.
This article will guide you through the process of setting up the custom domain. You will need access to your control panel where you manage your domain name DNS settings (namecheap, cloudflare etc). If you're not sure where this is, contact our team and we'll be happy to help clarify this for you.
Setting up your Domain
The Domain settings area will allow you to set up the name of your domain inside your Kourses platform.
To do this, you will have two options.
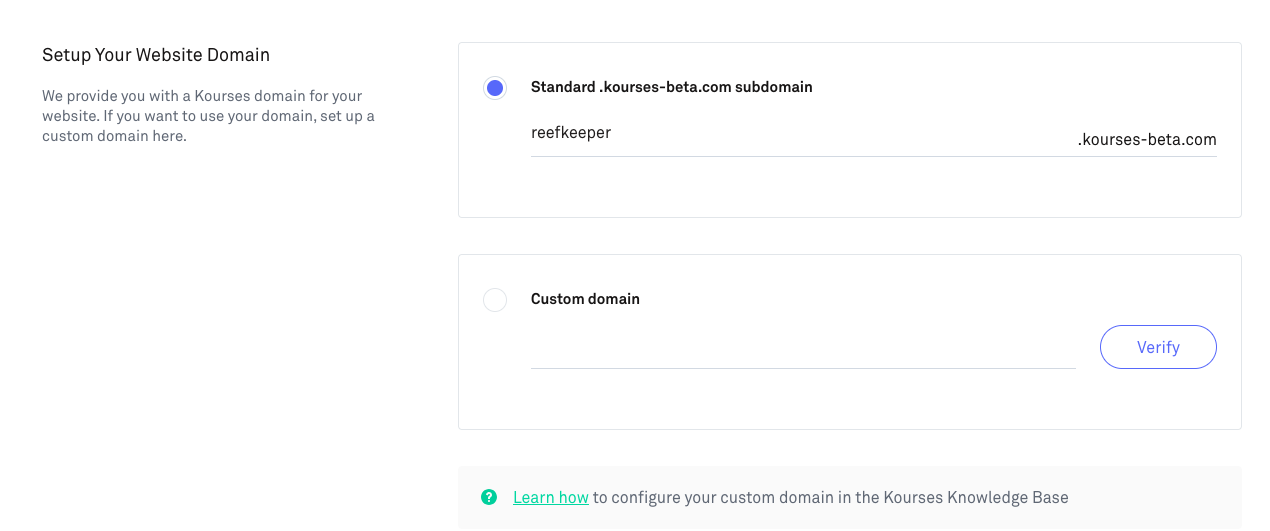
By default, you will be given a standard domain URL, to which you can assign a name. The structure of the URL is as follows: [subdomain].kourses.com
You can also choose to use your own Custom Domain, which you can set up by following the instructions in your domain hosting provider.
How to use your own custom domain
To use your own custom domain with your Kourses account, follow these steps.
We will cover the process for Cloudflare and non-cloudflare managed domains below:
Non-cloudflare Managed Domain
If you have a domain managed on another service (e.g. your domain registrar such as Namecheap, or in your hosting control panel) this setup process is for you.
Step 1: Point your domain or subdomain to Kourses
The first step is to point your subdomain or main domain to Kourses servers, so we can then generate an SSL and setup your custom domain to show your Kourses website.
You will need access to your DNS management for your domain. This will normally be available within your hosting registrar if you are using their DNS settings, or your server settings if you have pointed nameservers to your own server.
You need to create a custom CNAME and point it to our servers.
For a subdomain
If you're using a subdomain of your main domain e.g. courses.yourdomain.com you need to create a CNAME record with the following:
Host: Use the subdomain you wish to use - in my case "courses"
Target: a370f74205aa142c5853f7190315645e-c80aa80f98dd272d.elb.us-east-1.amazonaws.com
Example:
Once you have added this, save the record.
For your root/main domain
If you want to point your main domain to Kourses server e.g. yourdomain.com you will need to add CNAME records for the @ record on your domain:
Host: @
Target: a370f74205aa142c5853f7190315645e-c80aa80f98dd272d.elb.us-east-1.amazonaws.com
Step 2: Check your CNAME is propagated
Before you can add your domain inside Kourses, you need to ensure that your DNS changes have changed around the web, to ensure the URL properly points to the right place.
To do this, enter your URL into the Dig checker here:
https://toolbox.googleapps.com/apps/dig/#CNAME/
Step 3: Add your custom domain inside Kourses
Inside the Kourses interface, go to Website > Domain and choose the Custom domain option.
Now add your main domain or subdomain here depending on what you are using. For this example I am using a subdomain - and entered the domain into the field here.
Include the https:// at the start of your domain:
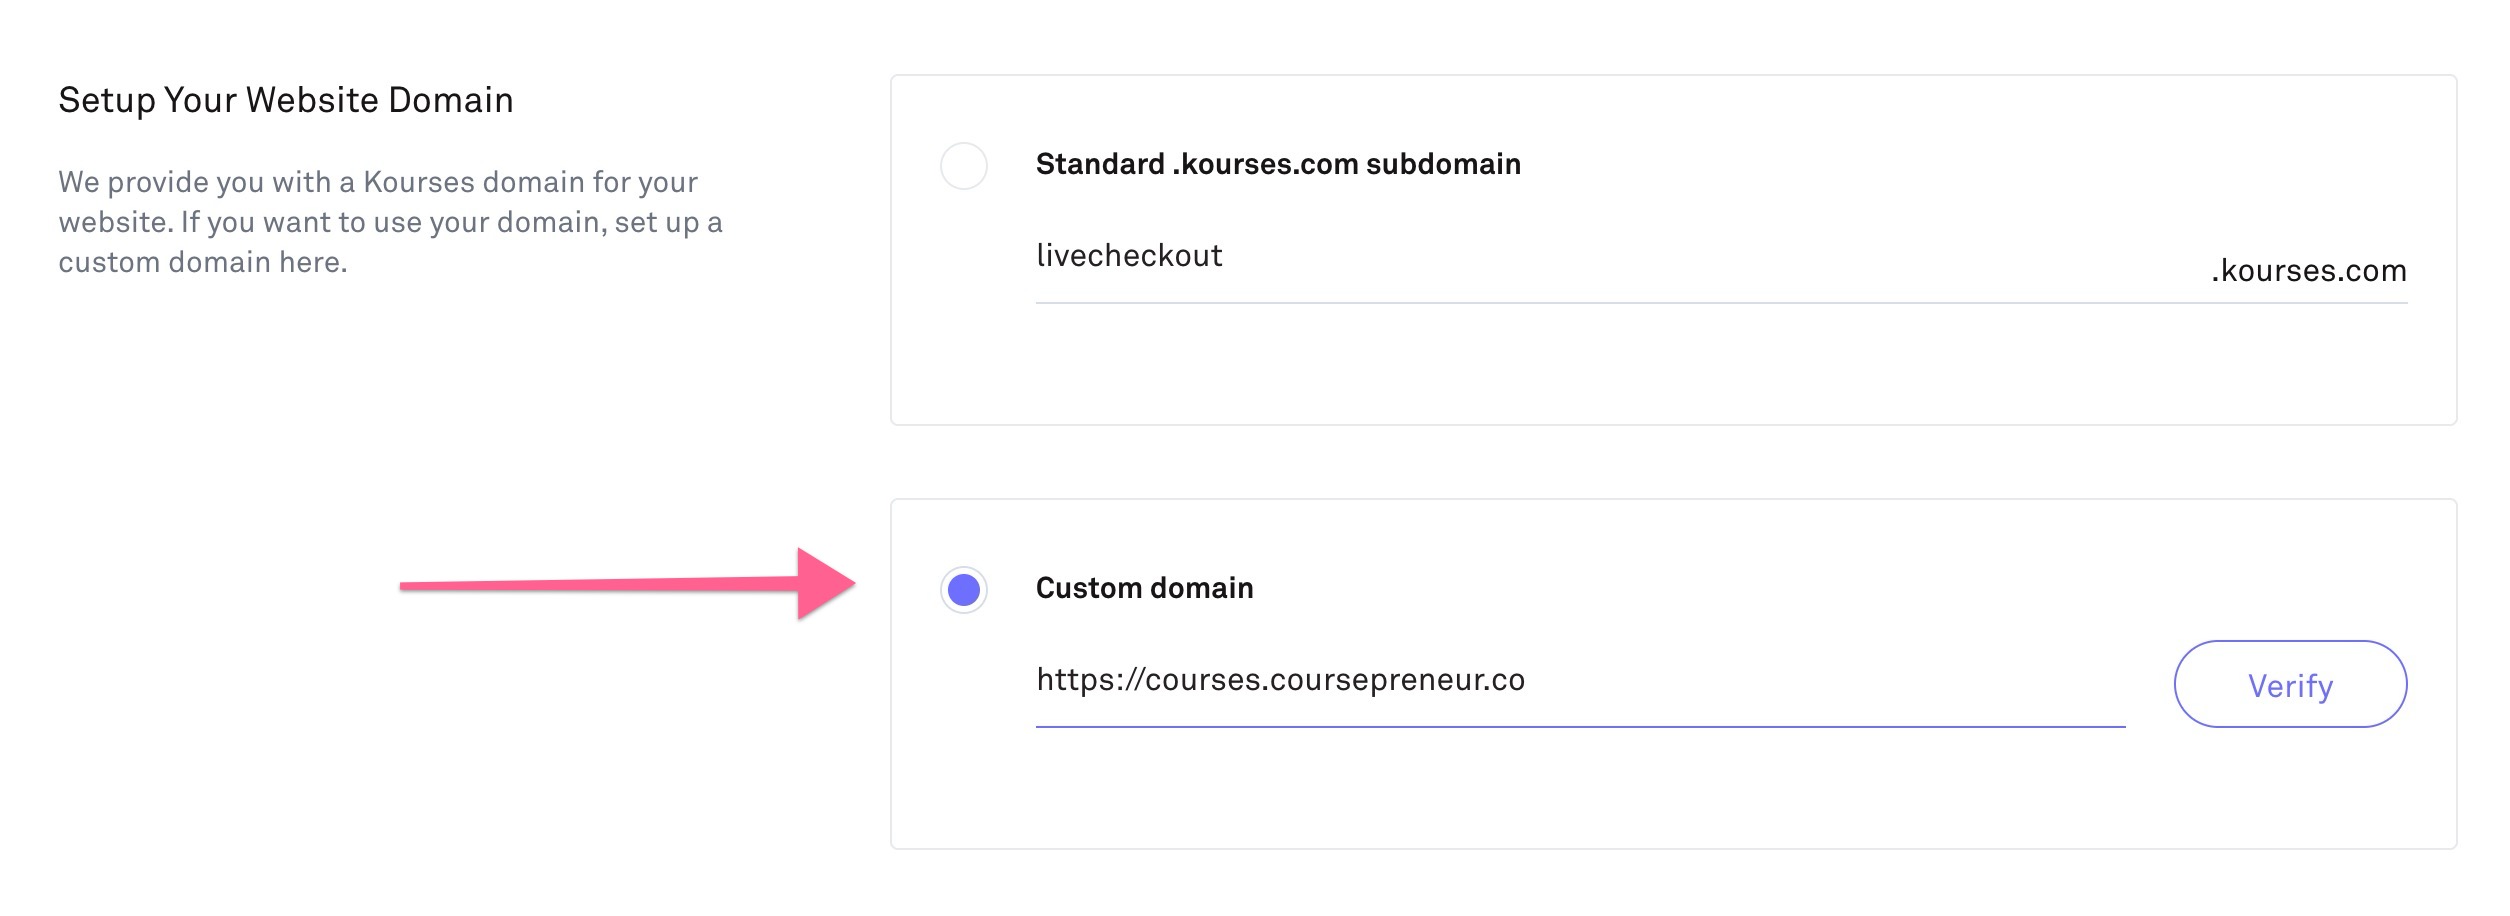
Once you are happy - click Verify.
If you do not receive a confirmation that the process was successful, please wait 12-24 hours for your domain to propagate and retry.

If you still have problems, please reach out to our support team.
Please be aware we cannot speed up the domain propagation process but we can check that you have set everything up correctly on your side. We may require access to your domain management control panel to confirm your settings.
Once you click verify and you receive a success message, save the page and your domain will be fully pointed to your Kourses website

Cloudflare Managed Domain
Step1: Setup your domain and point it to Kourses
For Cloudflare managed domains
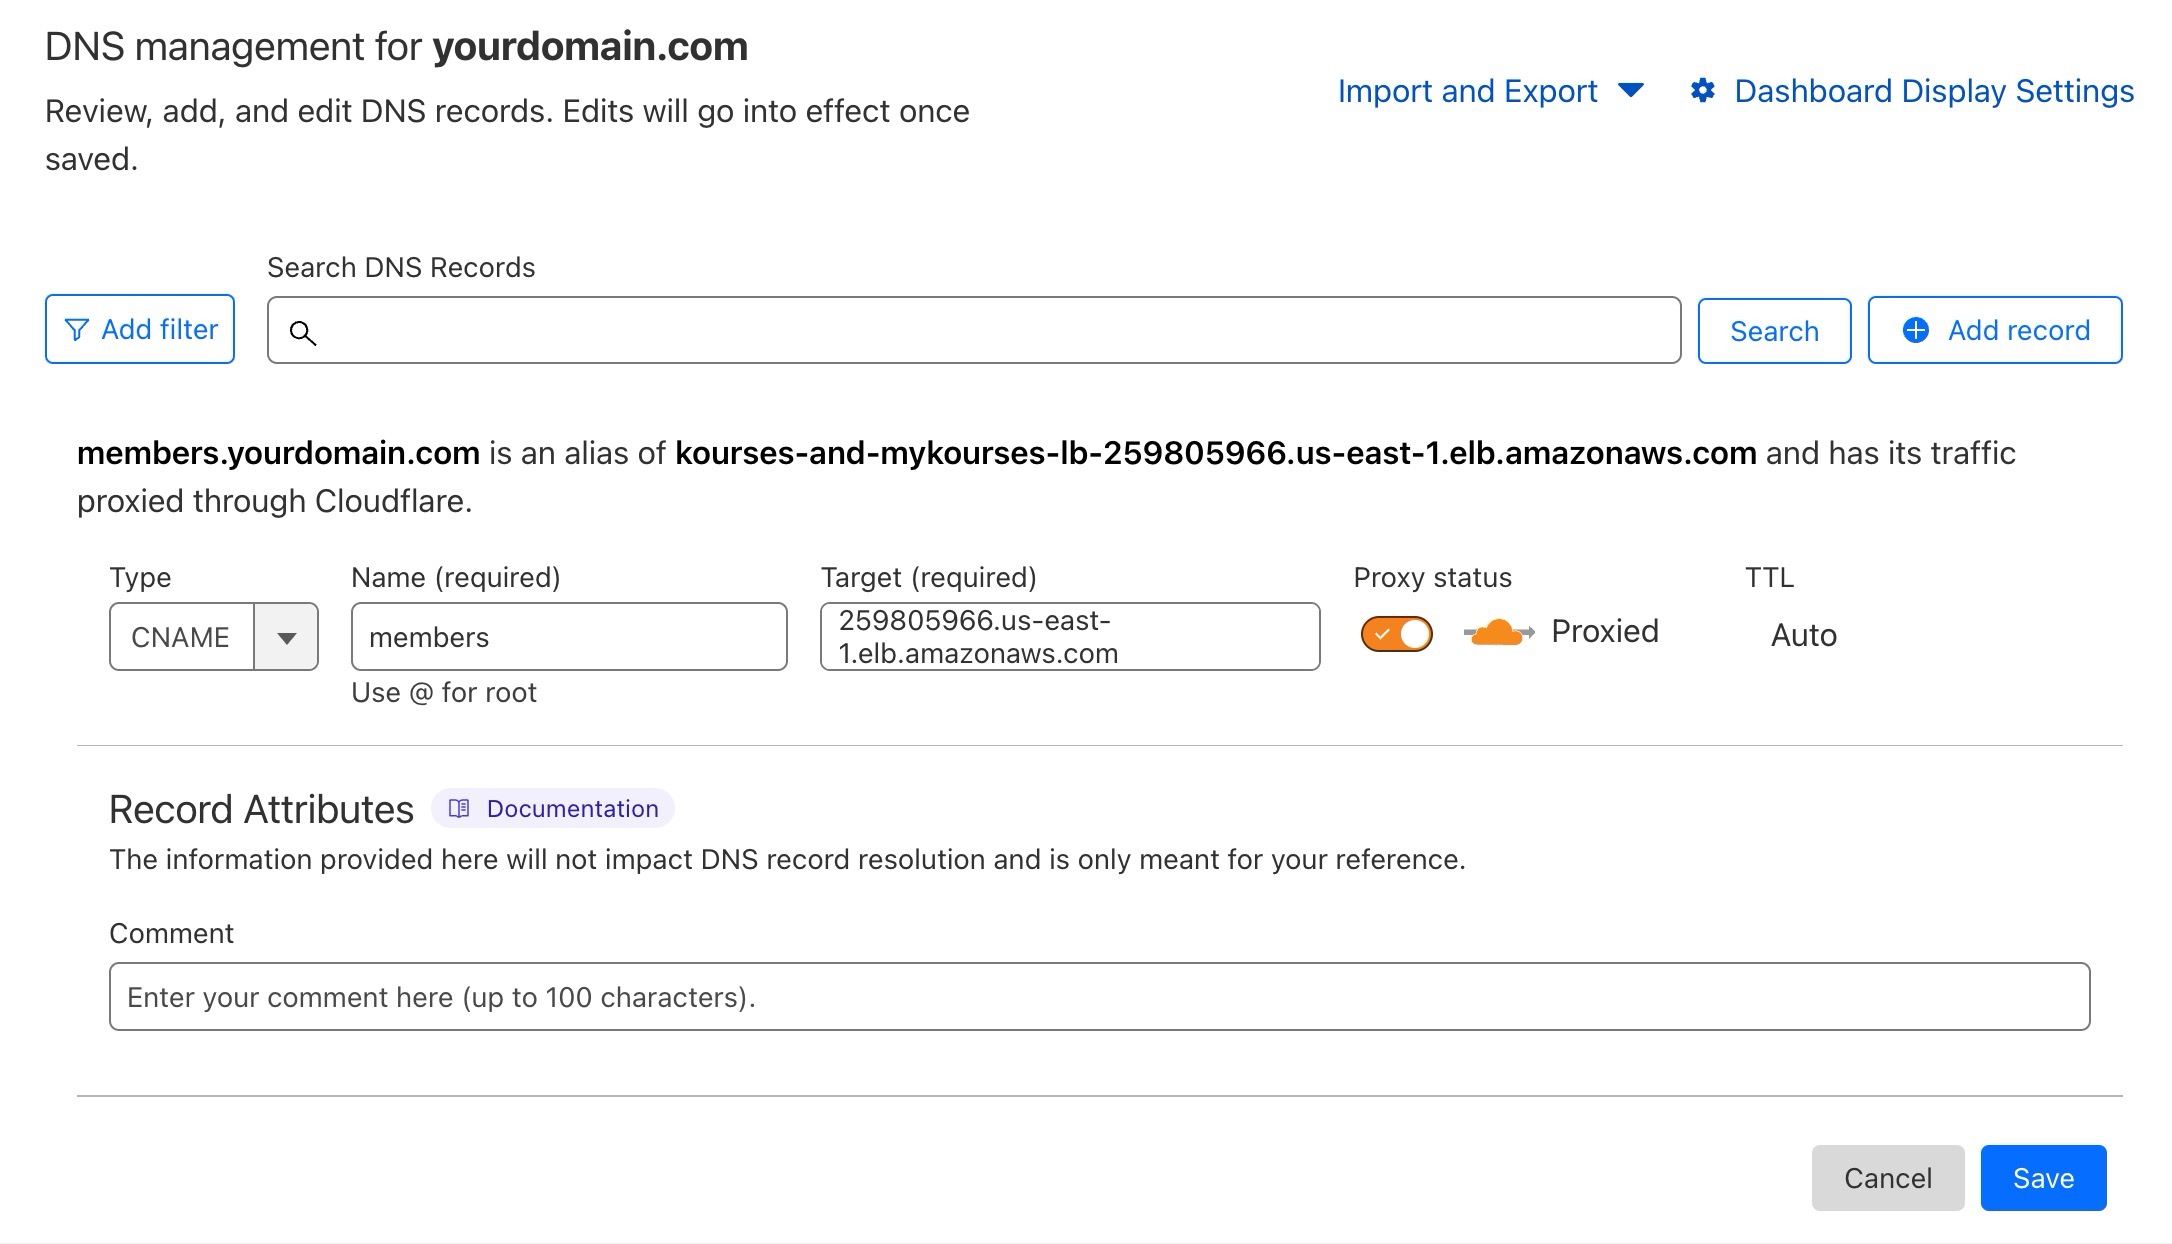
Inside of Cloudflare, find the domain that you wish to use, and click on DNS on the sidebar and choose Records
Once you're on that screen, click the blue "Add Record" button

Once you have the add record box open, you need to make a few selections:
- For the "Type" dropdown, select CNAME
- In the "Name (required)" field, you need to enter either your subdomain of your main domain you want to use e.g. members.yourdomain.com (enter "members") - or enter "@" if you want to use your root domain
- In the Target (required) field, enter a370f74205aa142c5853f7190315645e-c80aa80f98dd272d.elb.us-east-1.amazonaws.com
- Leave the setting for proxy status as "Proxied"
Click the blue "Save" button when you've set everything up. Here's an example where i am setting up my own subdomain of members.yourdomain.com to point to my Kourses site.
For non-cloudflare managed domains:
Login to the control panel for your hosting or wherever your domain DNS is managed.
Add a new DNS CNAME record.
If you are using a subdomain, you should enter the name of the subdomain. If you wish to use your root domain you would need to use @ instead

Set the Cname to resolve to or point to:
a370f74205aa142c5853f7190315645e-c80aa80f98dd272d.elb.us-east-1.amazonaws.com
Save your settings.
Now skip to step 4.
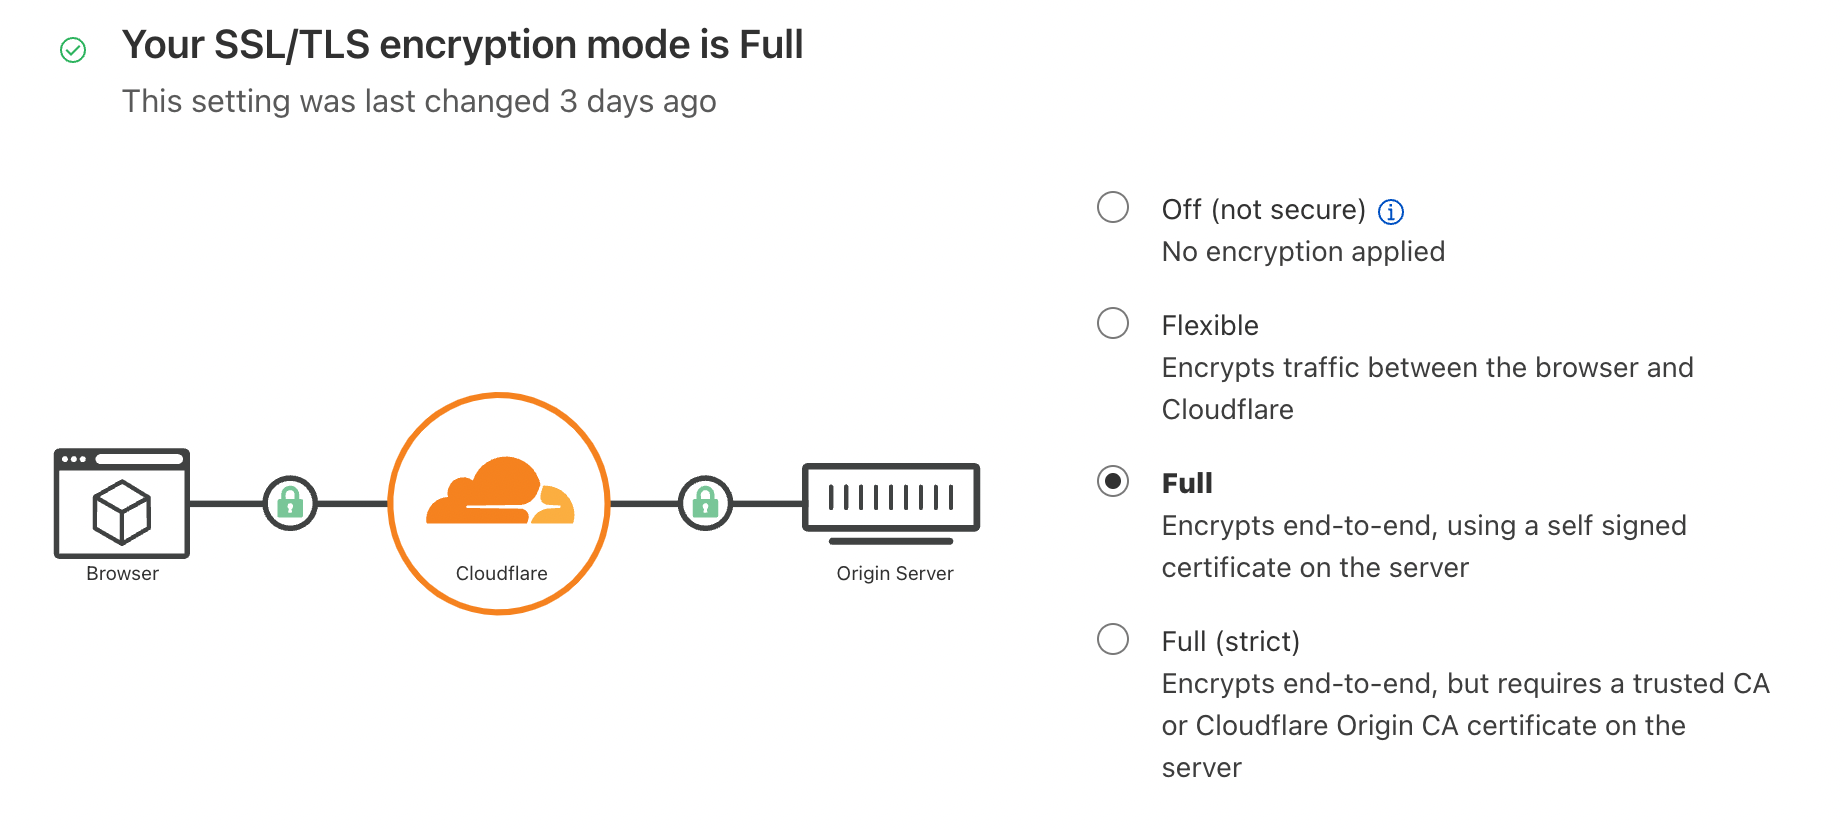
Step 2: Setup SSL settings for Cloudflare (Cloudflare only)
Then go to SSL/TLS > Overview page and set SSL/TLS encryption mode to “Full” but not “Full (strict).
Step 3: Set the HTTP rewrites setting (Cloudflare only)
Now go to SSL/TLS > Edge Certificates page and locate “Automatic HTTP Rewrites” and disable it. Step 4: Wait for changes to propagate
It can take up to 30 minutes for the changes to propagate around the web (usually quicker).
Step 5: Change your subdomain on Kourses
Login to your Kourses account, go to Website > Domain and follow these steps:
1. Click the custom domain button/option to begin entering your custom domain
2. Enter your custom domain including https:// at the start
3. Click Verify to verify your subdomain is ready (you should see a green confirmation message)
4. Click Save to save changes. Ensure you click save or your domain will not be updated.
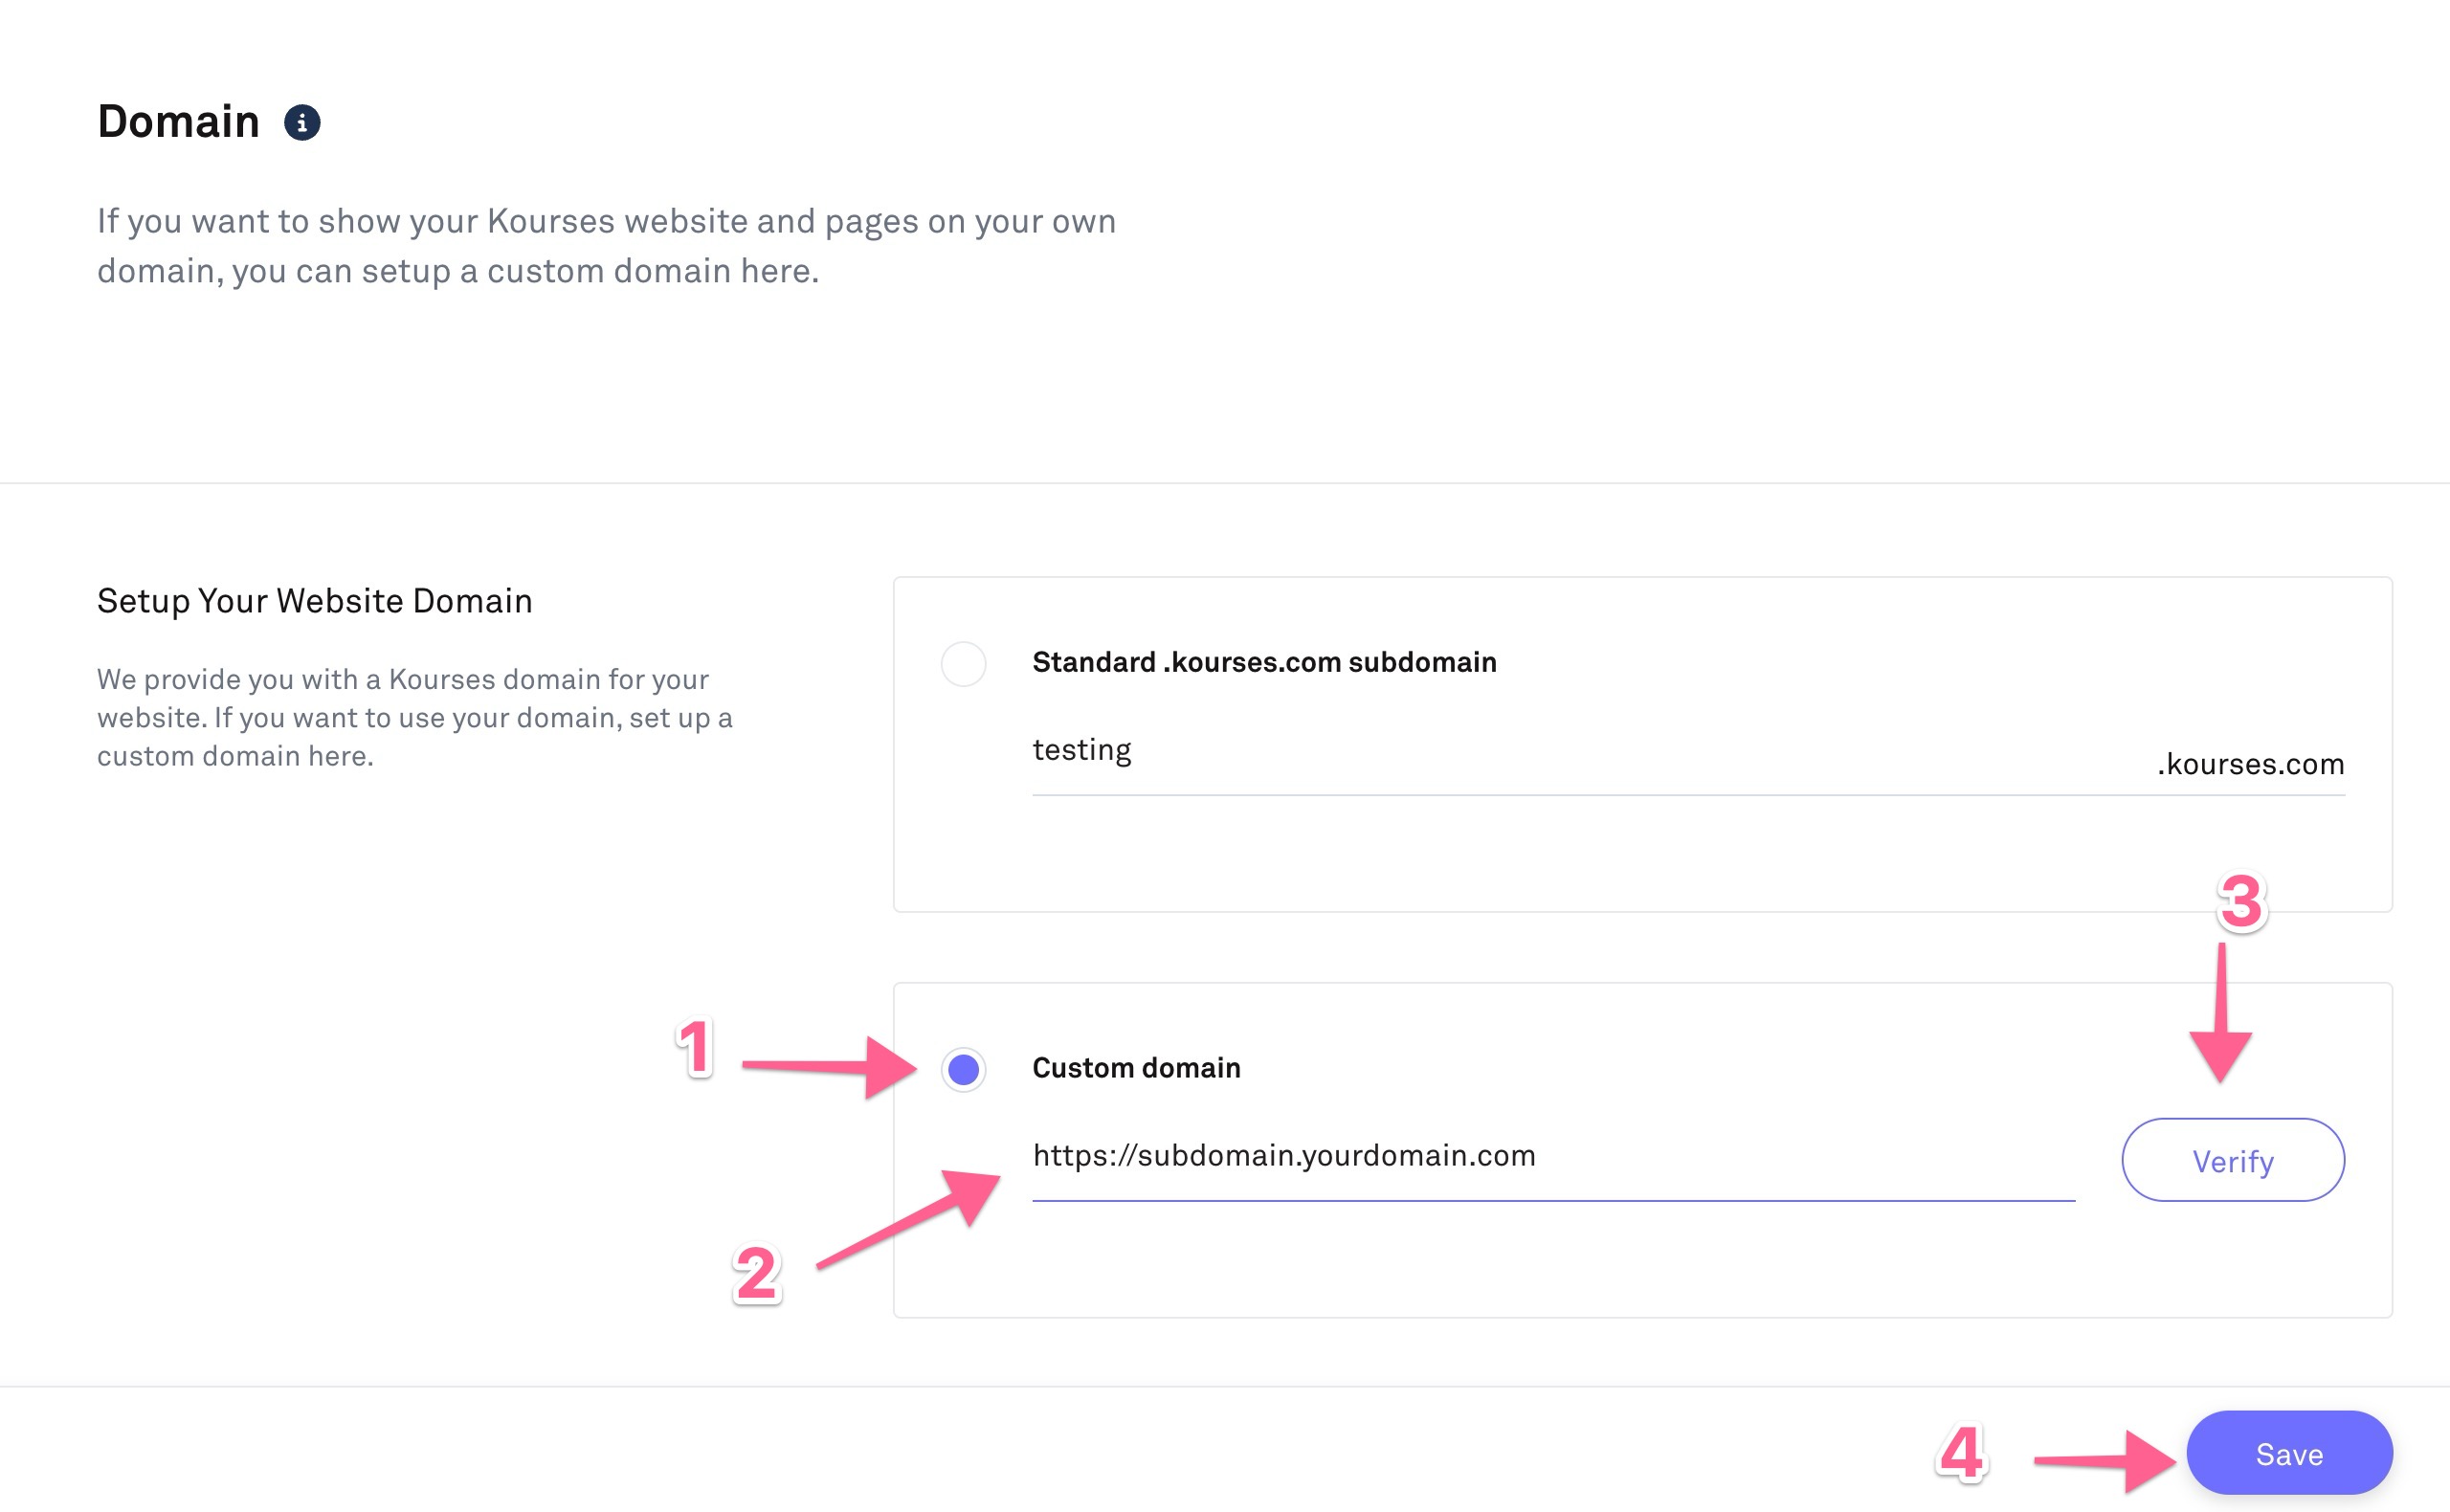
This will now generate the final SSL and point your membership site to your new custom domain
Please note that your site may show unsecure messages for 10-15 minutes after completing the process while the SSL is generated. During this time your old kourses subdomain will still continue to function for existing members to login.
If you have any problems, please reach out to our team who will be happy to assist.

