

How to Import Members
On the 'Import Members' page, you can manually add new members to your Kourses memberships.
You can add individual members or add them in bulk using a CSV file that you can upload to the platform.
Adding a New Member
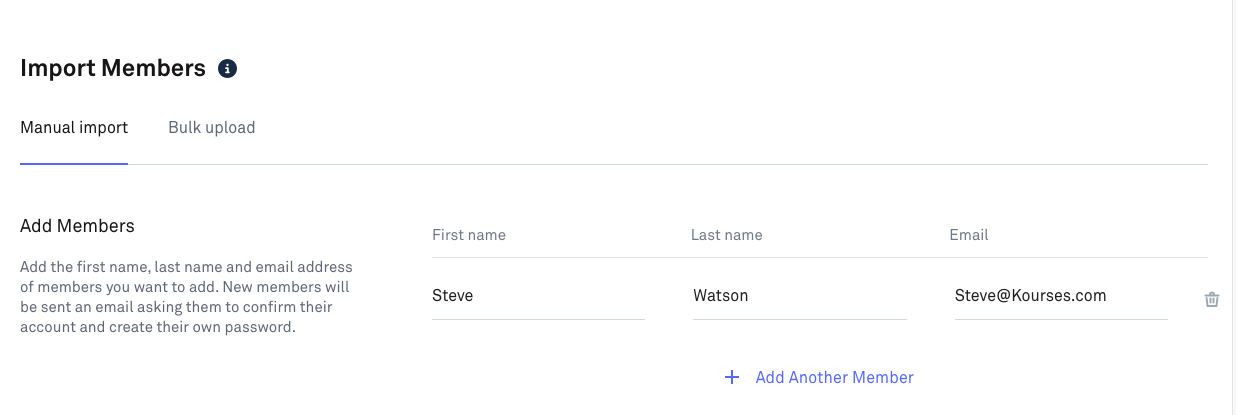
To add an individual member, enter the 'First name', 'Last name' and 'Email' in the fields provided.
You can add further members by clicking on the '+ Add Another Member' link.
Next, you will need to assign them to a membership.
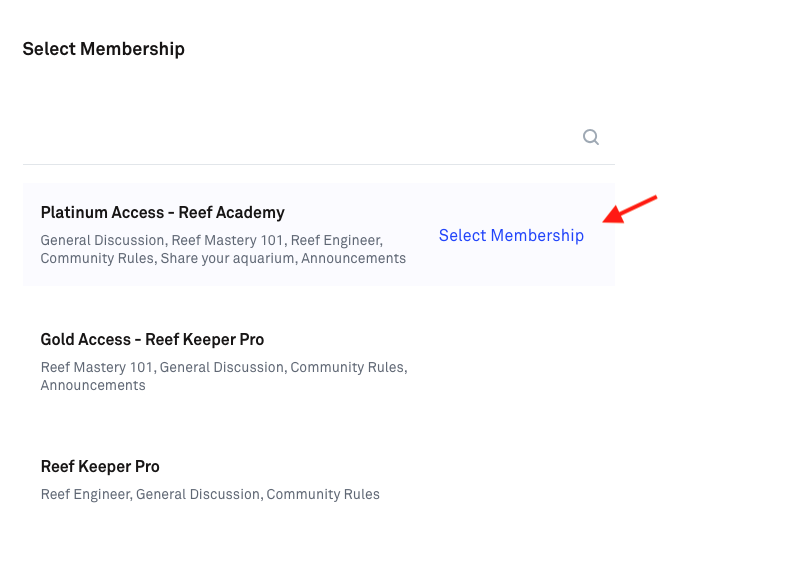
Click on the '+ Add Membership' link. An overlay will appear showing you a list of all of your current memberships.
Hover over the membership you would like to assign your members to and click the 'Select Membership' link that appears.
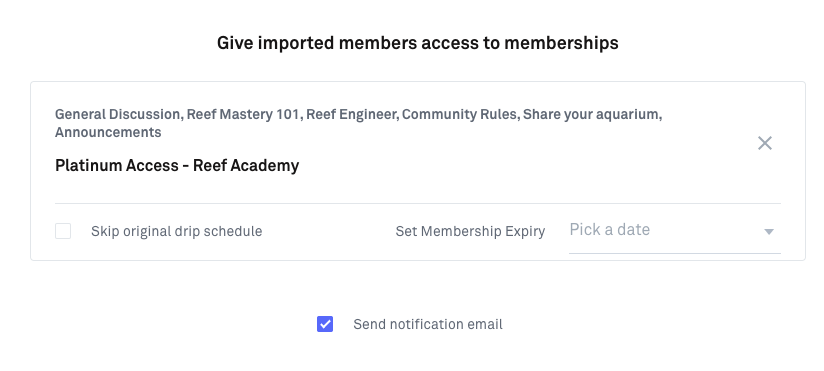
You will be taken back to the main 'Import Members' dashboard with the membership listed below your new member.
Here you will be able to 'Skip the original drip schedule' that may be assigned to the membership for members who you would like full immediate access to the content.
You can also 'Set a Membership Expiry' if you would like your members to access your membership for a predetermined time.
Lastly, you can choose to send them a notification email, letting them know that they have access to the membership. By default, this setting is ticked.
You can add as many memberships to your members as you want by clicking on the '+ Add Membership' link.
Once you've entered your member details and assigned them to a membership, click the 'Save' button on the bottom right of the page to confirm.
Adding New Members In Bulk
If you would like to upload multiple members in bulk, you will be able to upload a CSV file of all of your members to the platform.
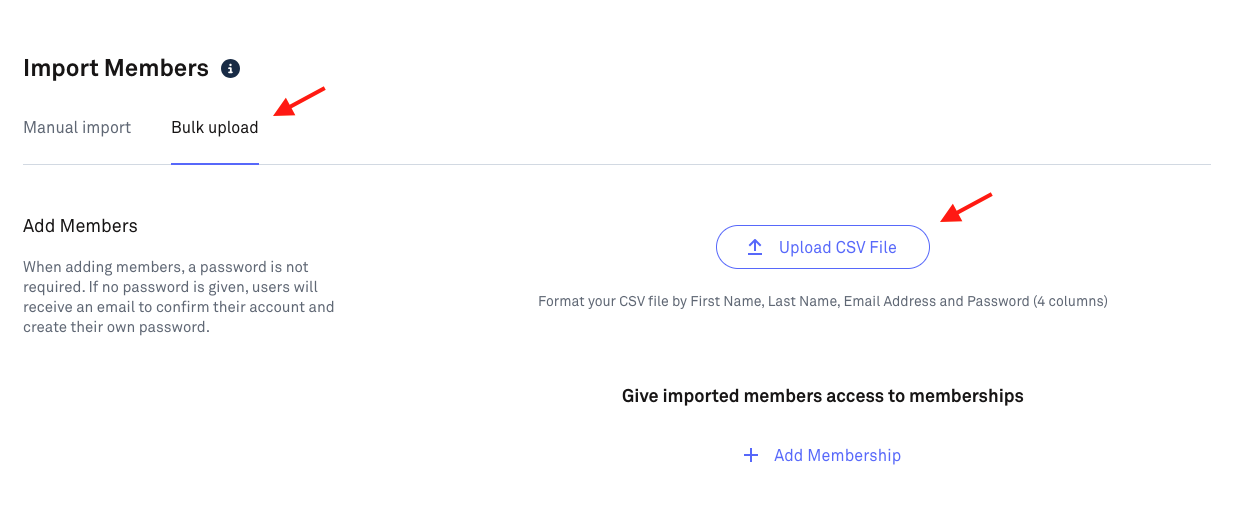
To do this correctly, you will need to ensure that your spreadsheet contains 4 columns: First Name, Last Name, Email & Password.
Here is a member spreadsheet file to give you an example of how to format the member data you import into Kourses - Download File Here.
Note: Do not need use titles for the columns in your database and ensure you export as a CSV file.
On the 'Import Members' page, click the 'Bulk Upload' tab. Next, click the 'Upload CSV FIle' button and select the CSV file on your computer.
With your CSV file uploaded, click the 'Add File' button to confirm the upload.
You can now follow the same process as before and assign your members to a membership.
Please Note: Bulk upload is limited to 500 members per import.