

Make is a platform for creating and automating workflows that can pass information between various software tools and apps. Kourses is now available as an integration on Make.com, and allows you to connect with thousands of other tools available inside Make,com to build custom integrations.
1. How make.com works
If you're new to Make.com, (formerly called Integromat), you'll need to setup an account. You can get a free account to start at make.com
Make works by creating what they call "Scenarios". This is a series of steps that you connect together to pass data and information between apps based on certain triggers.
An example of a make.com integration
Let's say you're using a checkout platform not currently supported by Kourses to sell access to your courses or memberships. You might want to create each new buyer as a member inside your Kourses site, with certain memberships or hubs added to their account.
You can do this easily by setting up a Scenario which includes your checkout platform as the first step, and then Kourses as the second step using the module available.
2. Adding the Kourses app to your make.com account
As the Kourses integration is new, it may not appear in your make.com account by default. Once you are logged into your make.com account, open the link below in the same browser:
https://www.make.com/en/hq/app-invitation/86253d96735fd6bb8552a569f2c85dea
This will present you with a screen to install our Kourses app into your Make.com workspace. Click the "Install" button as indicated below:

You will be prompted to choose which workspaces you wish to install the app. Check the boxes for your workspace/organisation and then click "install". After the installation is finished, click "Finish wizard"
2. Creating your first Make.com Integration
To use Kourses inside Make.com you need to first create a new "Scenario".
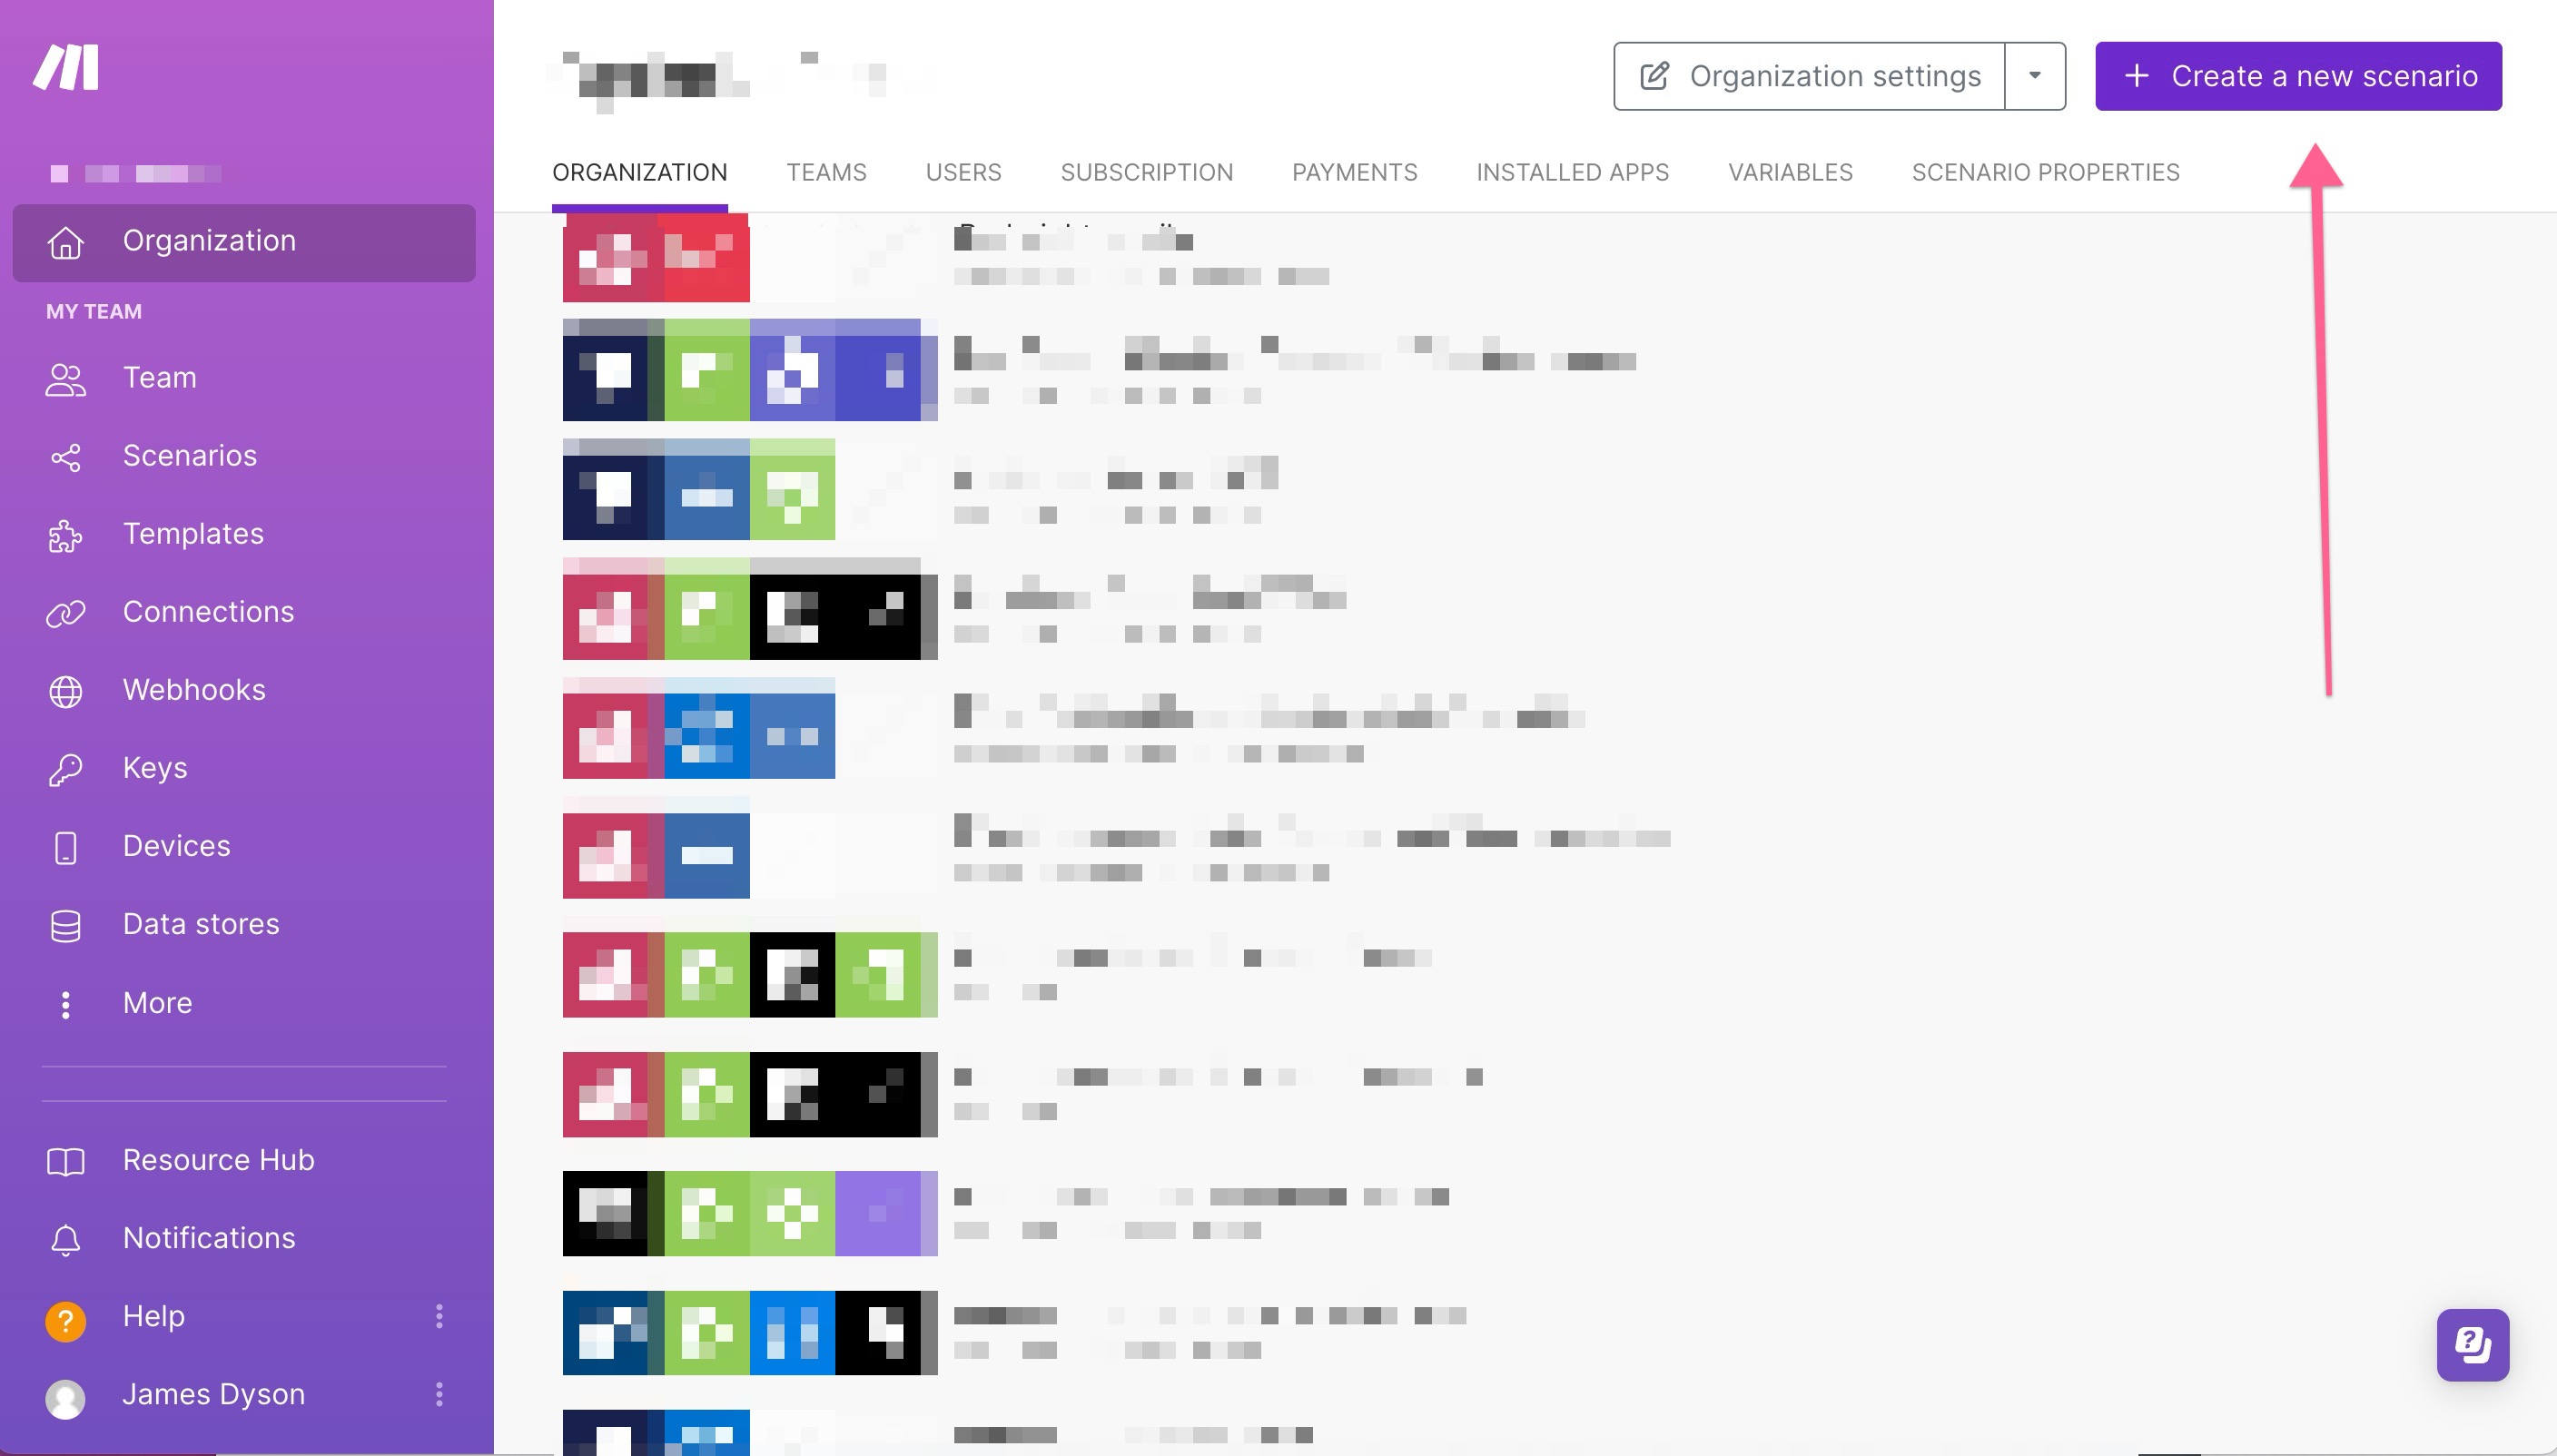
Create a new scenario
Click "Create a new scenario" from the main Dashboard inside make.com:
Add a trigger module
Next inside the Scenario builder you need to add a "Trigger" module. This is the first module in your scenario and would normally be the app where the data is coming from.
This might be a checkout solution, your payment processor, a spreadsheet, or any other tool where you want to send data from to Kourses.
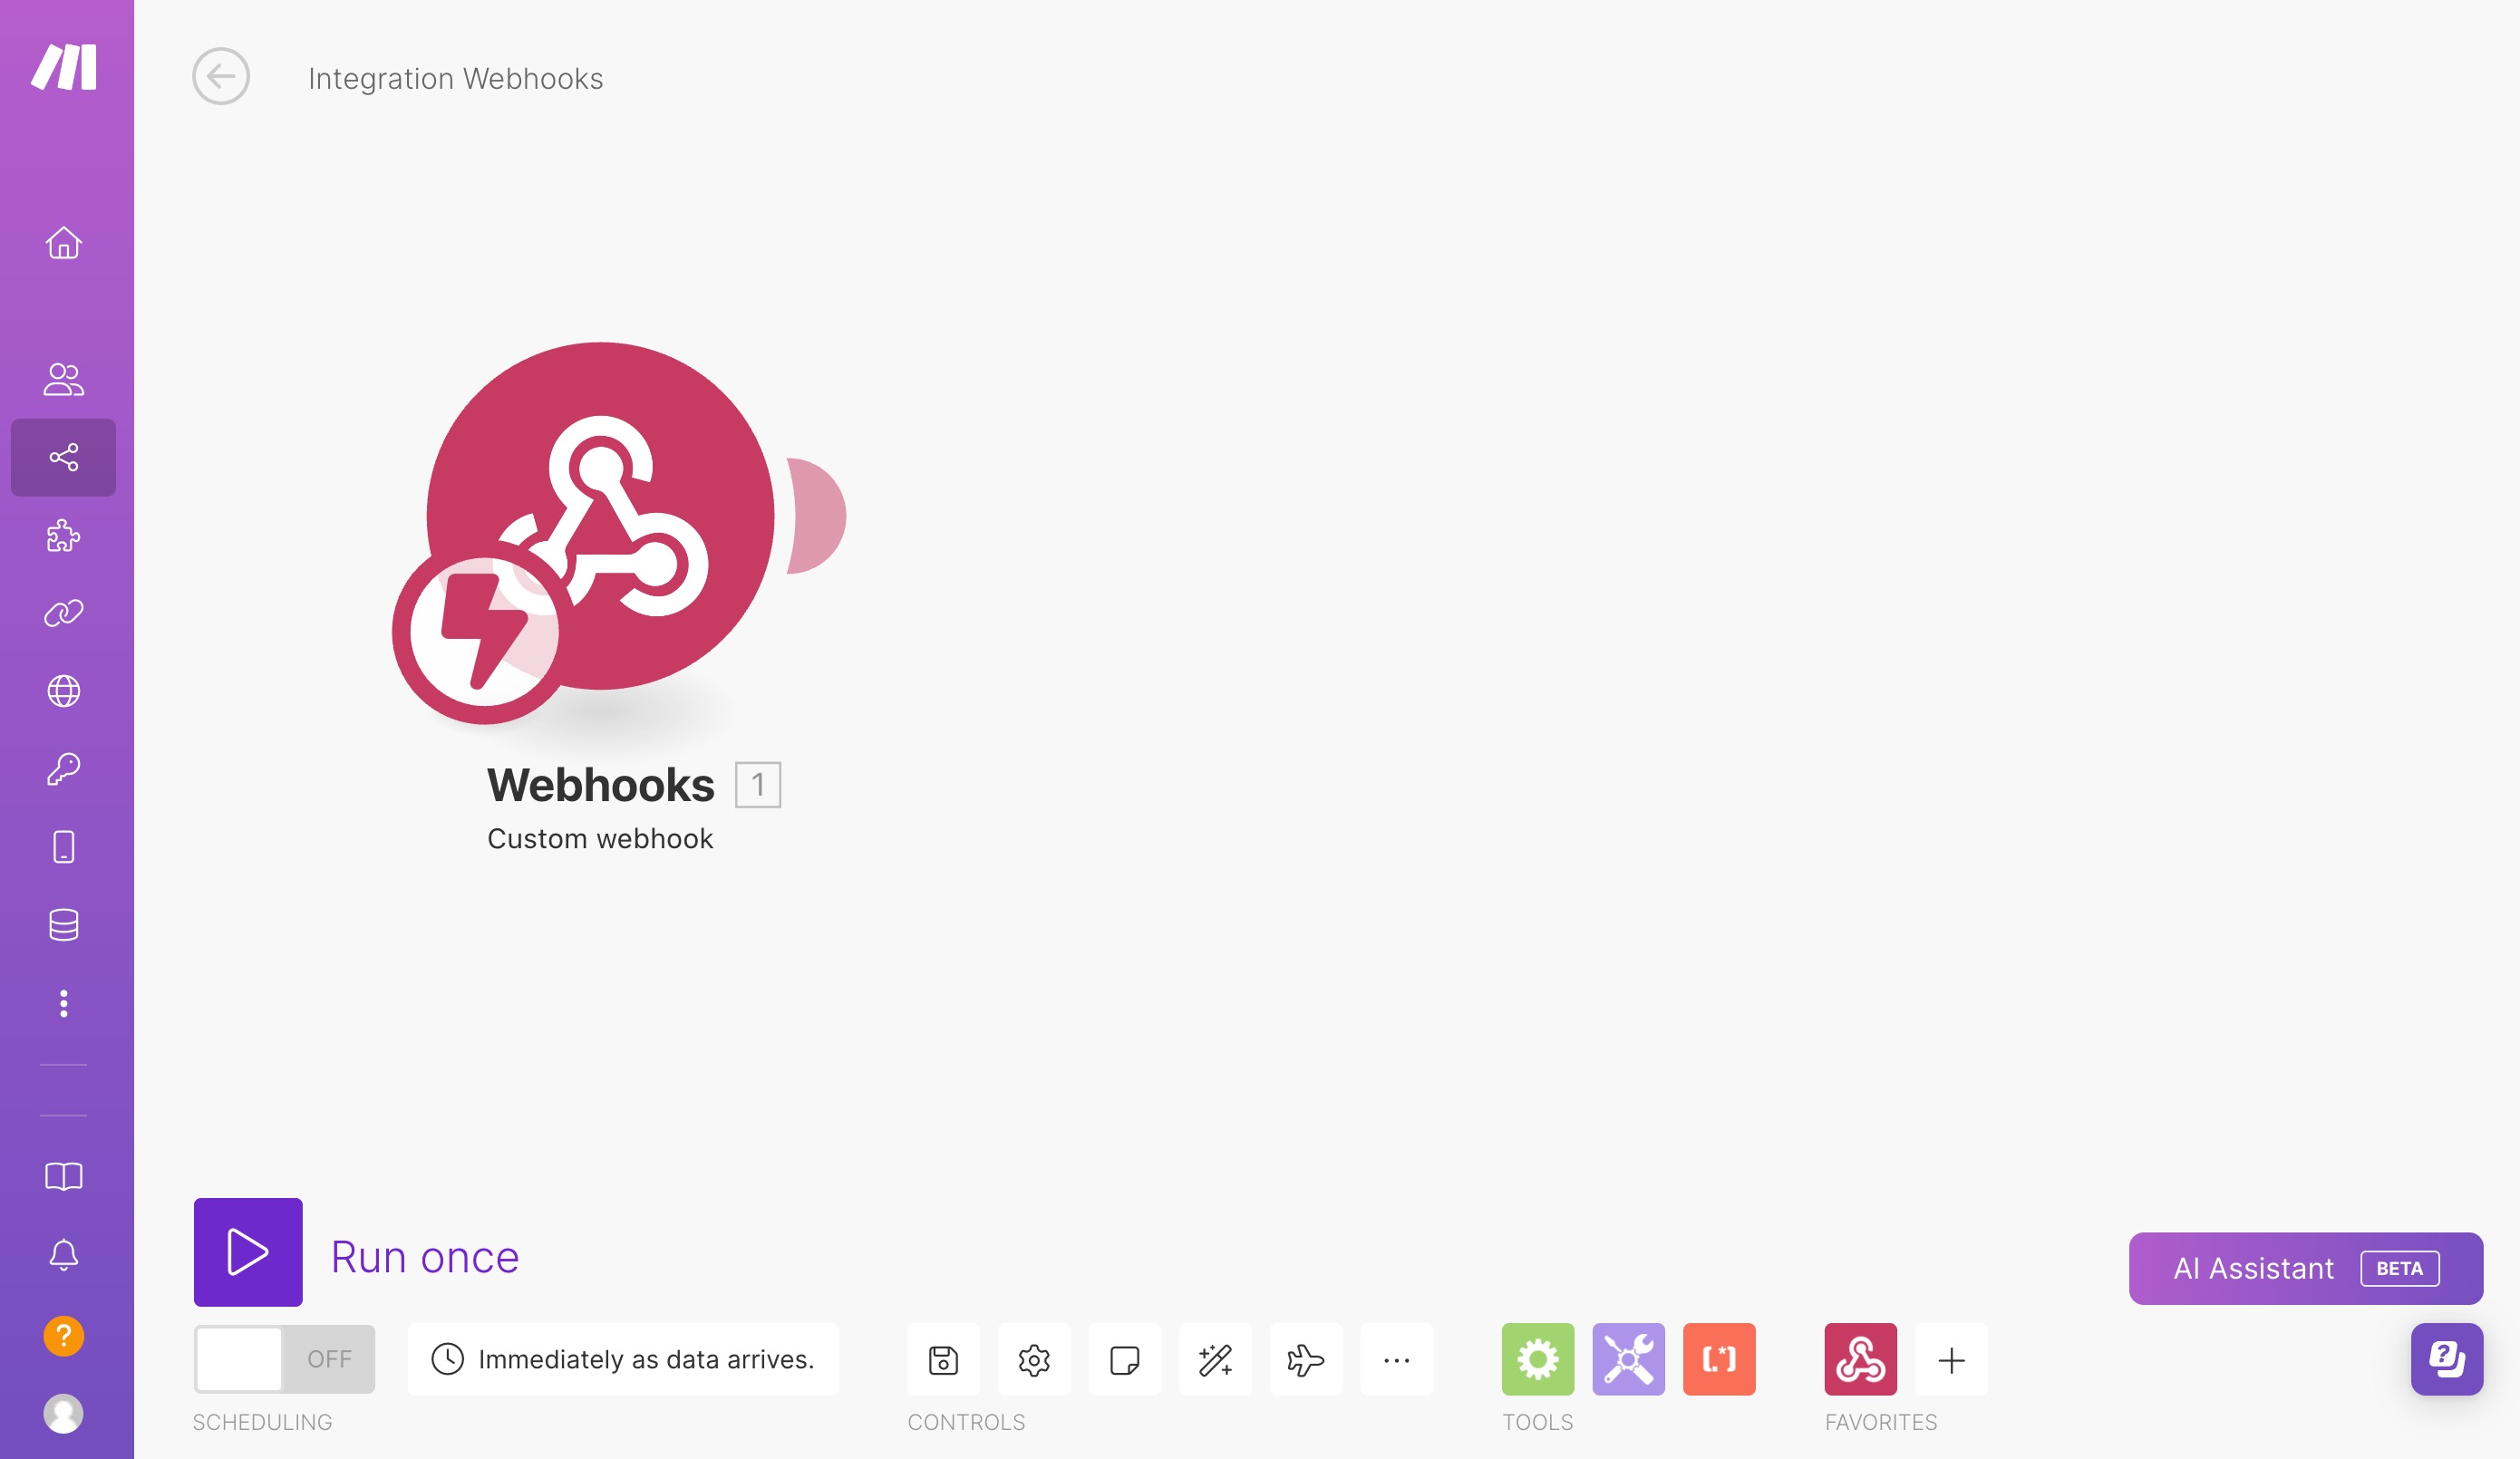
For the purposes of this example, I am going to use a "custom Webhook" module to receive data from another website:
Click the "+" button and choose a module from the menu. You will be prompted to configure the integration with that module. Consult the steps provided by Make.com or your chosen platform when configuring the first step:
Add the Kourses module
One you have your trigger module configured, you can add a new module to send the data to your Kourses account.
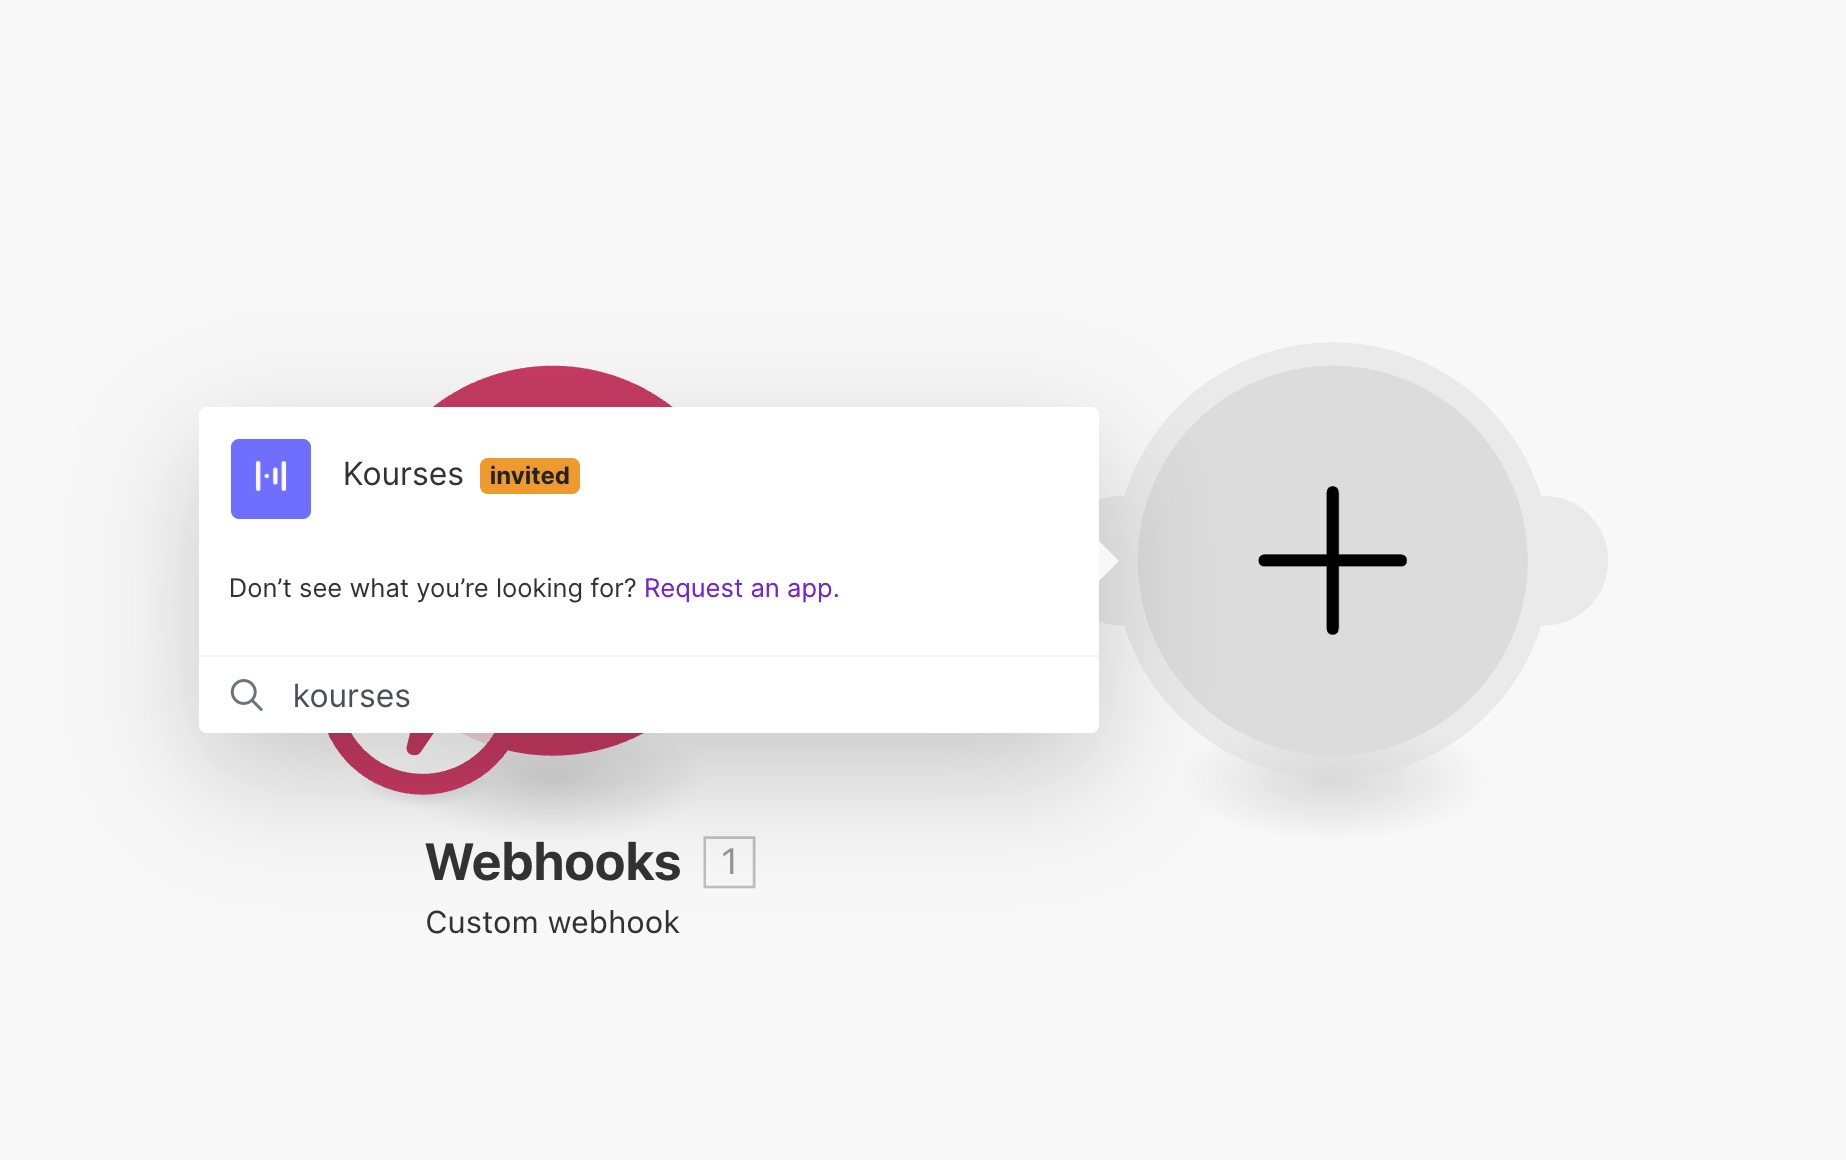
Hover over the side of the existing module to see the "Add new module" button - click this and you will be prompted to search for applications. Enter Kourses to find our app (remember it will only show if you have installed it as per the steps above):
Once you click the Kourses module, you will be prompted to choose the action you wish to run.
- Create Member - creates a member in your Kourses site
- Grant Permission - adds permission to a member for a membership
- Revoke Permission - removes permission from member accessing a membership
In this example, we'll choose "Create Member" as we want to create a new member on our site. We can also use this action to add specific memberships to the member.
Connect to your Kourses account
We now need to connect your Kourses account to make.com. This will be done via an API key.
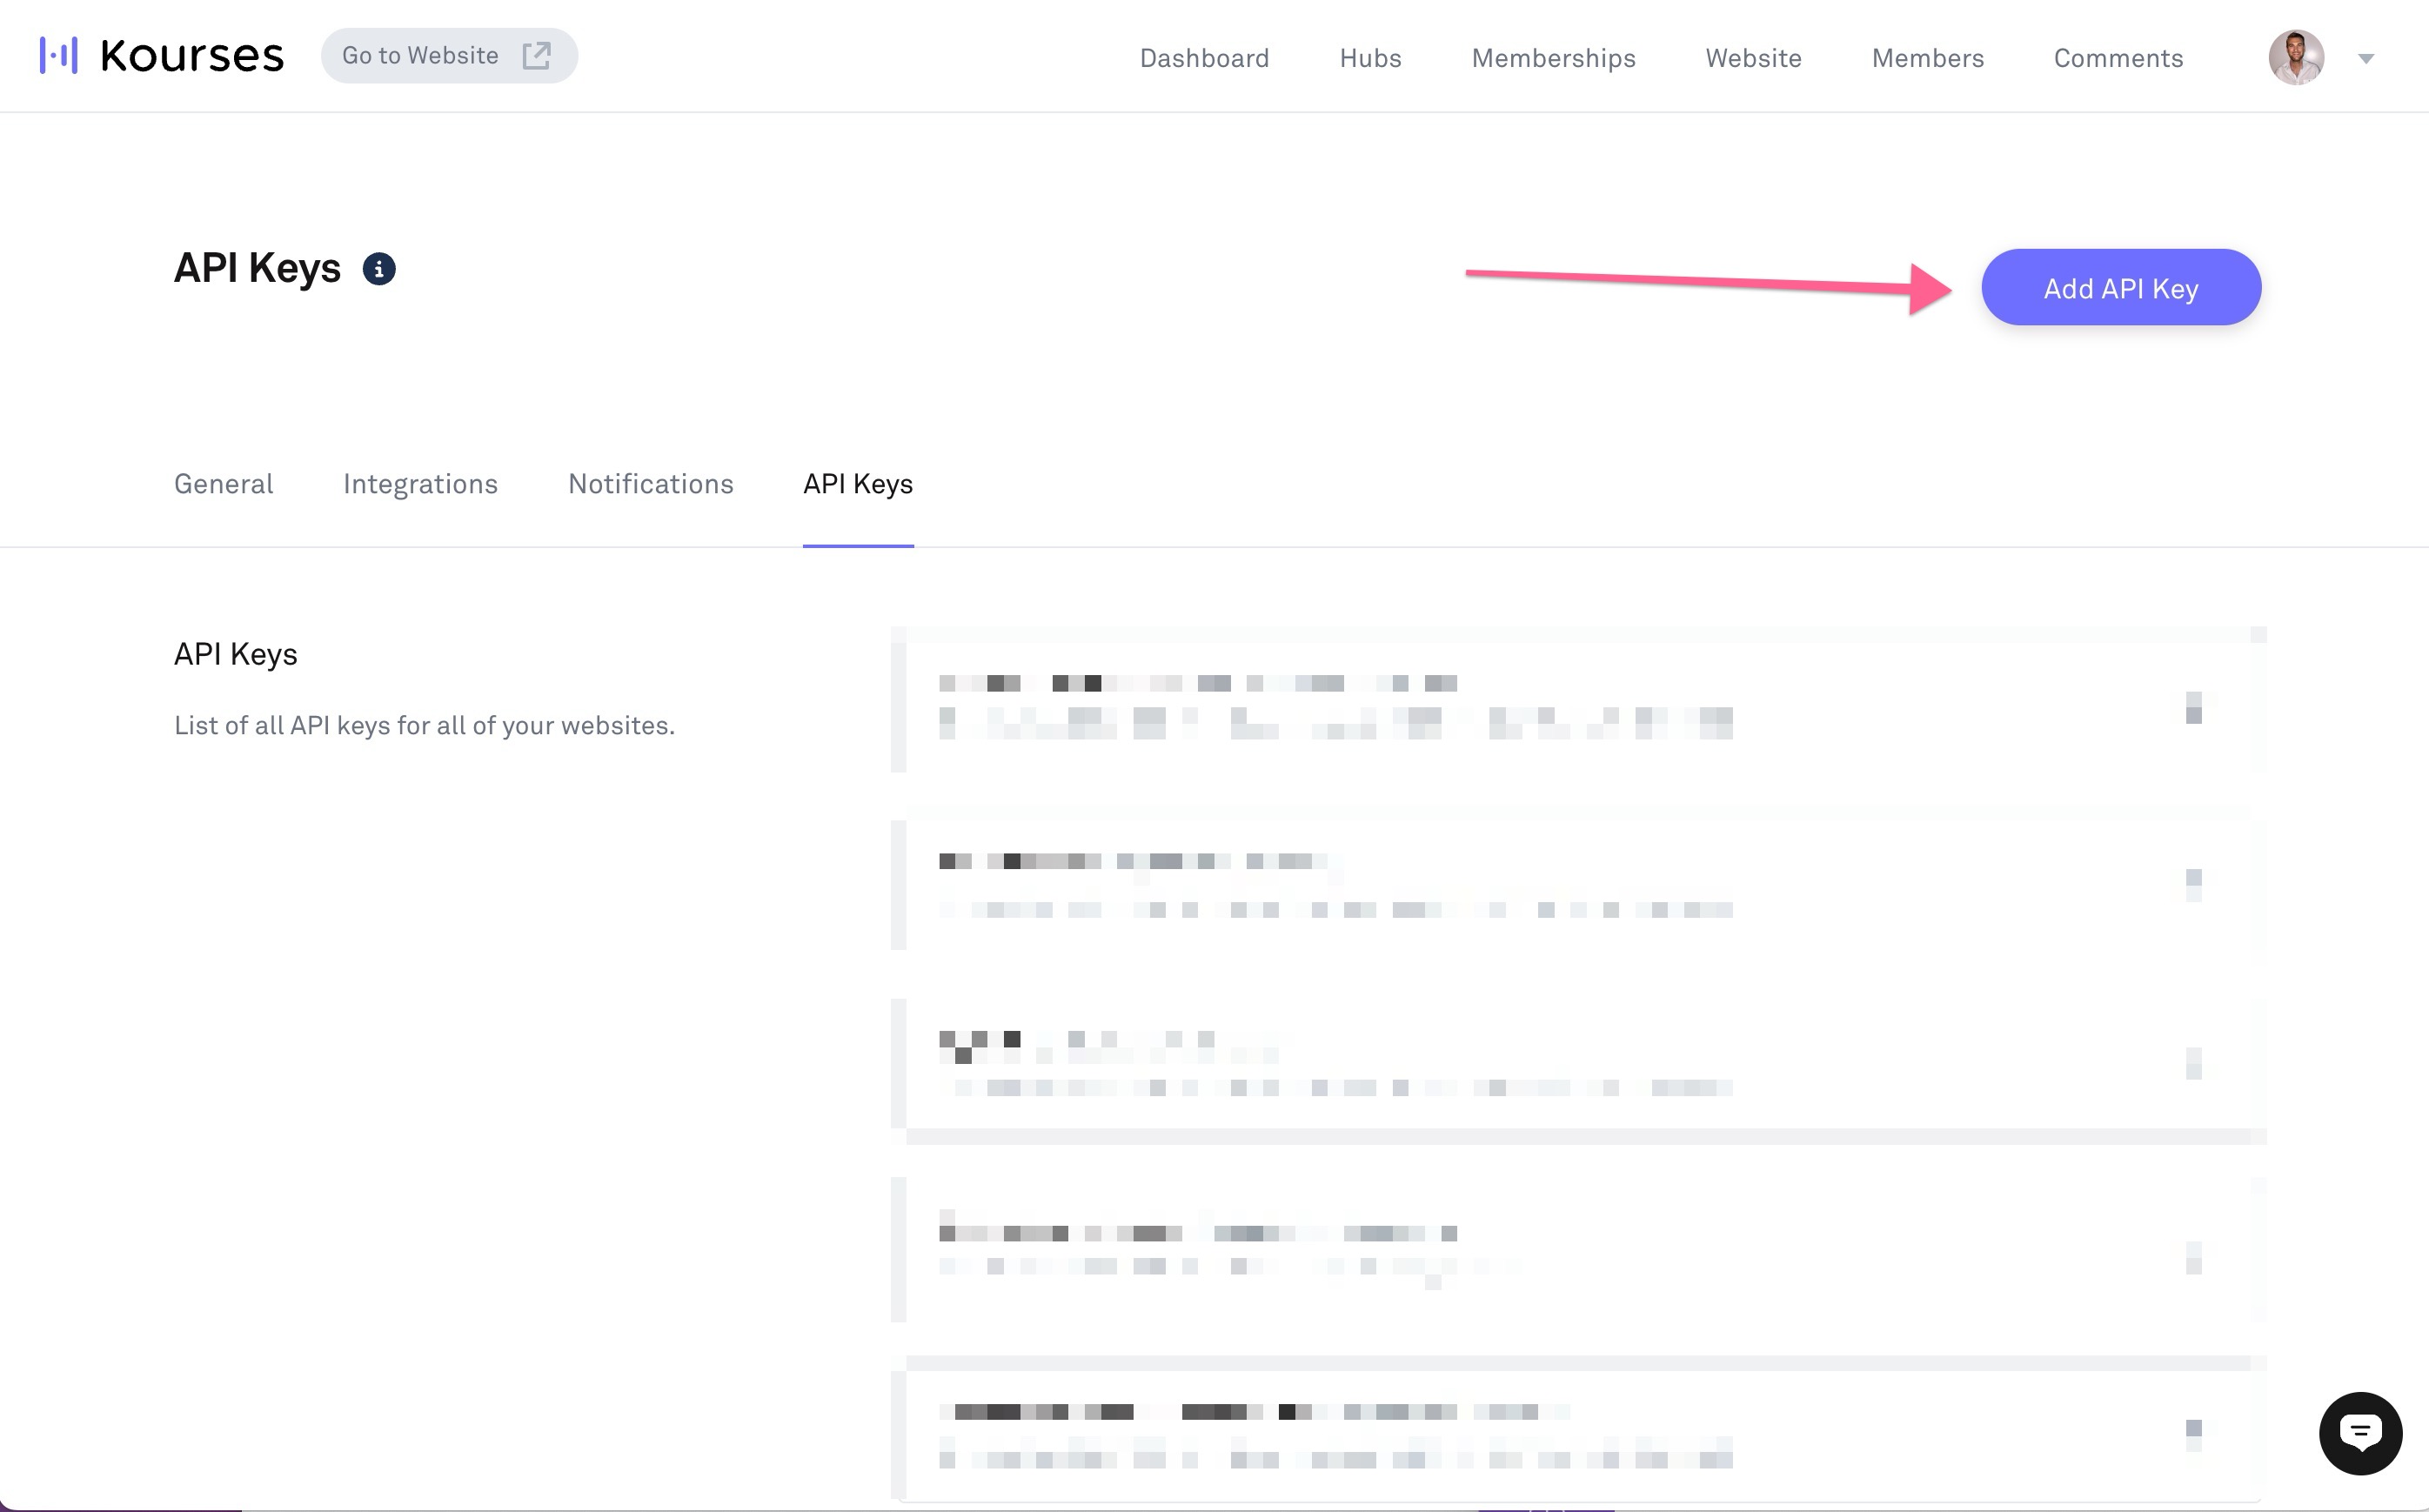
Head over to your Kourses account, and go to the top right menu (where your avatar is) and click Settings.
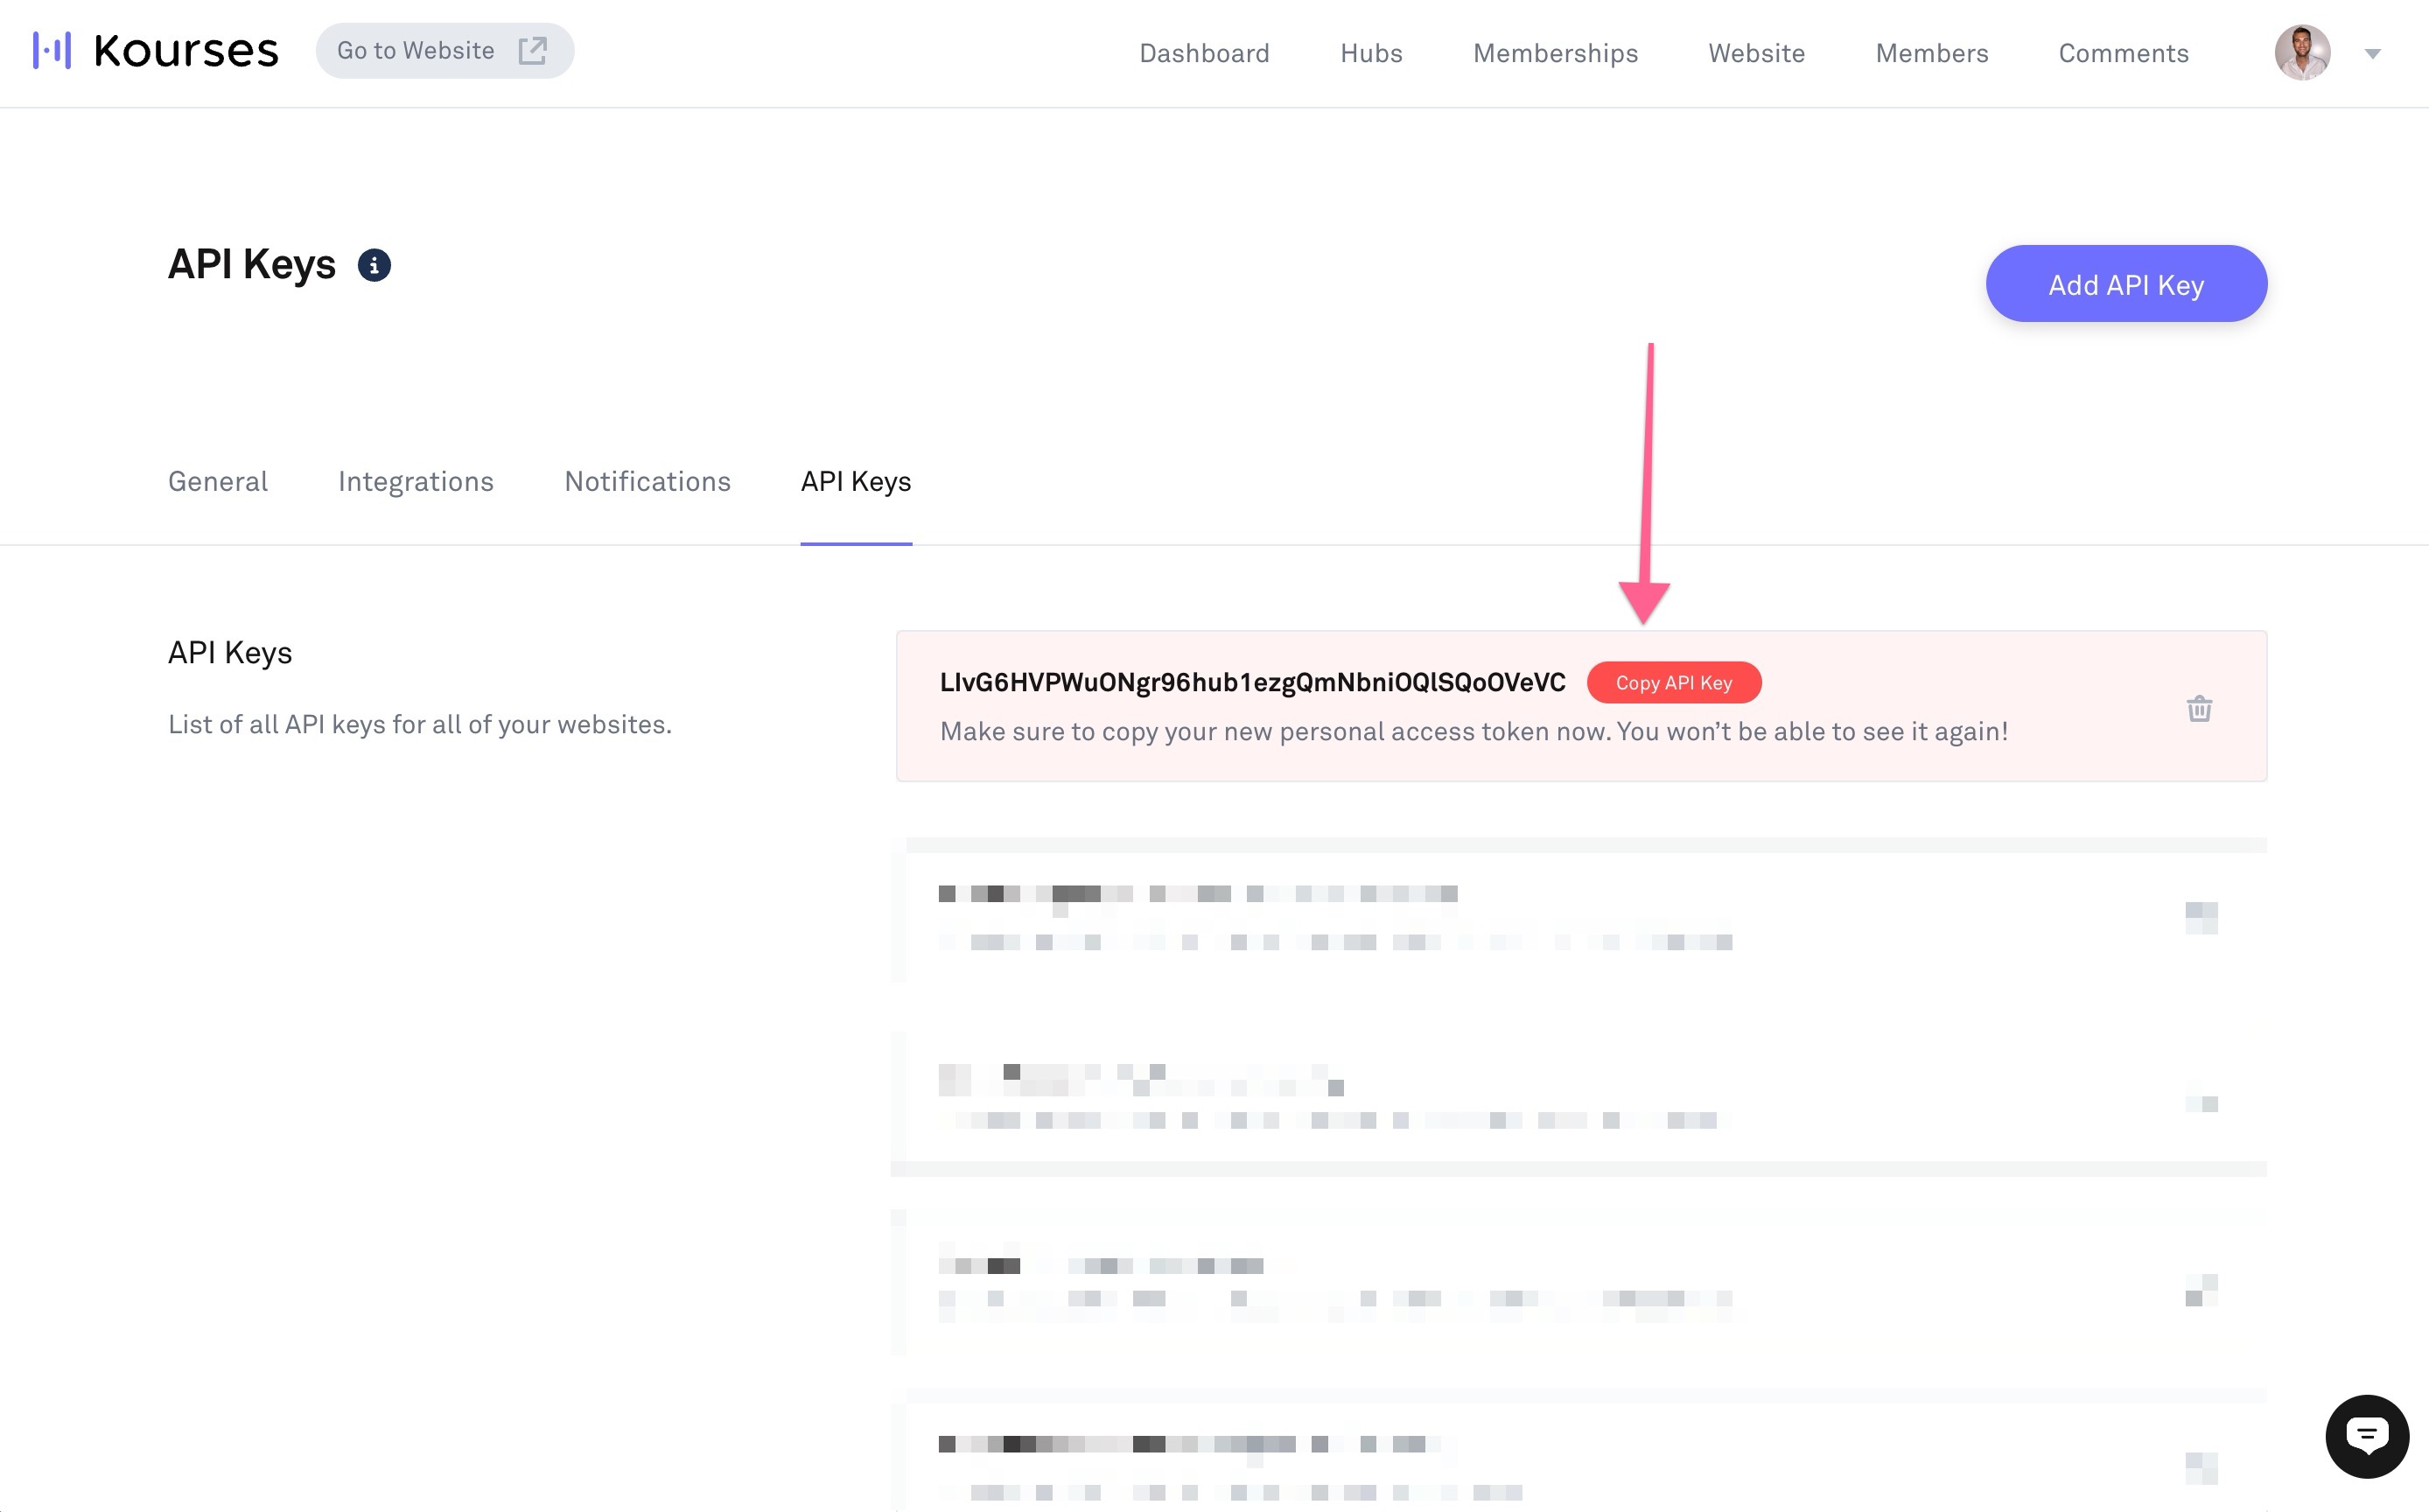
Next choose "API Keys" from the sub-menu. On the next screen, click the "Add API Key" button:
You'll be prompted to enter a name for the API key. We recommend using something you can easily identify it by, so something like "make.com integration"
You'll now be presented with your API key on screen. Be sure to click Copy API key and make a note of this as you will not be able to access it again:
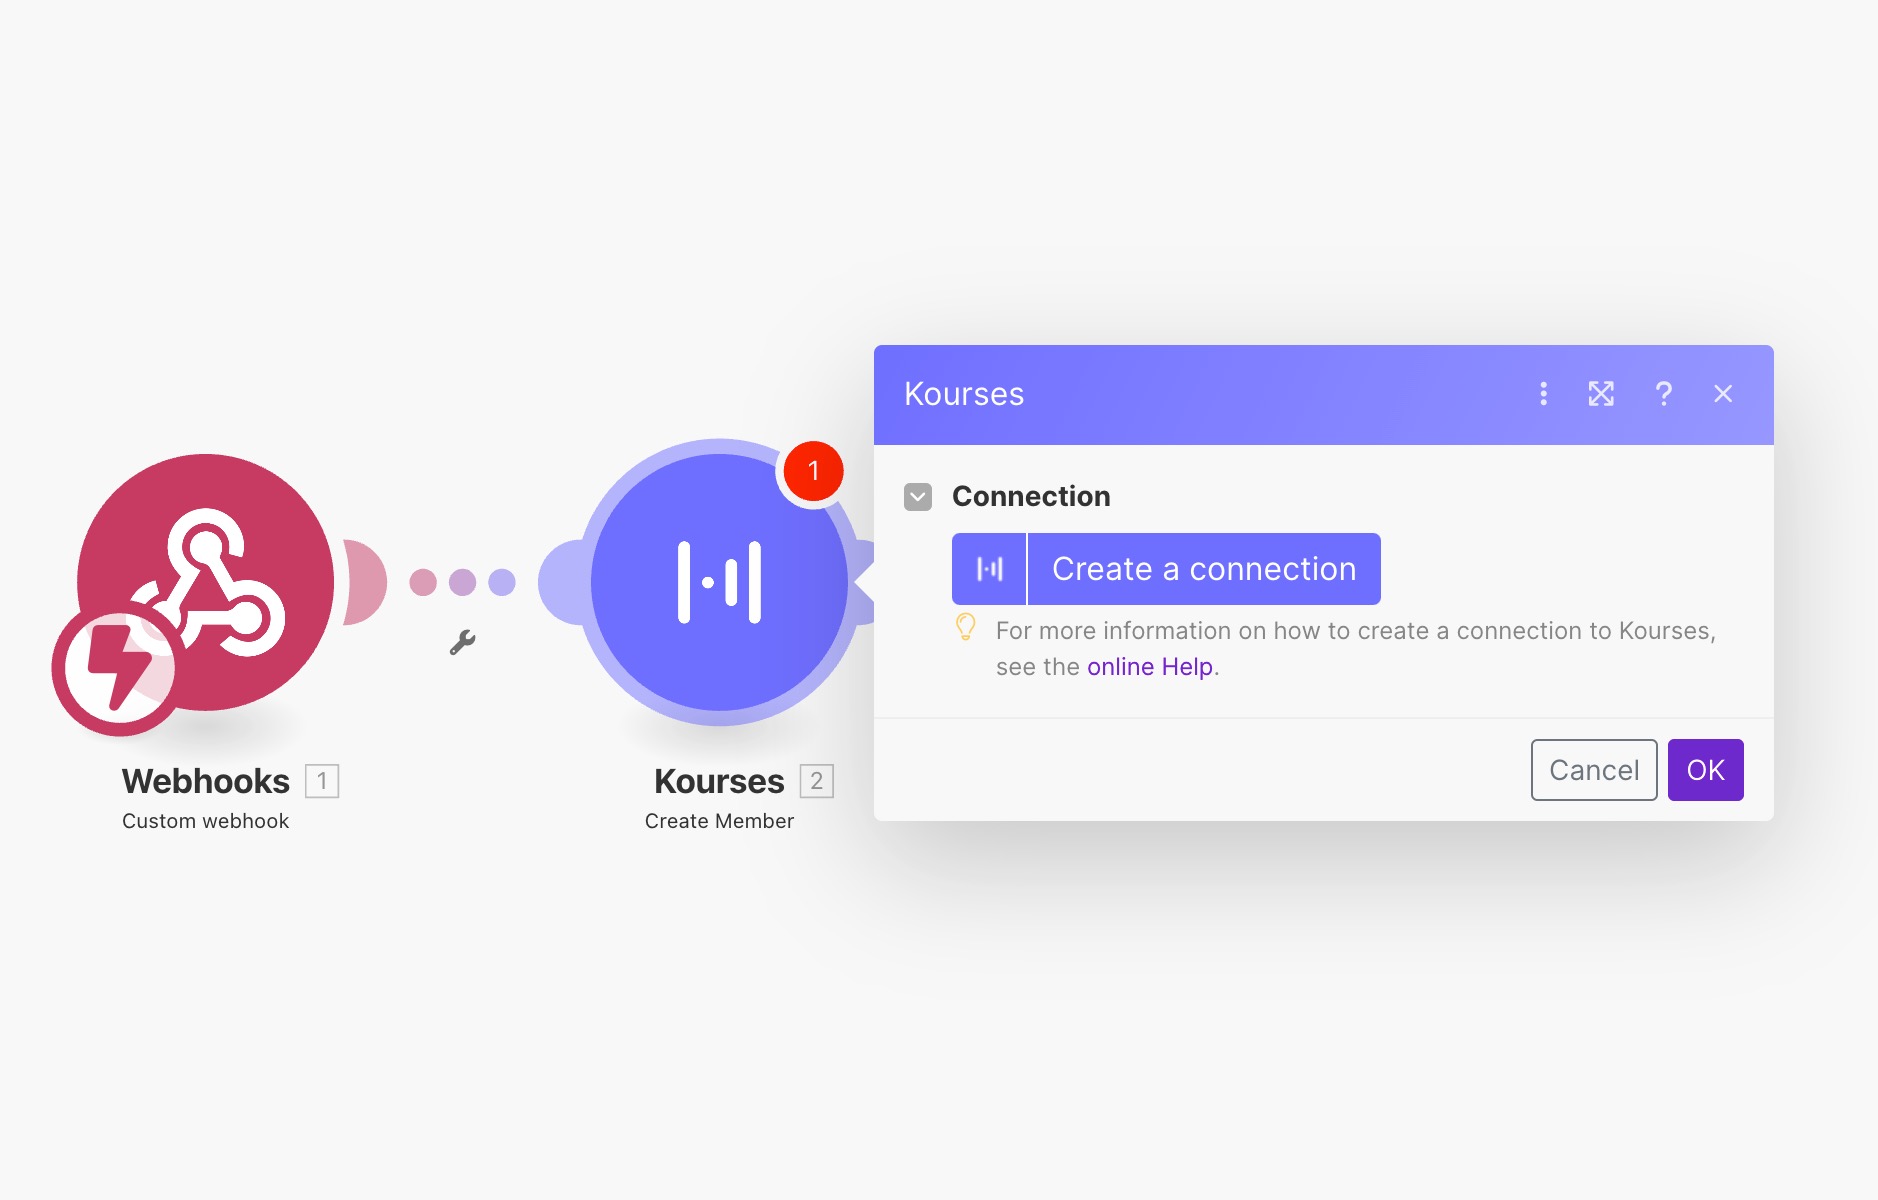
Now head back to your Make.com account and click on the "Create a connect" button which should be showing on screen:
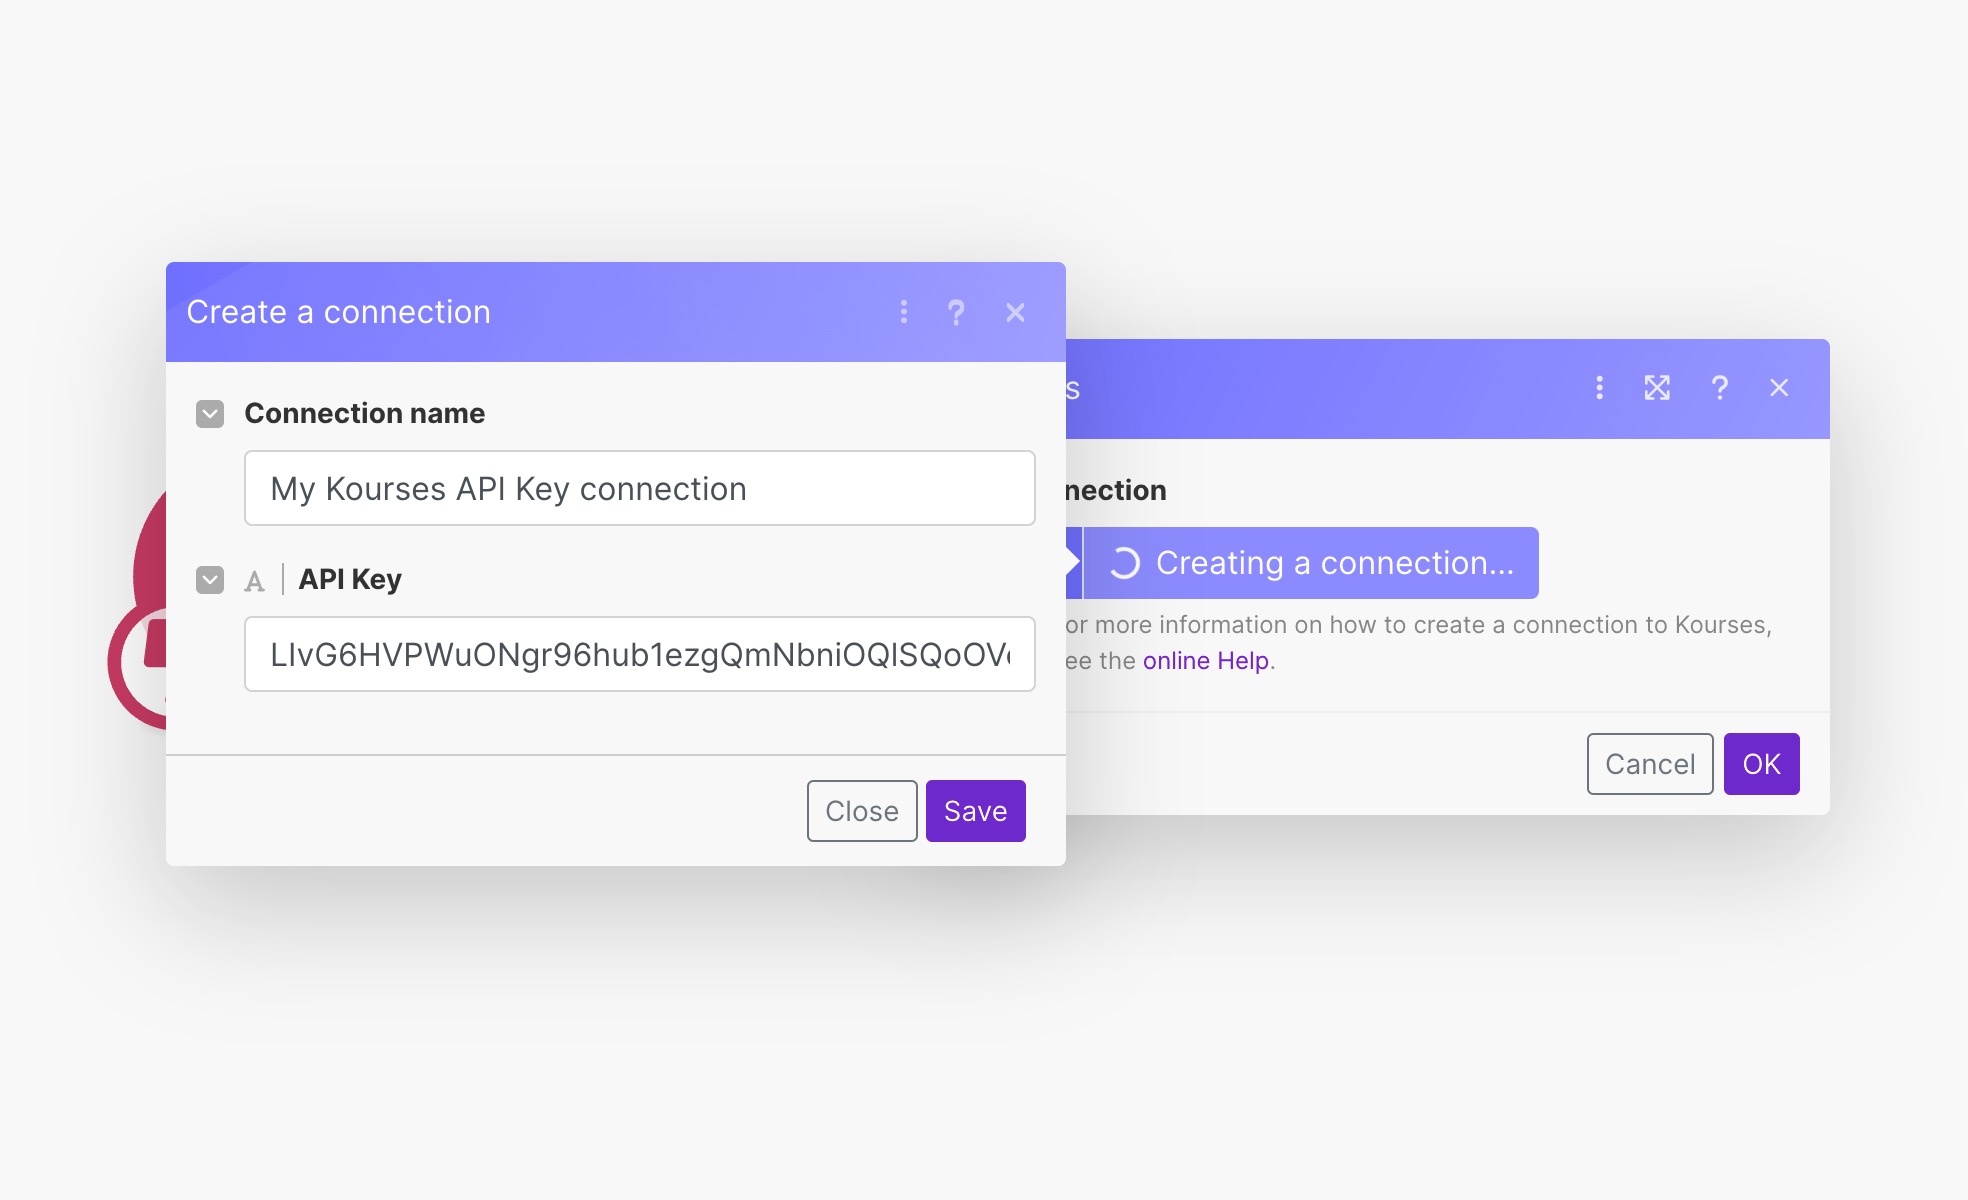
You will be prompted to give this connect a name (optional) and then enter your API key in the field provided. Click "Save" when you're done.
Configuring your Kourses Integration
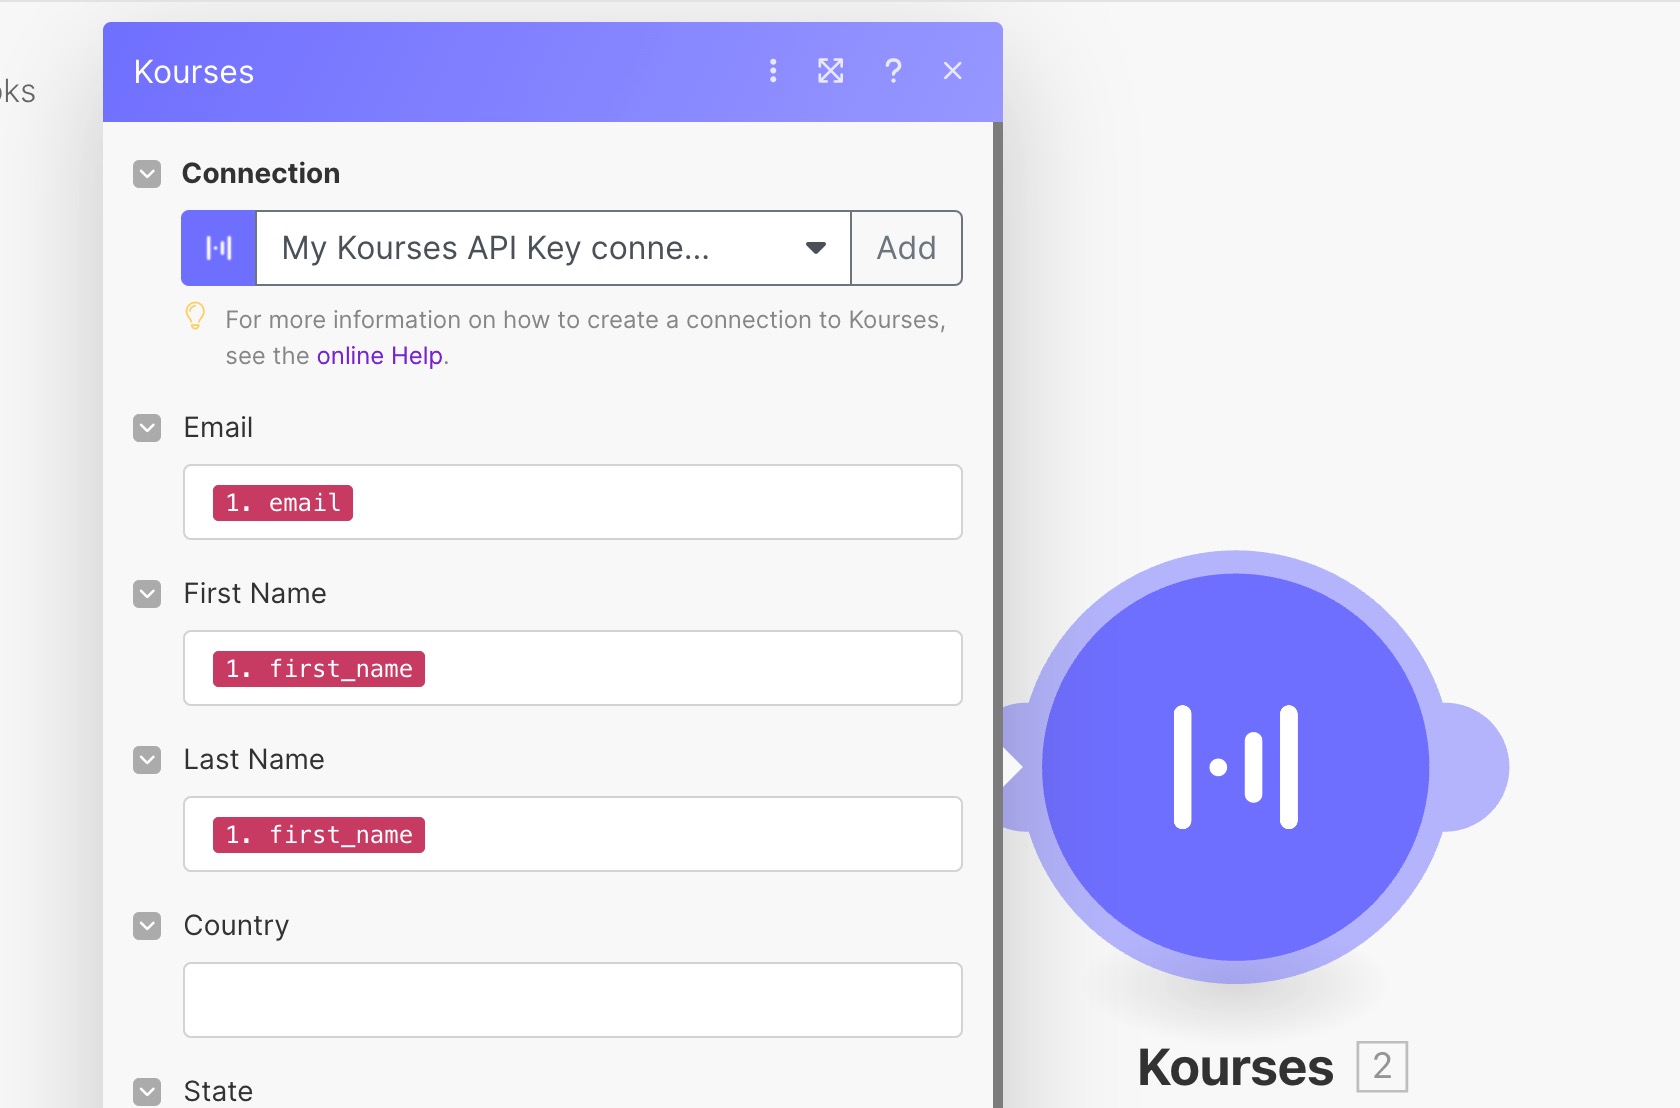
You're now ready to configure the Kourses module inside make.com. You will need to choose which data you wish to pass through to Kourses from your previous integrations in your Make scenario.
Depending on the data captured by your trigger module, you should find when you click into one of the integration fields, you see some data sources available.
In the example below you can see that my webhook integration has provided the following data:
- first_name
- last_name
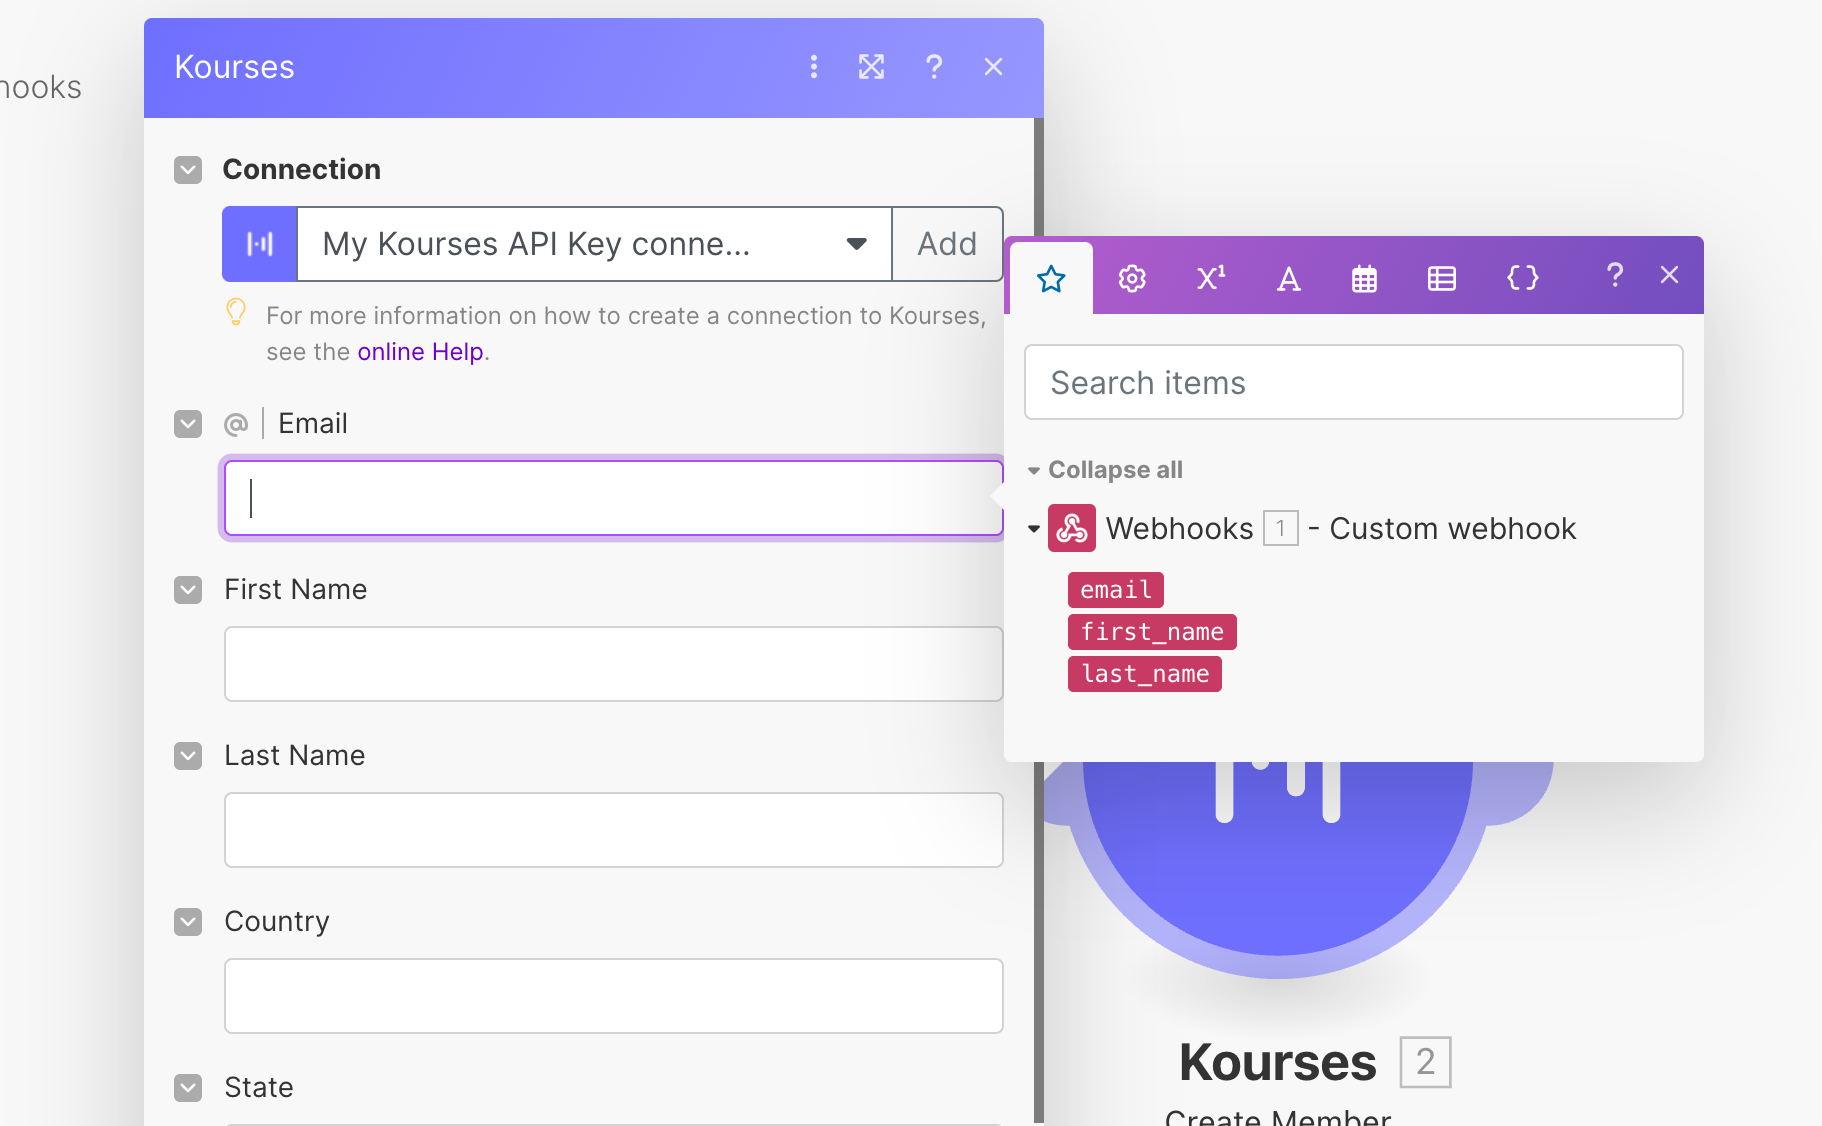
I can insert these into the matching fields to ensure that when data is captured from the trigger module, it is passed through to the right fields in my Kourses integration.
Note: as a minimum, you will need to pass through an email value for the integration to work.
Here's how my integration looks once i have added those data items:
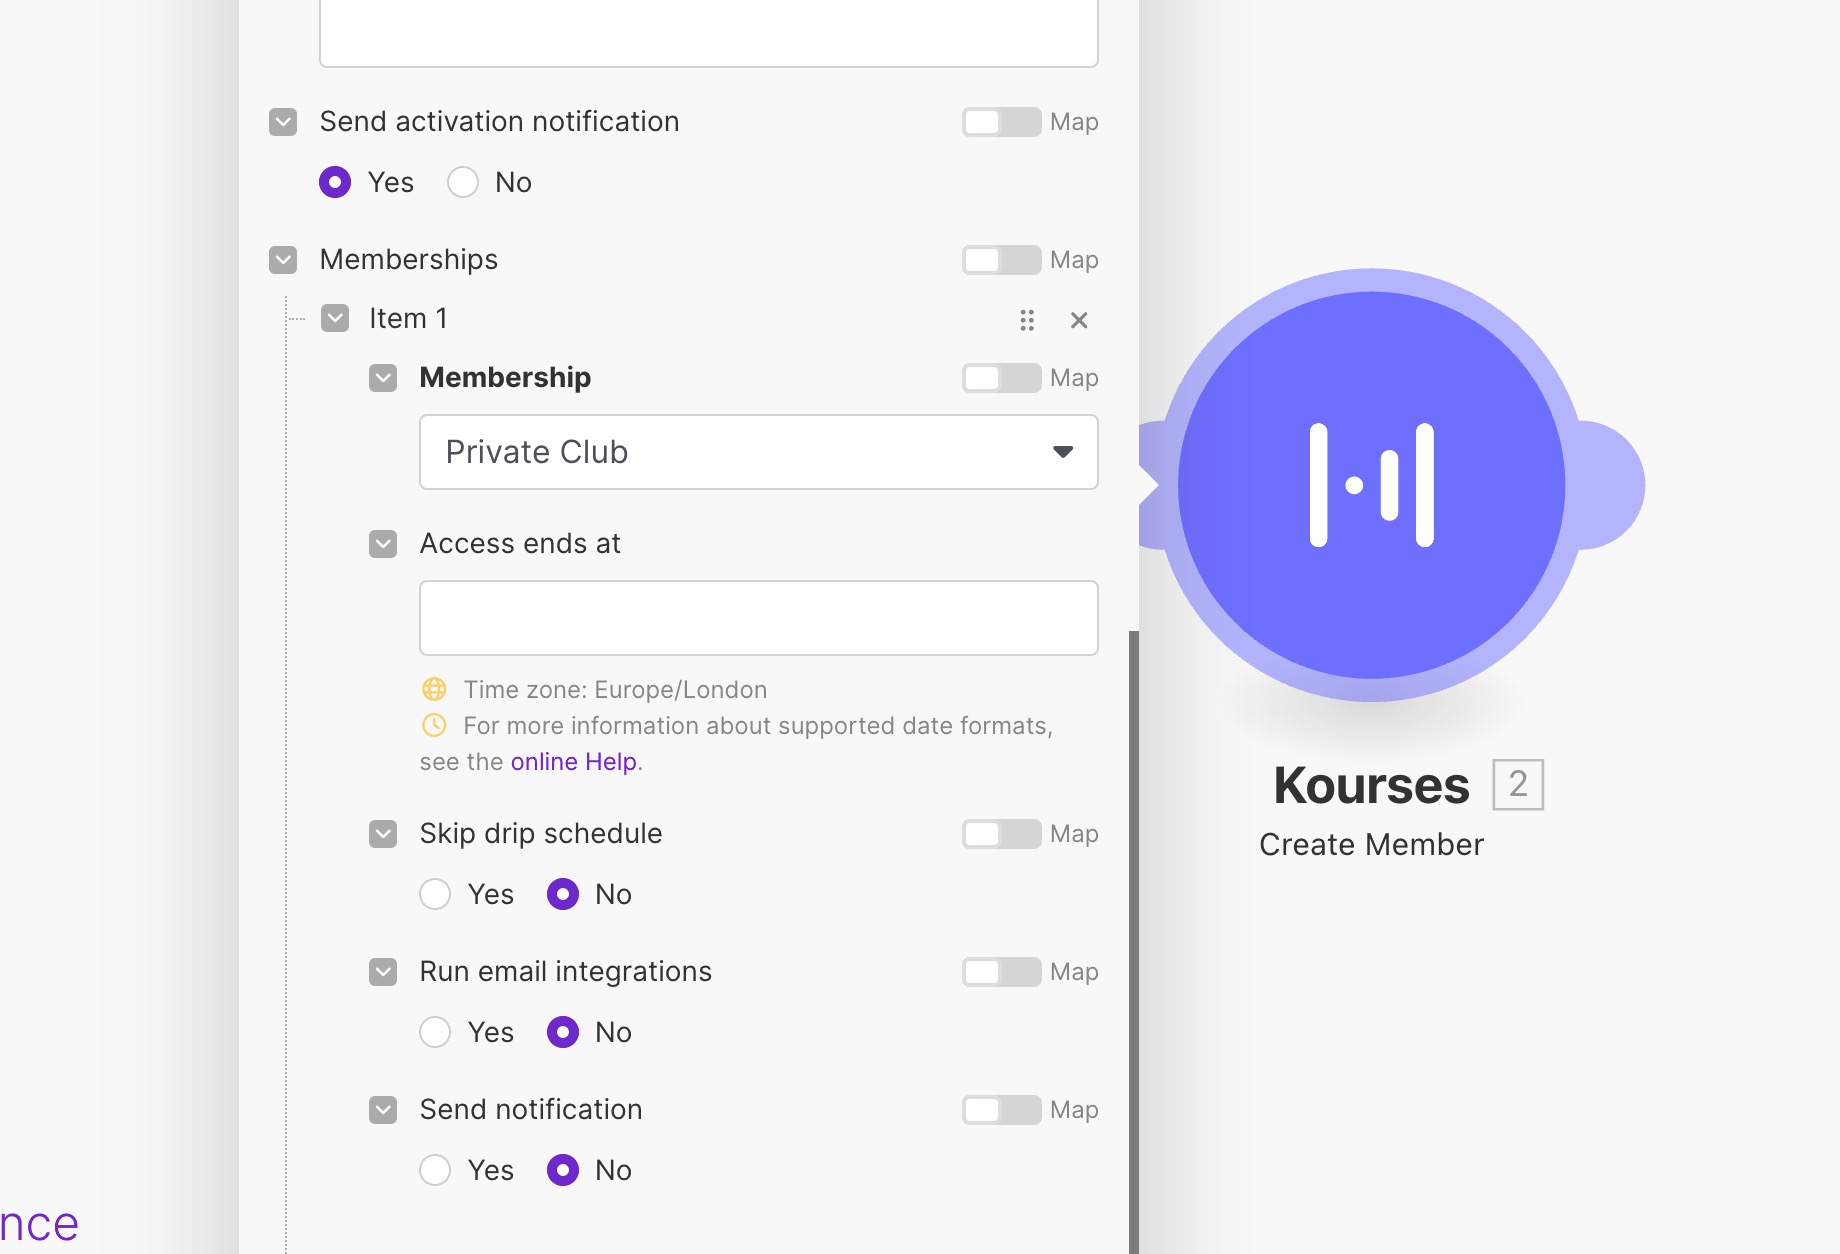
At the bottom of the Kourses integration box, you'll find a section where you can control memberships.
This means you can add this new member to specific memberships inside your account.
Click "Add item" to set a membership for this member if you wish. We will automatically pull a list of your memberships from your Kourses account
Select a membership to add to this member. You can also choose specifics for this membership such as triggering email notifications and email integrations
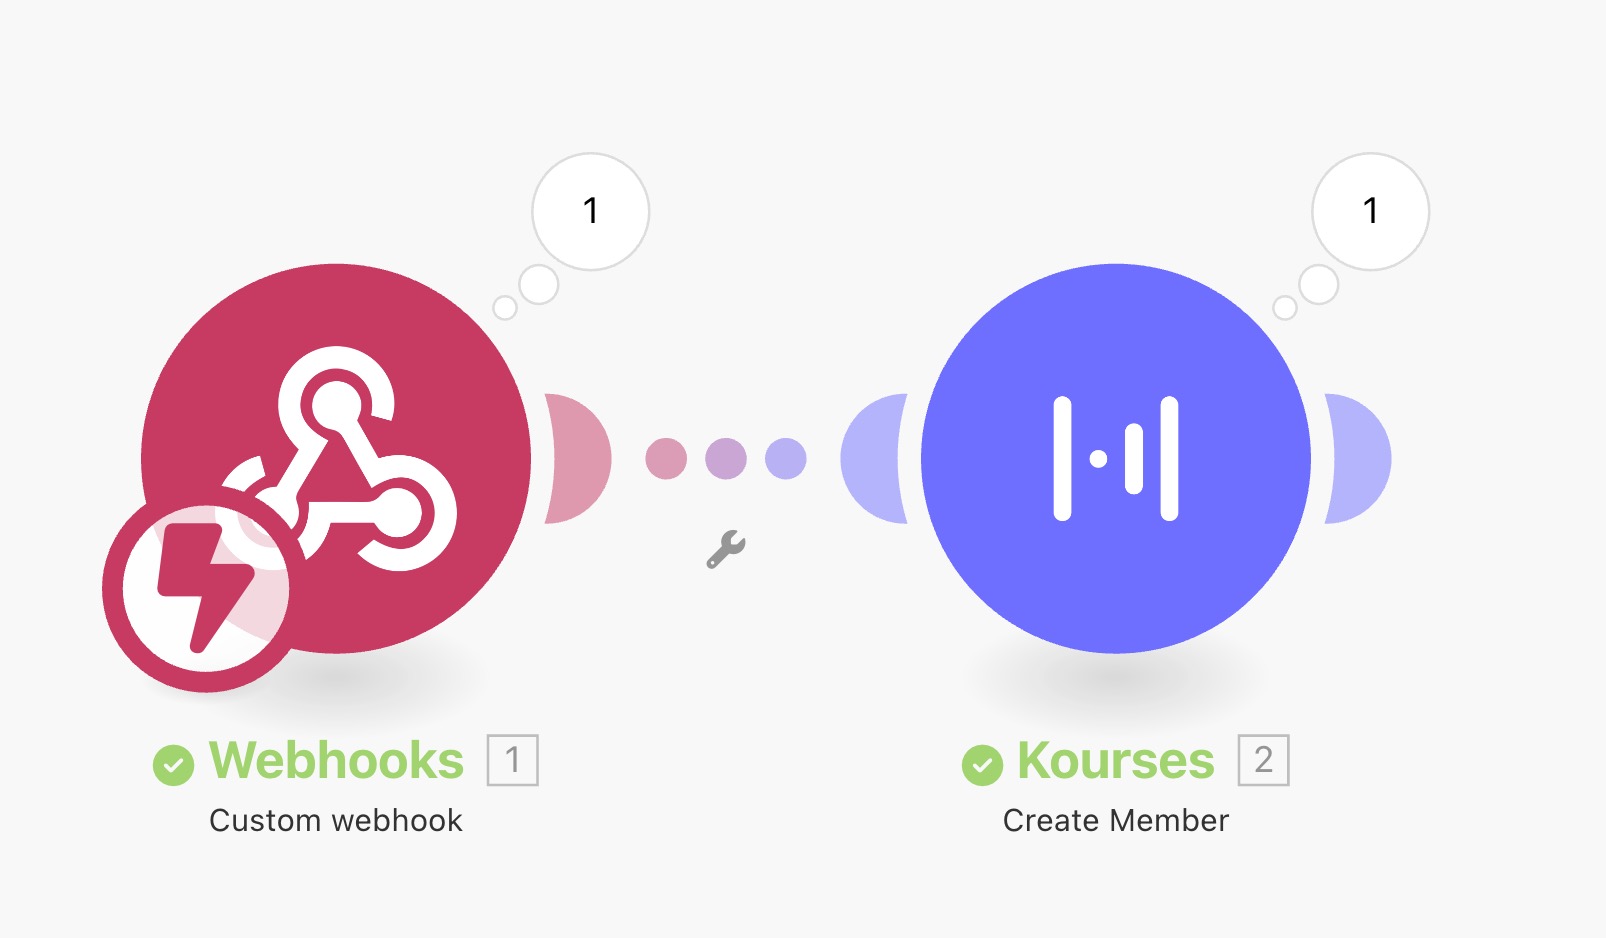
Once everything is setup, your final step is to test your integration.
Testing your integration
The best way to test your integration is to turn on the "Run once" option in the Make scenario, and then manually trigger some data from your trigger action. You will be able to see if the integration ran correctly if you don't see any errors.
You can also check inside your Kourses account to ensure the member was added on the members screen
Now that your integration is ready, you can turn it ON inside the make platform when you're ready for it to run with real data.
If you have any problems getting your make.com integration setup, please let our team know and we'll do our best to assist you.