

With our MailerLite integration, you can send buyer information for any integrated memberships through to MailerLite for followup marketing. You can segment buyers of different products into groups inside MailerLite for more effective marketing.
1) Get your MailerLite API Token
The first step in integrating MailerLite is to get your MailerLite API token.
Start by logging into your MailierLite account and go to Integrations > API:
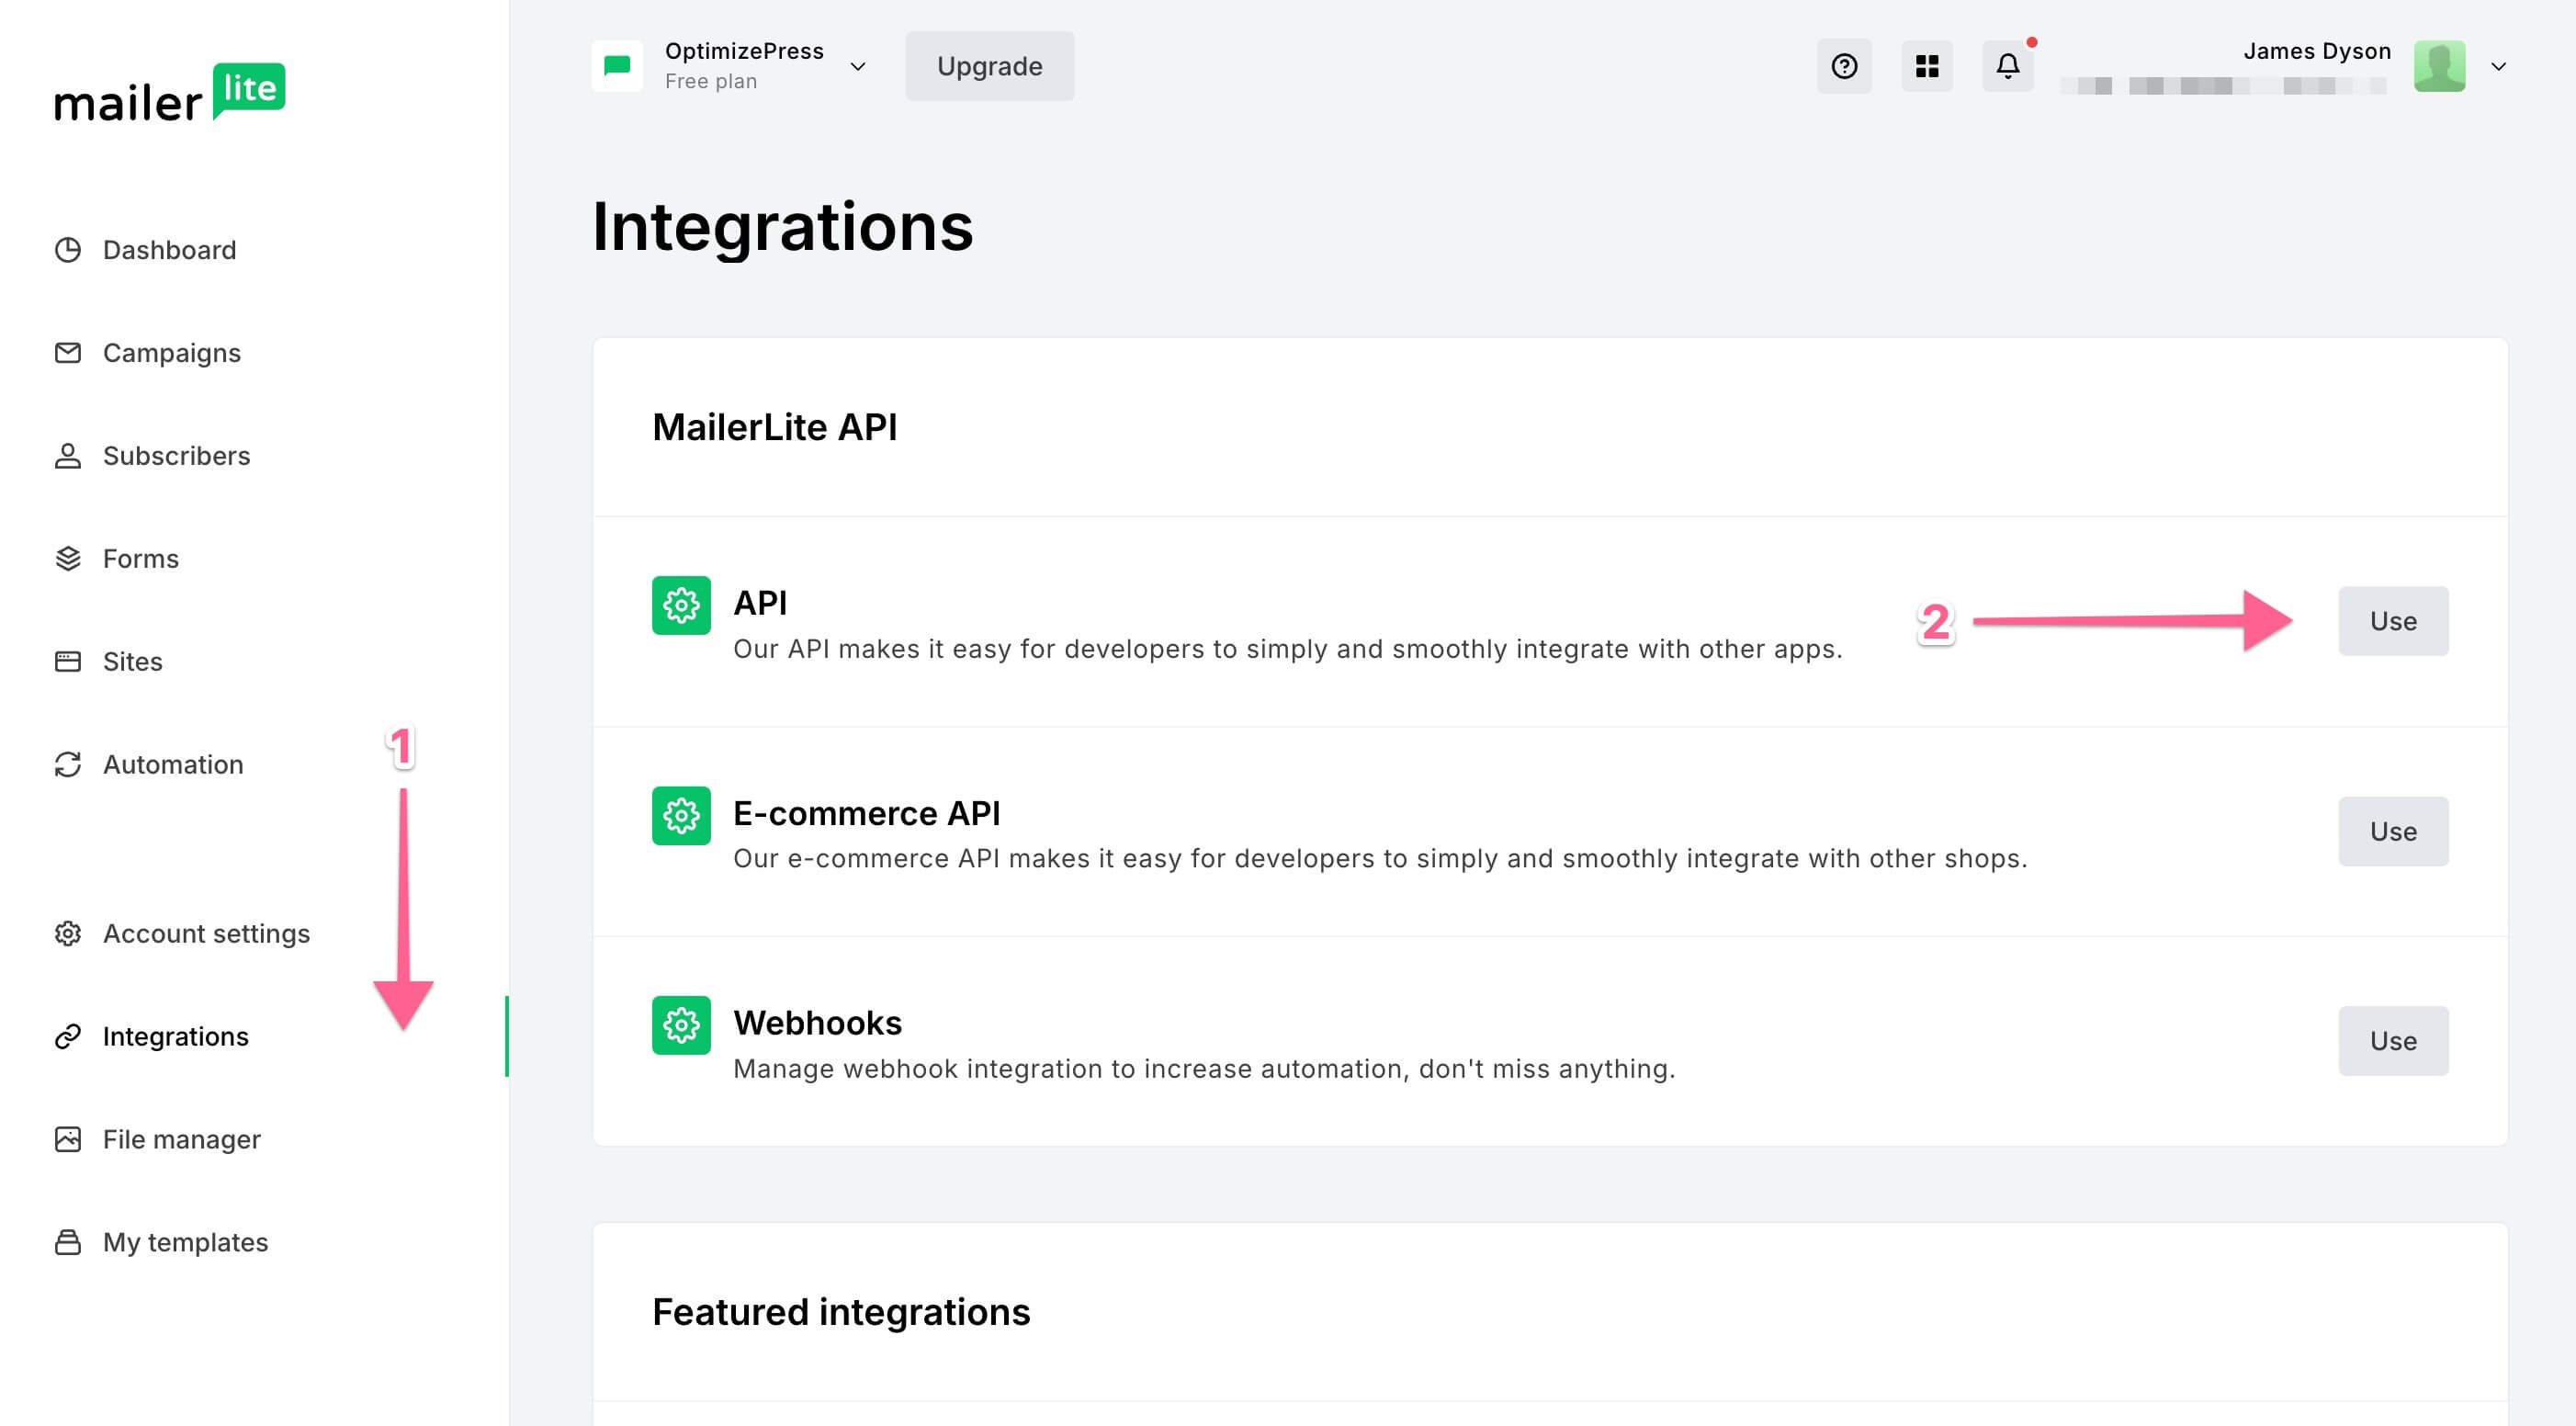
On the next screen, click Generate new Token:

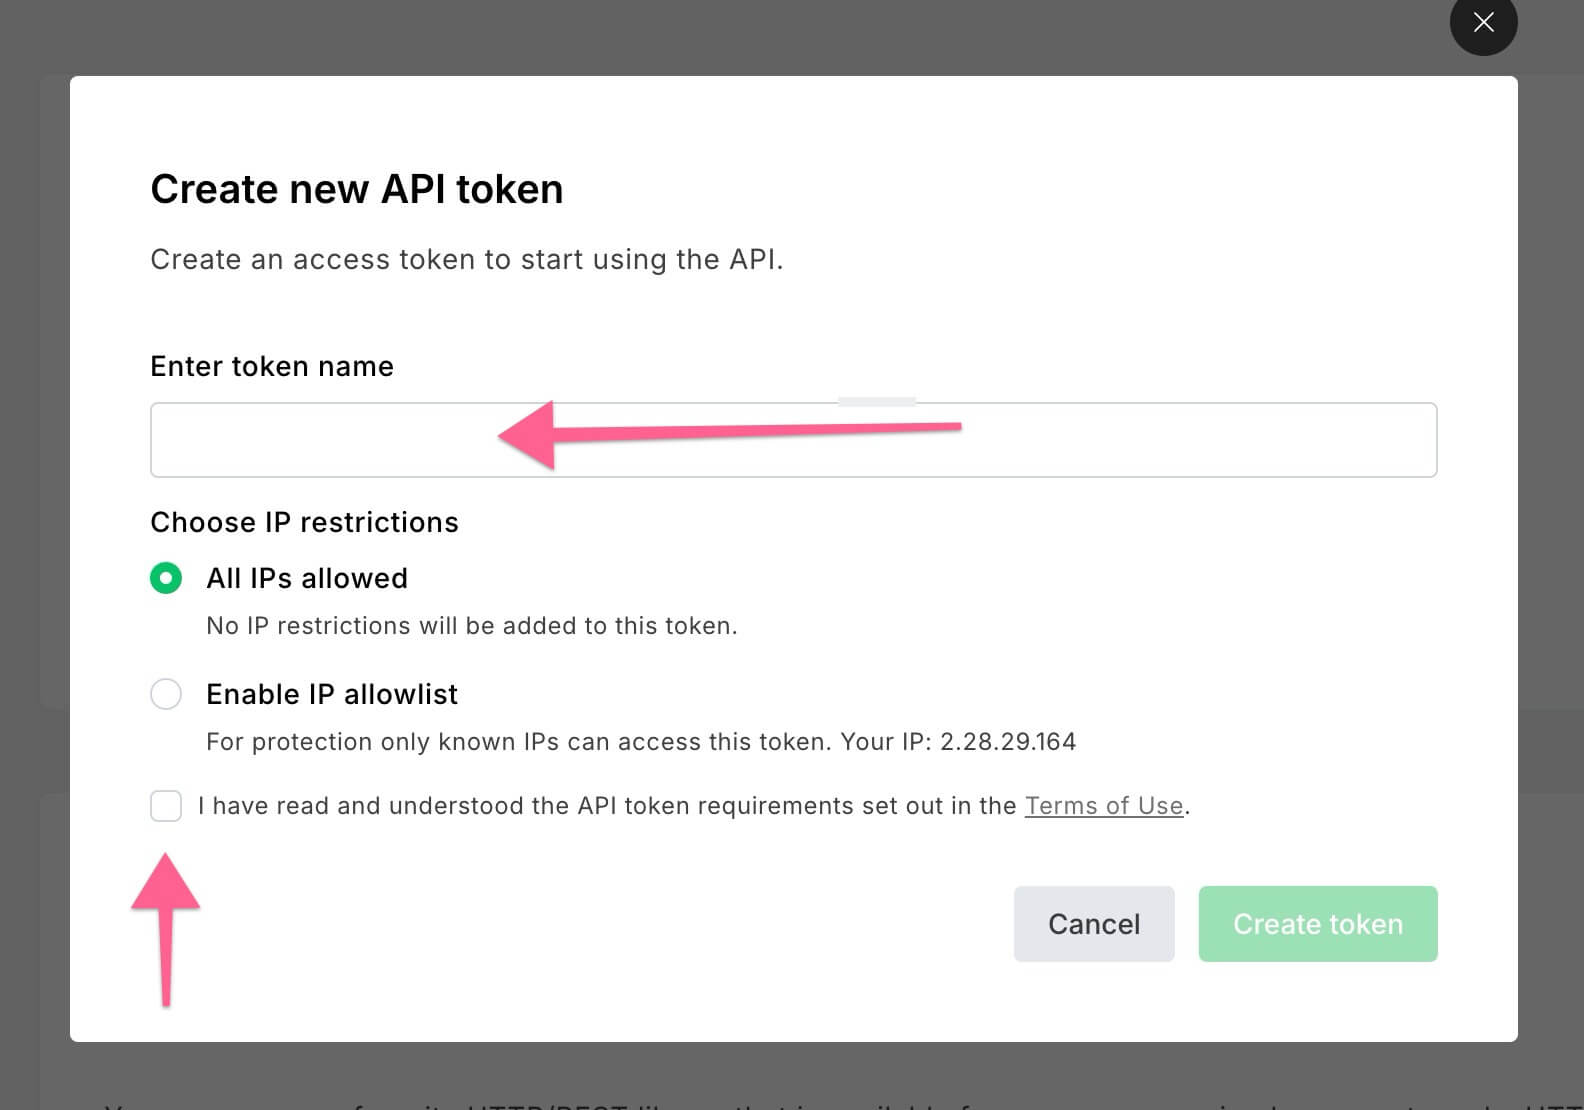
You will now need to give your token a name. We recommend naming this "Kourses" or something that you can recognise so you know what this API token is used for.
You'll also need to check the box to say you have read the MailerLite terms of use. Once you're happy - click Create token:
You will now be presented with your API token. Click the copy button to copy this to your computer clipboard. You might want to paste this somewhere like a notes document as you'll need this number in a few minutes.

2) Add MailerLite token to Kourses
Once you have your MailerLite API token, we need to add this into Kourses so your Kourses website can send data to MailerLite.
To add your MailerLite token to Kourses, first go to Settings (in the top right menu)
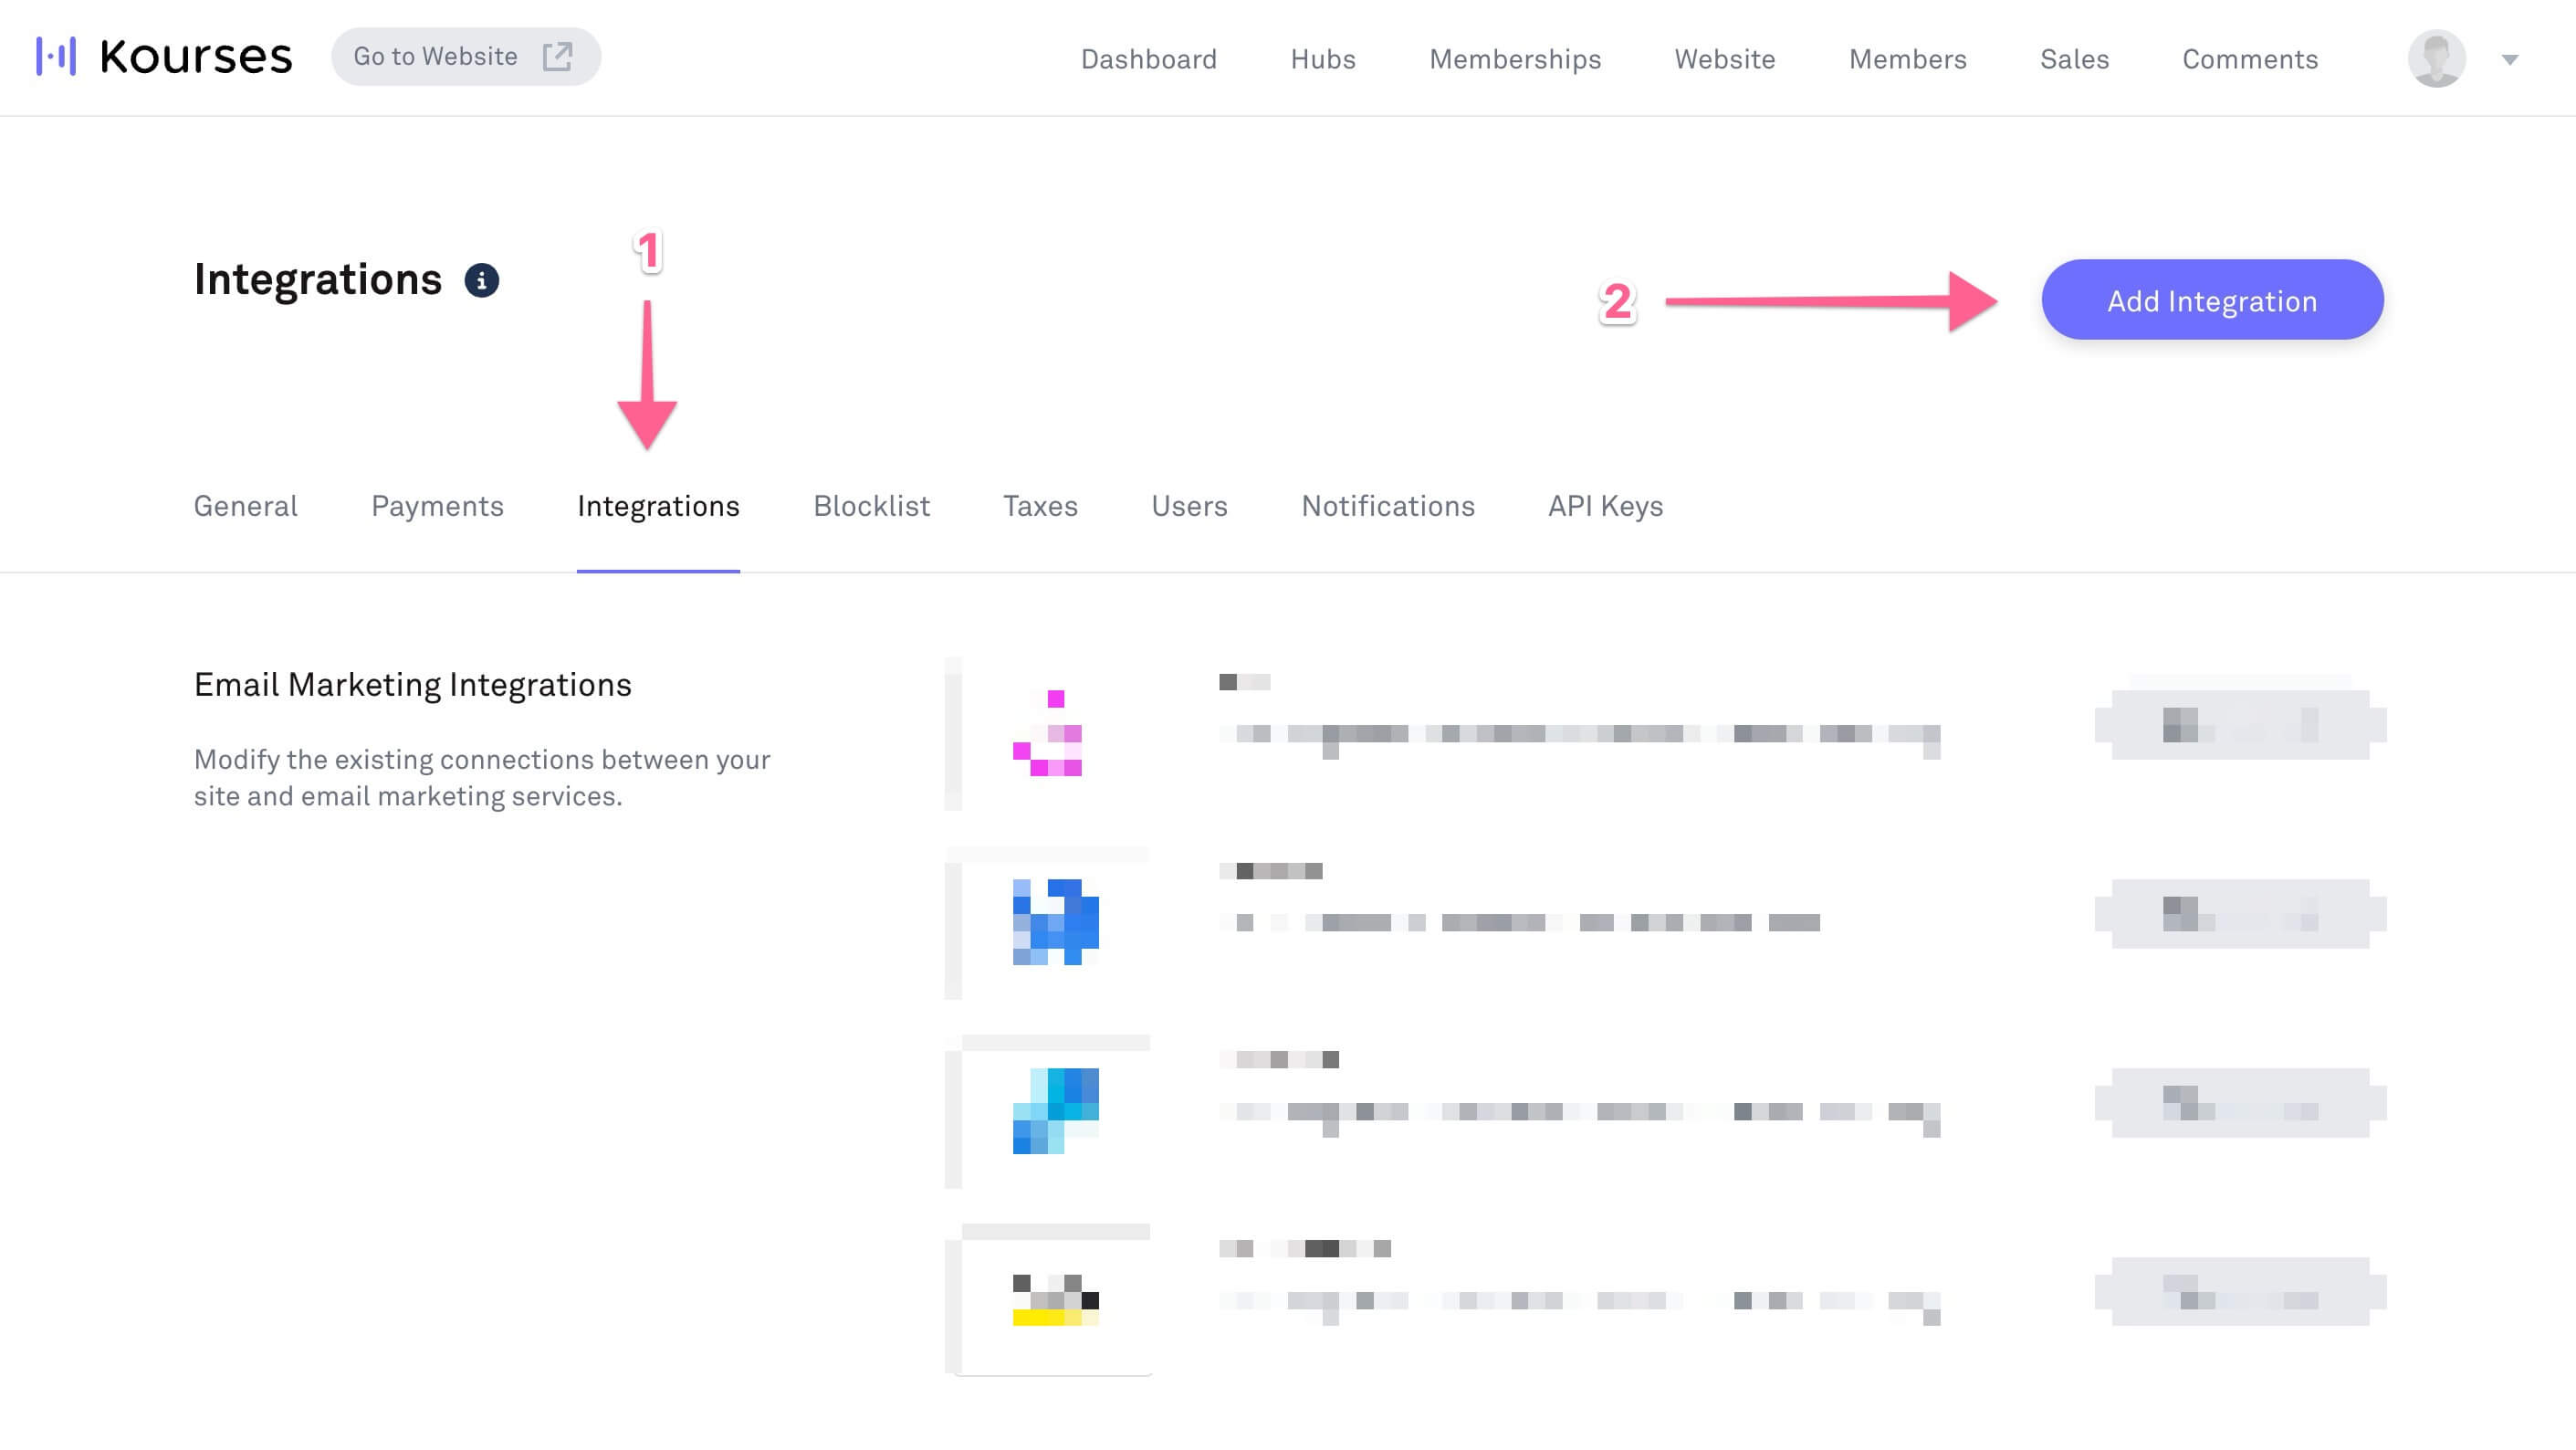
On the Settings screen, click Integrations (1)
Once you're on the Integrations screen, click Add New Integration (2)
You will now be presented with a list of Email Marketing Integrations available. Scroll down in this list and choose MailerLite
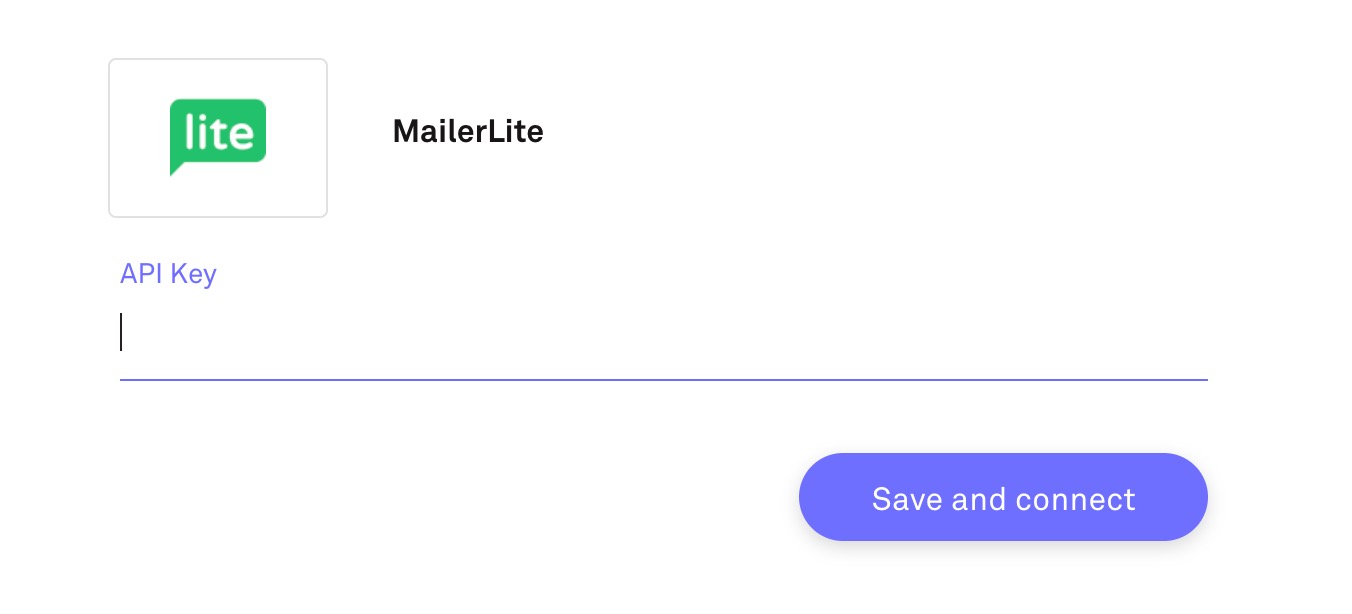
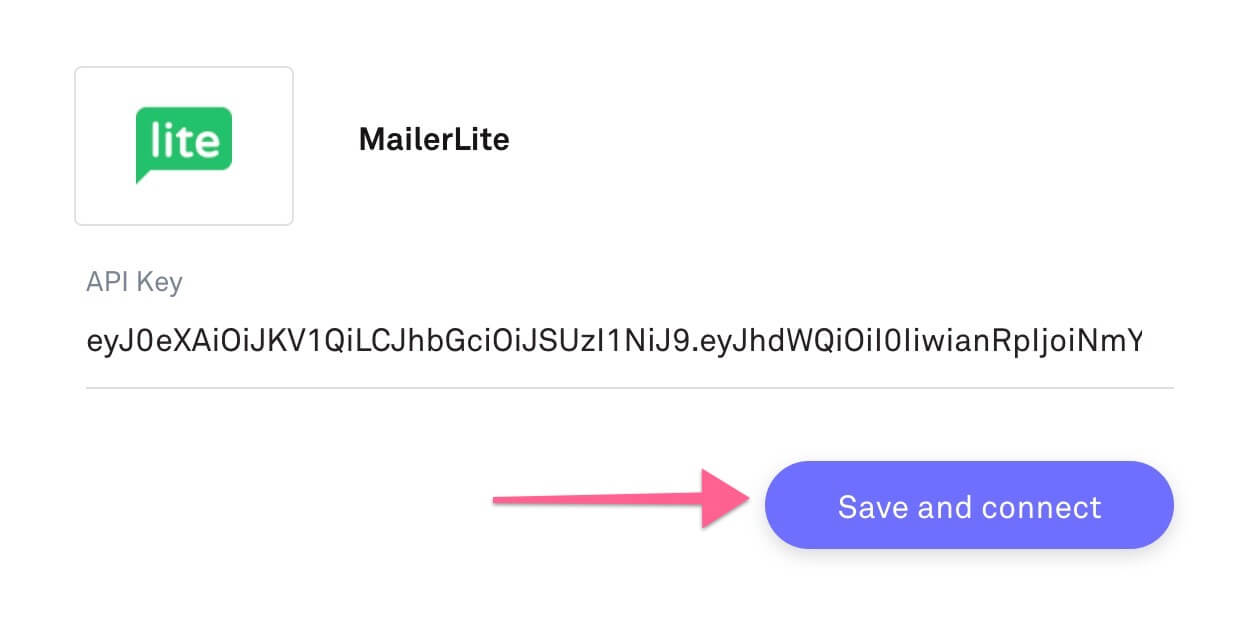
On this screen you can paste in your API token that you saved from MailerLite earlier. Once you have entered your API token (ensure you have no spaces before or after the API token) click Save and connect.
3) Use MailerLite with your memberships
Once you have connected MailerLite, you can now use this connection with any of your memberships to send buyer information through to MailerLite groups.
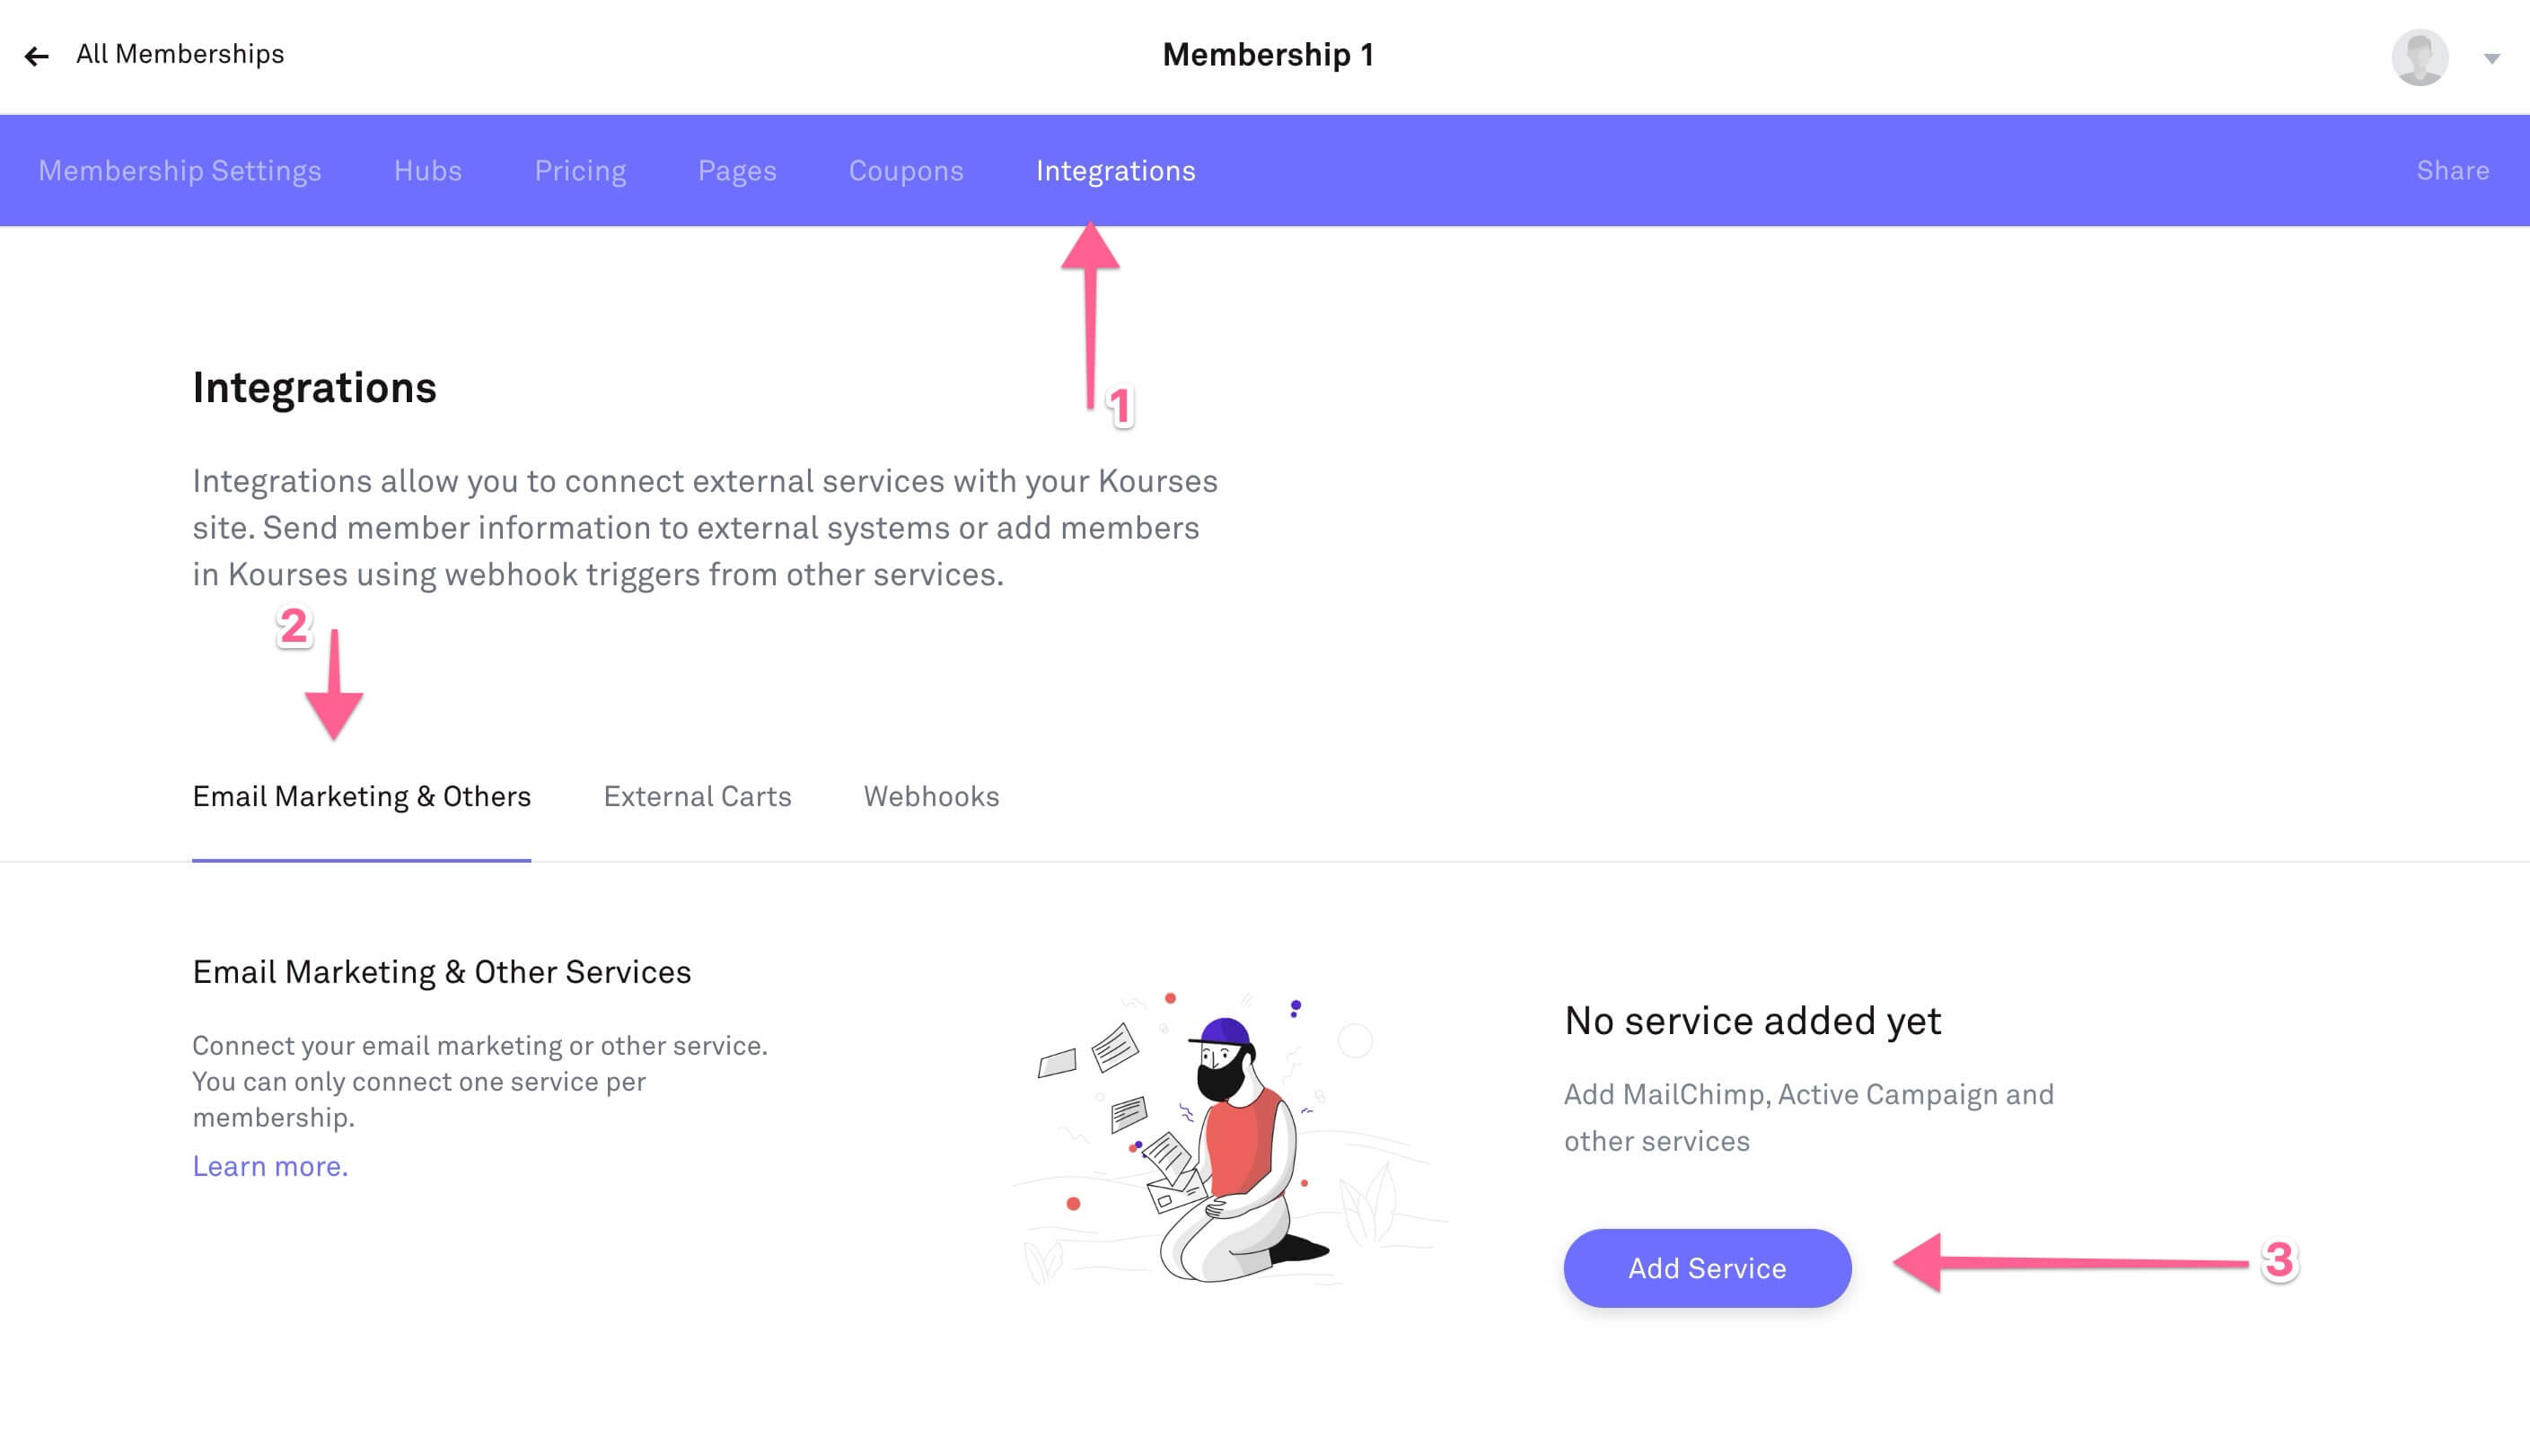
First step in using the MailerLite integration is to go to Memberships and open one of your created memberships. On the Membership screen, click Integrations (1) > Email Marketing & Others (2) > Add Service (3)
On the integrations list, find MailerLite and you'll see the integration connection already ready - just click Save and Connect to connect the integration to this Membership.
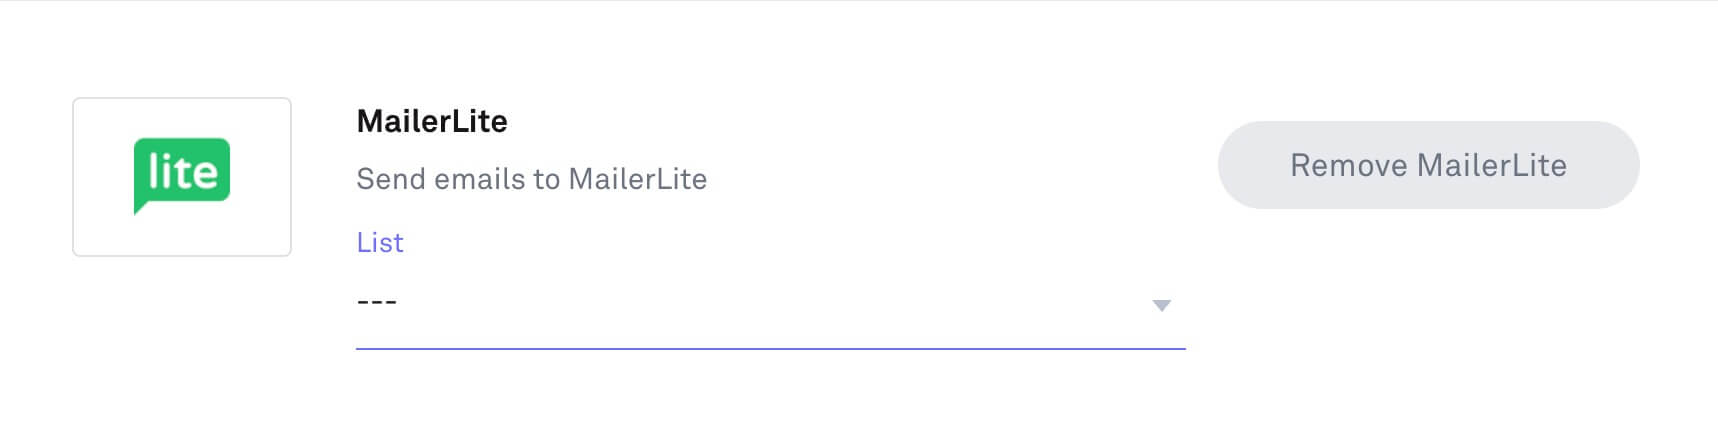
The final step in the integration is to choose which "group" inside MailerLite you want your buyer contact information to be sent through to. This will allow you to segment these contacts. Choose the group from the "list" dropdown to connect to this group.
We typically advise creating separate groups for each of your memberships or products to keep the followup organised and followup specific to those buyers.
Abandoned Cart Leads Integration
If you would like to pass your abandoned checkout / cart leads through to MailerLite, follow this guide to integrating MailerLite. We'll show you how to create the custom fields required for this integration to work most effectively.
Want to capture leads when someone abandons your checkout? Follow this simple guide to connect MailerLite to Kourses' abandoned cart system!
Step 1: Select Your Membership
Navigate to your memberships inside Kourses.
Choose the membership you want to connect.
(Example: Lead Funnel in a Weekend membership.)
Step 2: Open the Integrations Tab
Click on Integrations.
Under Email Marketing and Others, scroll to Abandoned Cart Leads.
Click Add Service.
Step 3: Connect to MailerLite
Find MailerLite in the service list and click Choose Service.
Enter your MailerLite API Key.
Click Save and Connect.
💡 Not sure where to find your API Key?
Check out the separate tutorial on locating your MailerLite API Key.
Step 4: Set Up Your List
After connecting, you'll need to define a List.
Choose where the abandoned cart leads should go.
(Example: An "Abandoned Cart" group inside MailerLite.)
⚡ Tip:
MailerLite uses Groups rather than Lists.
Make sure you create a dedicated group for these leads!
Step 5: Create Custom Fields in MailerLite
You need two custom fields to pass extra information:
Membership Name
Checkout URL
Here’s how to set them up:
In MailerLite, click Subscribers from the sidebar.
Click Fields.
Hit Create Field.
For each field:
Field 1: Enter
Membership Name, select Text as the type, and click Create.Field 2: Enter
Checkout URL, select Text again, and click Create.
Once done, scroll down — you should now see both new fields listed.
Step 6: Map the Custom Fields in Kourses
Go back to Kourses and Save the integration page to refresh.
Under the Membership Name Field, select your new
Membership Namecustom field.Under the Checkout URL Field, select your new
Checkout URLcustom field.Click Save.
Step 7: Done! Here's How It Works
Now, whenever a user abandons your checkout:
Their information is sent automatically to MailerLite.
They’ll be added to the Abandoned Cart group.
Their Membership Name and Checkout URL will be saved in the corresponding fields.
📈 Pro Tip:
You can use these fields to personalize your follow-up emails and boost your abandoned cart recovery rates!