You can manually add members to your Kourses account at any time. This is useful both for adding new customers directly and for setting up test members so you can experience your membership exactly as your customers do.
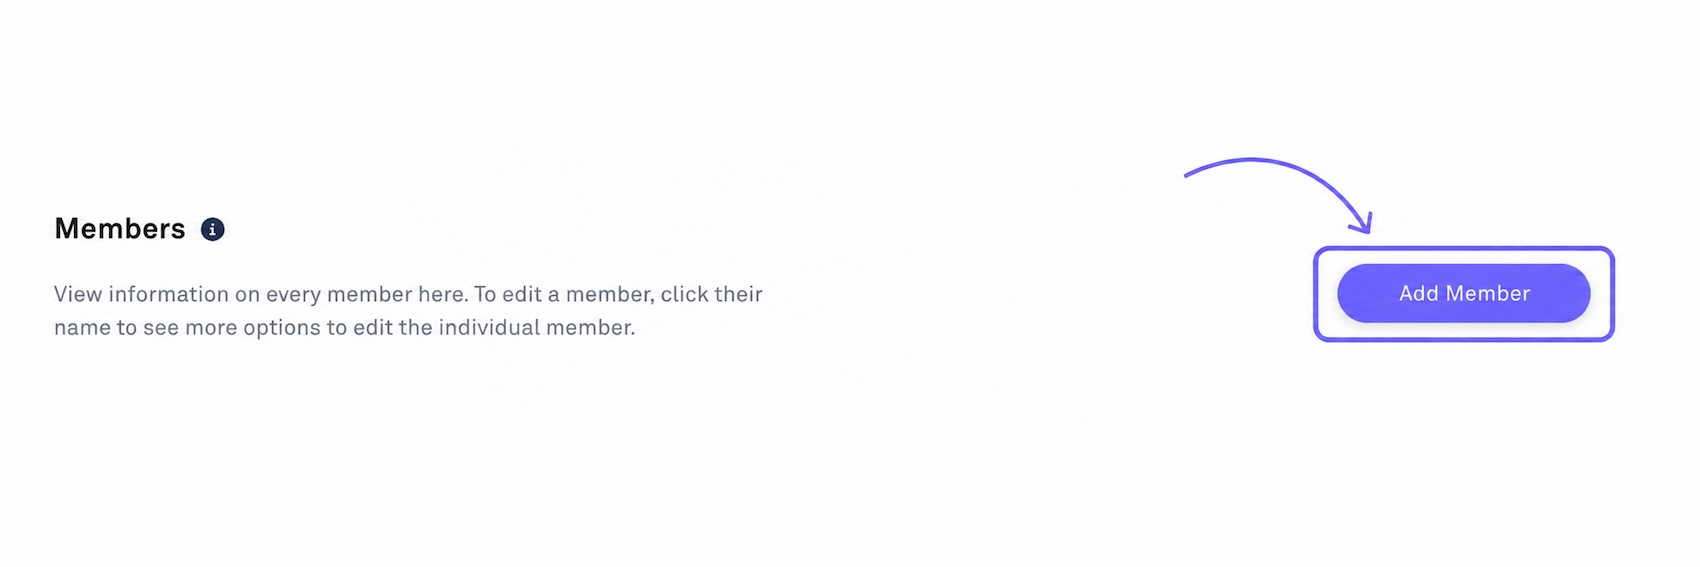
Step 1 - Go to the Members screen
From your Kourses dashboard, navigate to the Members screen and click Add Member.
Step 2 - Enter member details
Enter a first name (1), last name (2), and email address (3) for your new member. If you'd like to add more than one member at the same time, click Add Another Member (4) and repeat the process.
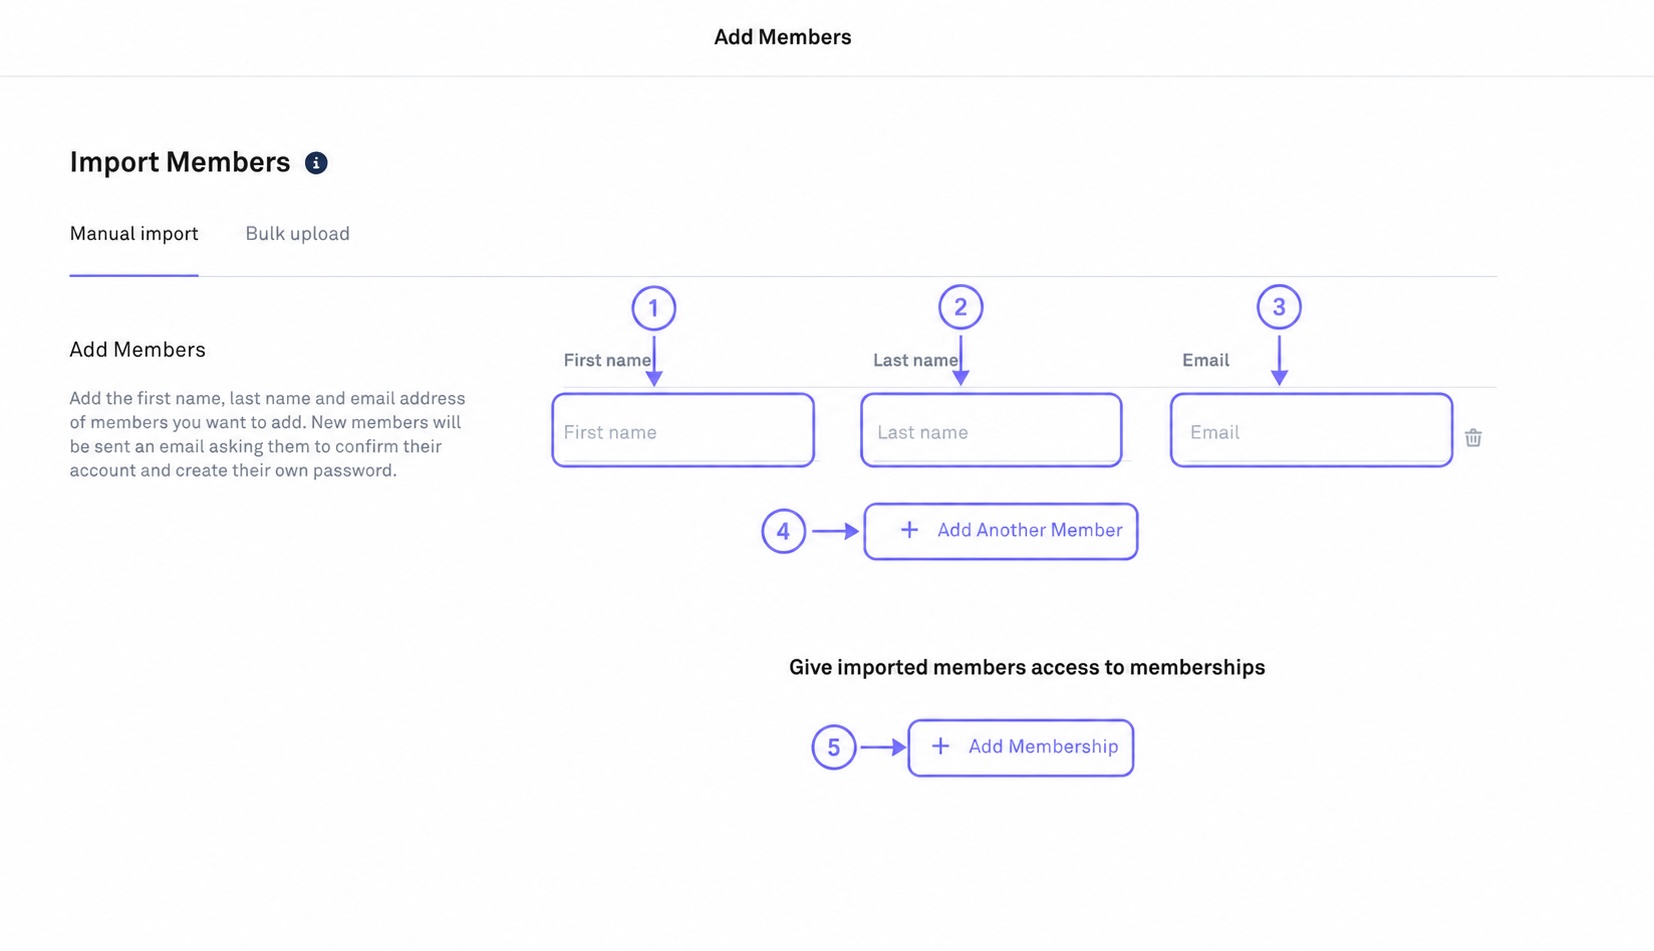
Click Add Membership (5) and select which membership(s) you'd like to give this member access to. You can add more than one membership if needed.
Step 3 - Configure access options
You have a few options to configure at this stage:
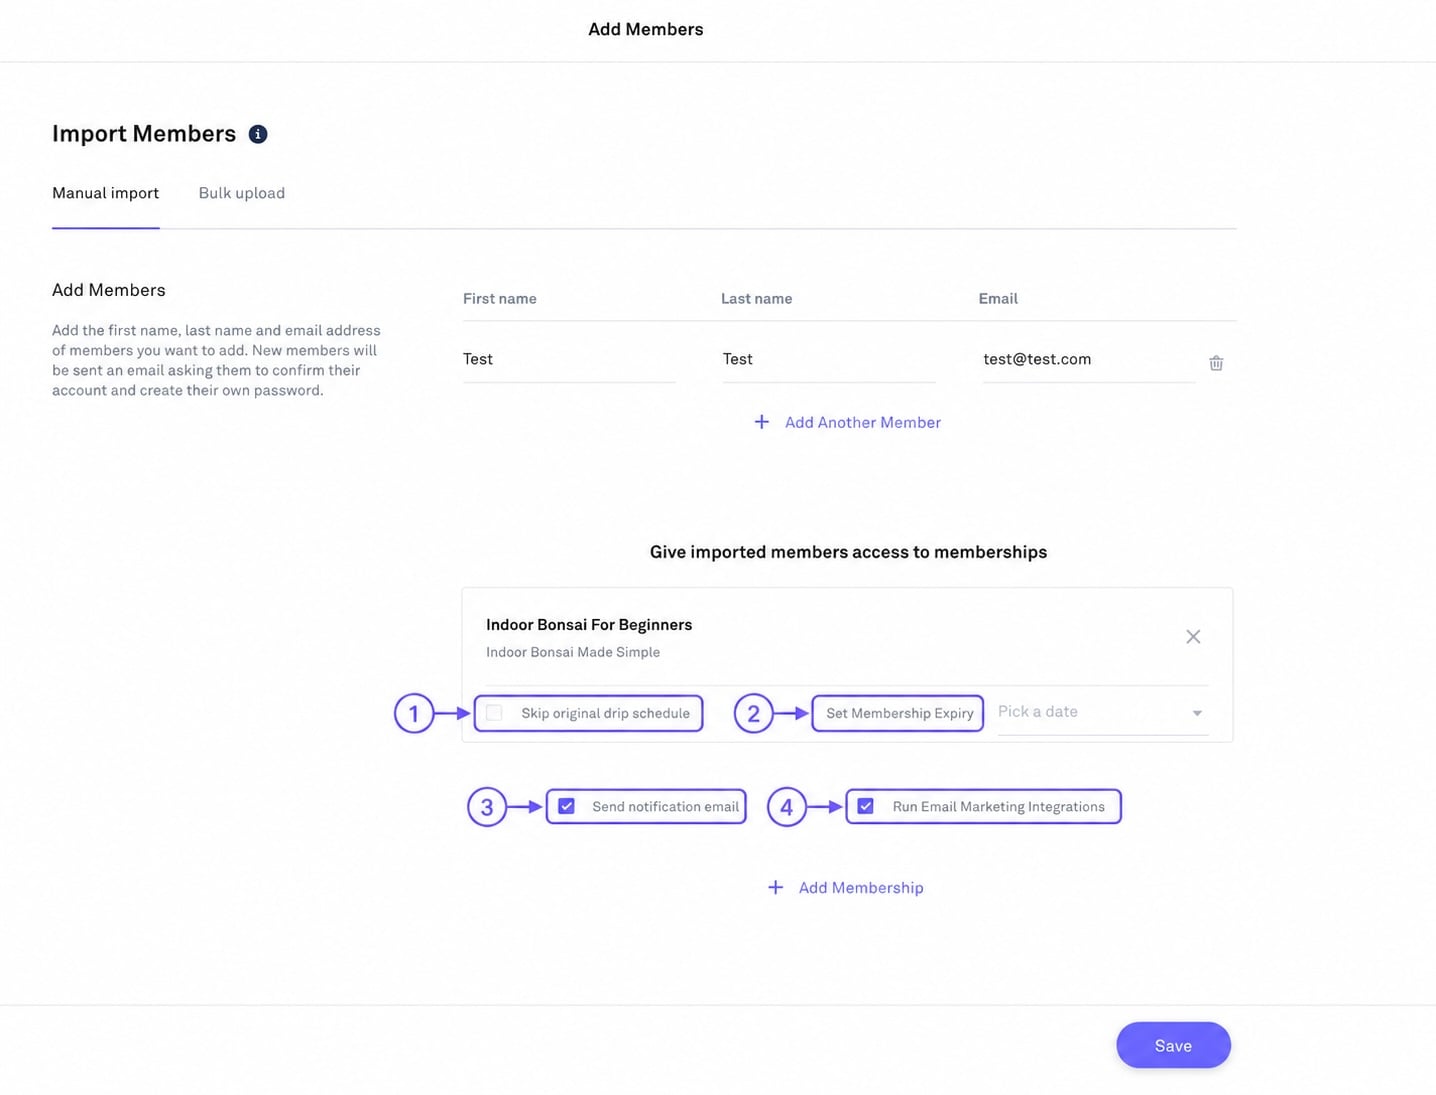
Skip drip schedule (1) - Tick this to override any drip schedule settings at the product or membership level, giving the member instant access to all content.
Set an expiry date (2) - Leave this blank for unlimited access, or set a specific date if you'd like access to expire automatically.
Step 4 - Notification and integration options
Send notification email (3) - If ticked, the member will receive an email to set up their Kourses account by creating their password.
Run email integrations (4) - If ticked, this will trigger any connected integrations (such as your CRM) to add the member automatically. Untick this if you don't want test members added to any integrations you have set up.
Step 5 - Save
Click Save to complete the process. The member will now appear in your Members list.
Testing tip
When using this process to add a test member, we recommend logging in as that member using either a different browser or a private/incognito browser window. This ensures you see the true member experience rather than your admin view.
To login as a member you need to visit your member area login page, which you’ll find at yoursite.kourses.com