

How to use Lessons
Adding a lesson is quick and easy in Kourses with a few customisation options for your to set.
Lesson Info
The Lesson Info section allows you to set a lesson name and a short lesson description that will be displayed on the main course page of your membership site. This is used to tease lessons to members. 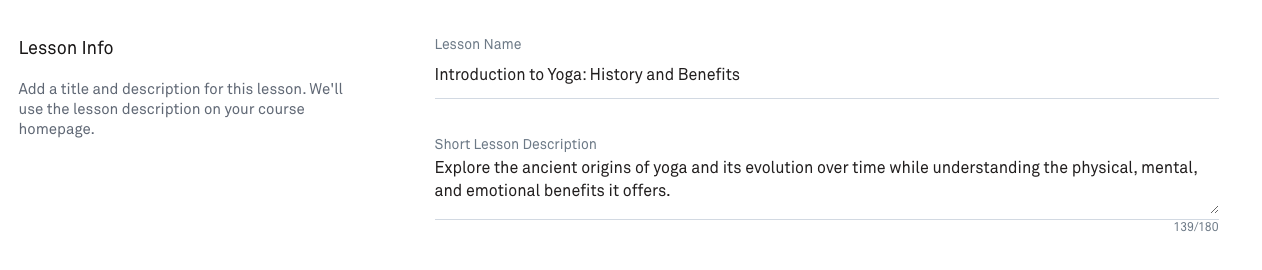
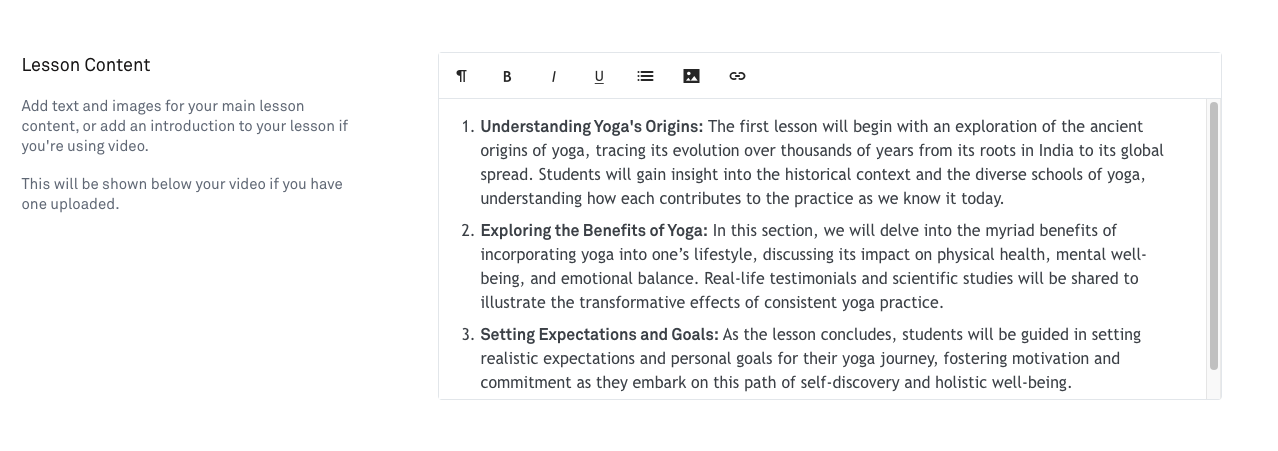
Lesson Content
The Lesson Content section is the area where you can give more info on what your lesson content is about. This is essential for helping your members understand the lesson structure and what they will be learning.
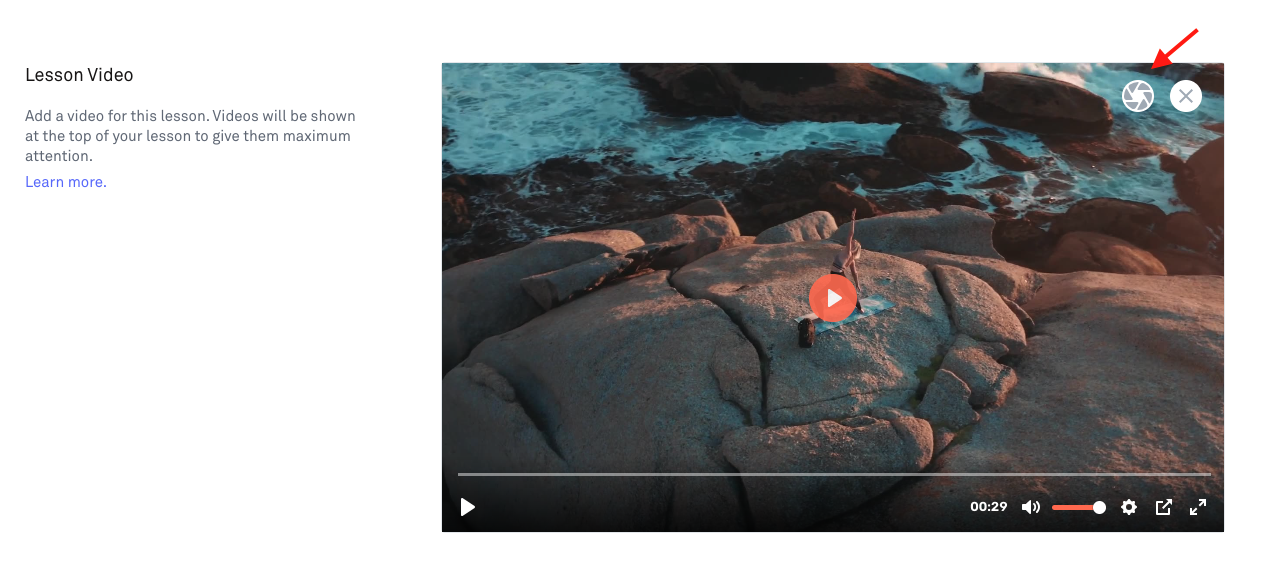
Lesson Video
The Lesson Video section allows you to insert and upload your videos into the Kourses platform. You can either upload your video for Kourses to host or embed a URL.
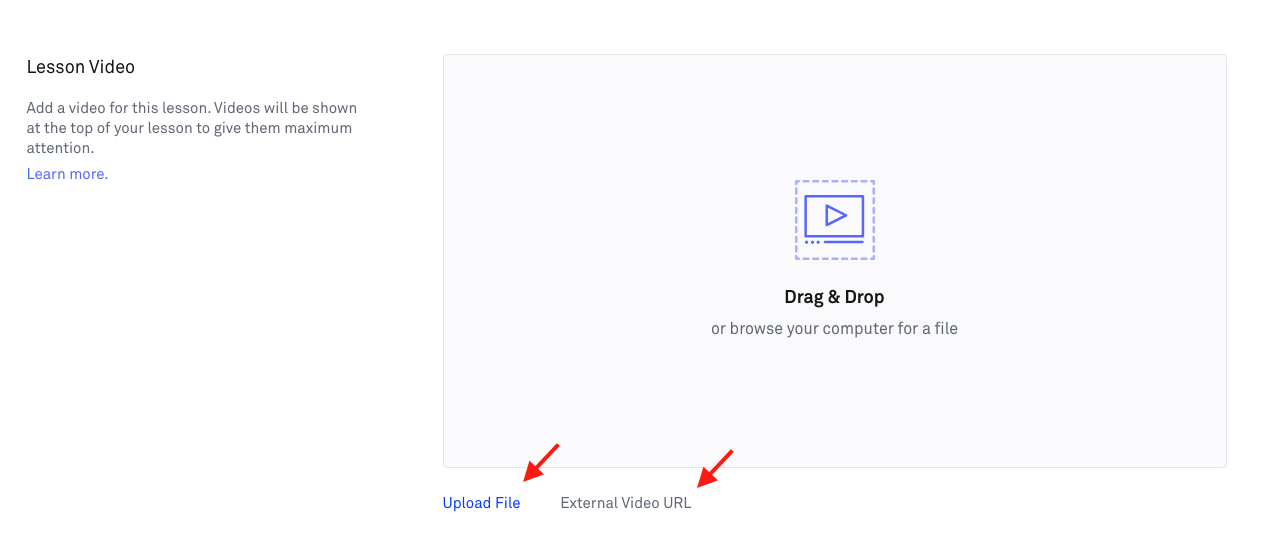
To upload your video, click the 'Upload File' link and select the video you would like Kourses to host.
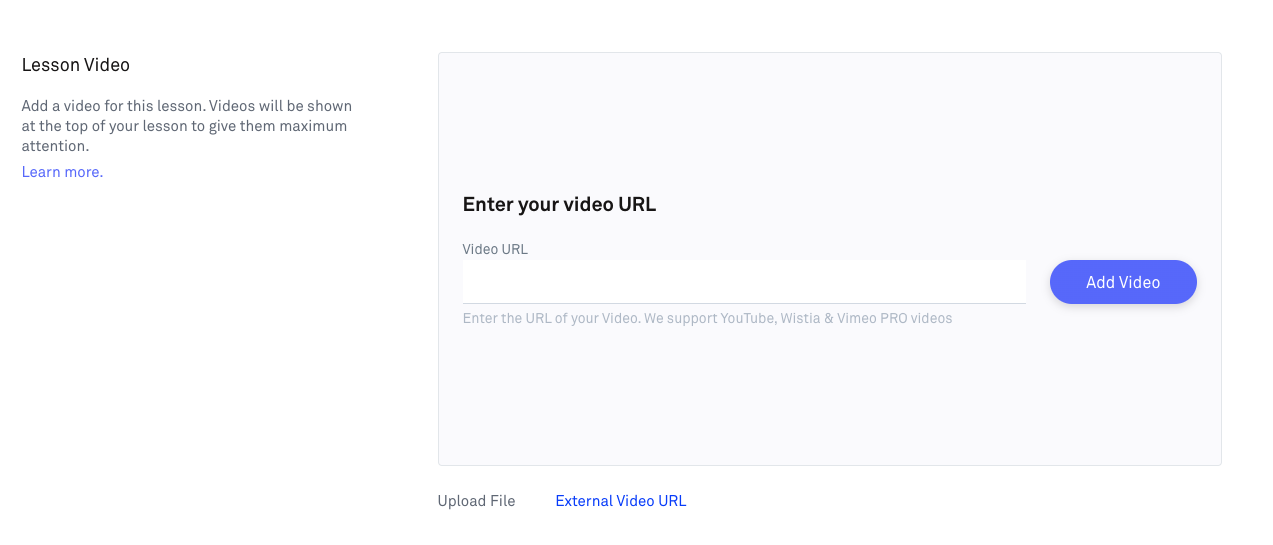
To insert a video URL, click the 'External Video URL' link and paste in the URL link in the area provided. You can use either a Youtube URL or a Vimeo URL.
If you're hosting your own videos using an external video URL, once you have added your video URL and saved the page, you can manually add your video's duration. Adding the video duration will mean Kourses can calculate and show the total course duration to members.
Note: If you upload your video file for Kourses to host the video duration is automatically calculated for you.

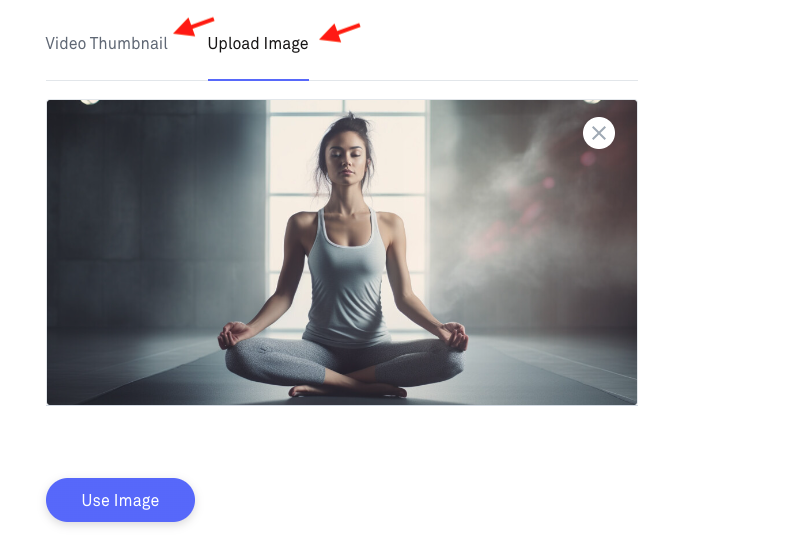
If you are using the Kourses video hosting a video placeholder will automatically be generated by the platform. You can also set your own placeholder image. To Set this up, click the small patterned circular button on the top right of the video.
An overlay screen will appear with the option to automatically set a video thumbnail from the video or insert your own custom image.
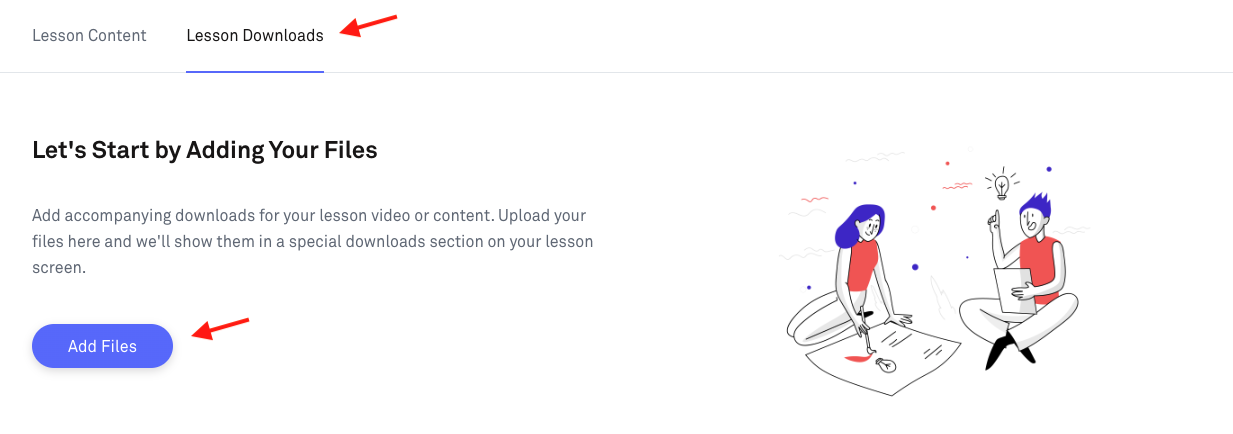
Lesson Downloads
The Lesson Downloads tab will allow you to upload downloads and resources to your lessons for your members to download.
To add a download, click the 'Add Files' button.
You will be taken to an area to upload your files. Drag the file you would like to upload. An 'Uploaded' message will appear to notify you of the upload. Click the 'Add Files' button to confirm.
Note: You can multiple files at once if needed.
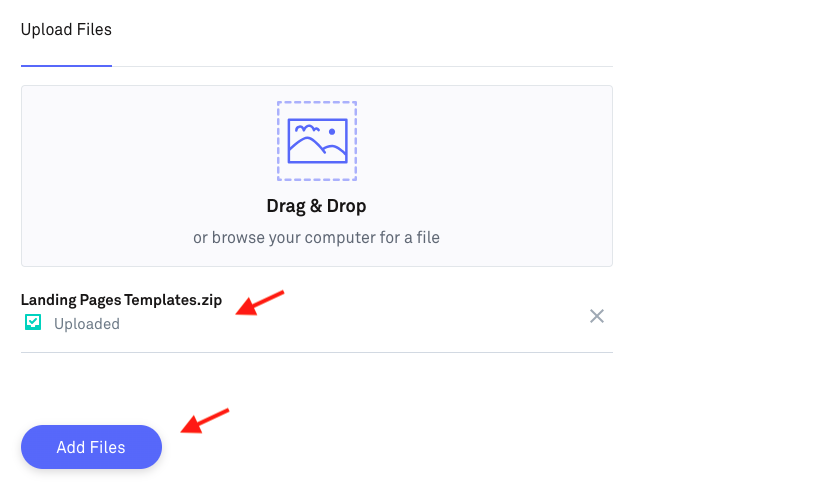
You should now see a list of all of your current files that will be included in your lesson.
Here, you can edit your file or delete it by clicking on the icons listed.

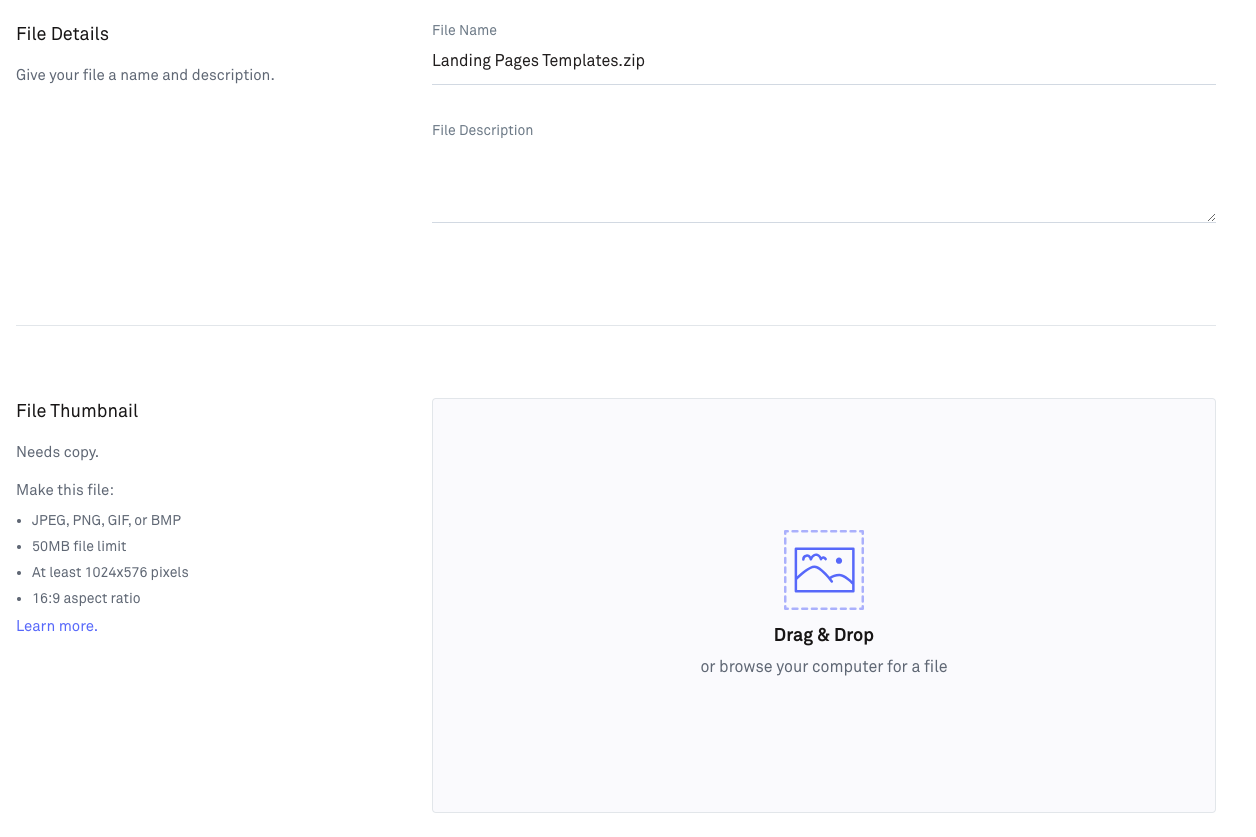
Clicking on the small pencil icon will take you to the file details area. Here, you can give your file a name and a short description as well as assign it its own custom thumbnail which you can upload in the areas provided.
Want a complete course on creating a membership site in Kourses? Our 1 Hour Membership Site course will help you hit the ground running and launch with ease.
Related articles
Course Settings
Course Lessons & Content
Course Drip Scheduling